An anti-miserabilist approach to historical cooking

Author: Kim Connor (page 3 of 5)

Sir William Paston’s Meathe

Mead recipe from 1669

So I have to apologise for dropping of the face of the earth for a couple of weeks, life got in the way again. I have a couple of Historical Food Fortnightly challenges to catch up with, they are done but still need writing up I’m afraid so please bear with me. Can I also say how lovely it was to have people reminiscing about puftaloons, please keep it up!

The challenge a couple of weeks ago was ‘Sweet Sips and Potent Potables’. I was originally planning on making hypocras (basically medieval mulled wine) but a couple of weeks before the challenge a friend of mine won a prize at Rhythm and Brews with her mead, and of course I decided I had to try out the recipe for myself. This was my first mead, or at least the first that is actually ready (I have another batch fermenting but it’s got several months to go) so I used the instructions from Taryn’s fantastic article ‘Mead in Three Weekends’ as a reference.

The recipe itself comes from “The Closet of Sir Kenelm Digby Opened” which was originally published in 1669. The recipe I used is called Sir William Paston’s Meathe, and after a quick search I think this probably refers to the High Sheriff of Norfolk and first Baronet of Oxnead, Sir William Paston (1610-1663)[1]. A well-travelled courtier and diplomat, Digby’s collection includes recipes from many of his friends and acquaintances, from the Queen-Mother to the Muscovian Ambassador’s steward. I think you can imagine him single-mindedly tracking down the recipe for the dish he just tasted, no matter the rank of the individuals concerned.

The Recipe

SIR WILLIAM PASTON’S MEATHE

“Take ten Gallons of Spring-water, and put therein ten Pints of the best honey. Let this boil half an hour, and scum it very well; then put in one handful of Rosemary, and as much of Bay-leaves; with a little Limon-peel. Boil this half an hour longer, then take it off the fire, and put it into a clean Tub; and when it is cool, work it up with yest, as you do Beer. When it is wrought, put it into your vessel, and stop it very close. Within three days you may Bottle it, and in ten days after it will be fit to drink.”[2]

This is a fast fermented mead, taking only 13 days in total, when it is not uncommon for meads to make 6 months or more. It was described by my taste tester as “Like extremely dry, thin cider. But oddly moreish.” Given that I’m not sure if I’m counting this as a success or not, I’m just going to give you the quantities that I used. Note that the flavour of lemon was strong, but the rosemary and bay were almost non-existent so if you were to make it yourself you might want to adjust those quantities.

I used: 2 cups of honey, 3.8lt of water, peel of 1/2 lemon, 2 sticks of rosemary, 3 dried bay leaves and 1 packet of beer yeast dissolved in a cup of water and 1 tsp of sugar.

Mead recipe from 1669

The Recipe: Sir William Paston’s Meathe from Sir Kenelm Diby’s Closet Opened (available here)

The Date:1669

How did you make it?: See above.

Time to complete?: About an hour of boiling, followed by several hours cooling. Then a couple of days later bottling.

How successful was it?: I’m not sure, I didn’t really like it because it tasted quite yeasty, like beer, but it certainly improved with age. It was also very, very bubbly!

How accurate?: It was very difficult to tell the quantities of herbs that were implied in the recipe so that was a bit of guess work. The yeast was also quite different.

[1] John Burke and Bernard Burke, A Genealogical and Heraldic History of the Extinct and Dormant Baronetcies of England, Ireland, and Scotland (Genealogical Publishing Com, 1841), 402.

[2] Anne Macdonell, ed., The Closet of Sir Kenelm Digby Knight Opened (London: Philip Lee Warner, 1910), 42.

And since the other photos don't really show you what the mead looks like ...

And since the other photos don’t really show you what the mead looks like …

Bibliography 

Burke, John, and Bernard Burke. A Genealogical and Heraldic History of the Extinct and Dormant Baronetcies of England, Ireland, and Scotland. Genealogical Publishing Com, 1841.

Macdonell, Anne, ed. The Closet of Sir Kenelm Digby Knight Opened. London: Philip Lee Warner, 1910.

Puftaloons

Puftaloons, recipe from 1904

This fortnight for the Historical Food Fortnightly it’s Make Do or Do Without. Nowadays most ingredients are available year round, and even the more obscure ones are available online, but for historical cooks the options were much more limited. If tomatoes were out of season, too bad. If you lived in Australia and couldn’t get goose, well then you would use parrot instead. And what if you didn’t have the equipment or ingredients to make bread? Then you get inventive.

Whilst not a problem limited to countries of the New World, see for example my post on soda bread, settlers in colonial countries were particularly vulnerable to this problem. The lack of ovens, problems keeping yeast viable in hot weather and the transient lifestyles of stockmen, trappers etc meant that they had to come up with some creative solutions to meet their cravings for bread.

View of a Bush Kitchen, c. 1896. Image courtesy of the State Library of NSW.

View of a Bush Kitchen, c. 1896. Image courtesy of the State Library of NSW. As you can see, conditions were basic, but this kitchen is actually a step up from the temporary bush camps. Under the window you can see the Dutch ovens used for, among other things, baking damper. 

In Australia the quintessential answer was damper, a basic bread made from flour, baking powder, salt and water which is then shaped into a round and baked in the ashes, on a hot stone or in a Dutch oven. Francis Lancelott, a mineralogical surveyor, visited Australia in the mid 1800s and described the weekly menu of a shepherd:

You may talk of the dishes of Paris renown,

Or for plenty through London may range,

If variety’s pleasing, oh, leave either town,

And come to the bush for a change.

On Monday we’ve mutton, with damper and tea;

On Tuesday, tea, damper and mutton,

Such dishes I’m certain all men must agree

Are fit for peer, peasant, or glutton.

On Wednesday we’ve damper, with mutton and tea;

On Thursday tea, mutton and damper,

On Friday we’ve mutton, tea, damper while we

With our flocks over hill and dale scamper.

Our Saturday feast may seem rather strange,

‘Tis of damper with tea and fine mutton;

Now surely I’ve shown you that plenty of change

In the bush, is the friendly board put on.

But no, rest assured that another fine treat

Is ready for all men on one day,

For every bushman is sure that he’ll meet

With the whole of the dishes on Sunday.[1]

But although damper is the best known of the quickbreads that Australian settlers made and ate, it is not the only one. One of the downsides of the damper was that, at nearly a foot in diameter and several inches thick, it took up to an hour to cook. For hungry shepherds, that was a long time to wait and so a series of faster options developed. Johnny cakes, small rounds of dough fried in a dry pan, were based on the American corn breads of the same name, whilst puftaloons were a kind of scone cooked in fat. Other variations included fat cakes, normally containing fat but sometimes cooked in fat, and leather-jackets which seem to be nearly identical to the wheat based Johnny cakes.[2]

Tea and Damper, 1883, J.D; Troedel & Co. Courtesy of the State Library of Victoria.

Tea and Damper, 1883, J.D; Troedel & Co. Courtesy of the State Library of Victoria.

I have to admit I was quite intrigued by what I read about puftaloons, also known as puftalooners and puftaloonies. They seemed to be a favourite amongst children and stockmen alike but I’d never heard of them before doing this research. Still, the thought of a scone fried in lard was a bit off-putting.

Would they be soggy, greasy or, even worse, meaty? In fact they were delicious. Soft and scone-like inside but with a harder crust than your average scone. They were perfect for breakfast with some jam but would make an equally nice addition to bacon, eggs and some grilled tomatoes for a lazy brunch or with honey for an afternoon snack. Not only were they very tasty, but they were amazingly fast to make, the whole process took less than 20 minutes. I’m definitely a convert!

Puftaloons, recipe from 1904

The Recipe

The recipe for this comes from a 1904 edition of the Liverpool Herald, an Australian newspaper, but there are dozens of all but identical recipes. A variation for Pineapple Puftaloons is available here (apparently to shred pineapple you use the tines of a fork on a very ripe pineapple, but if anyone has actually done this please let me know if it works!).

“PUFTALOONS.” Liverpool Herald. October 15, 1904.

“PUFTALOONS.” Liverpool Herald. October 15, 1904, 12.

The Redaction

1 3/4 cups self-raising flour (I use Australian/UK cup sizes which are slightly different from US sizes)

1 1/2 cups of milk

A pinch of salt

Lard for frying (about 40g)

  1. Mix the flour and the salt together in a large mixing bowl. Make a well in the middle and pour in the milk. Mix the two together to form a slightly sticky dough.
  2. Lightly flour a flat surface and turn the dough out onto it. Knead it just until all the ingredients are incorporated. Use a rolling pin to roll it out half an inch thick. Cut out circles using a cutter or the floured mouth of a glass.
  3. Heat the lard in a frying pan over moderate heat until it’s melted and warm. Add the puftaloons and fry until golden, then turn them over to cook the other side. Keep the heat moderate because the dough needs time to cook all the way through. When golden on both sides drain them on kitchen towel and serve hot with your favourite spreads.

Puftaloons, recipe from 1904

The Round Up

The Recipe: From the Liverpool Herald (available here)

The Date: 1904

How did you make it? See above.

Time to complete?: 20 mins.

How successful was it?:  Soft and light inside, with a nice crust. They went well with both sweet and savoury toppings and were still good when reheated.

How accurate?: Pretty good I think, although they were done in a kitchen rather than at a bush camp which would make it significantly more difficult.

[1] Lancelott in Barbara Santich, Bold Palates (Kent Town: Wakefield Press, 2012), 156.

[2] Ibid., 215–220.

 Bibliography

“PUFTALOONS.” Liverpool Herald. October 15, 1904.

Santich, Barbara. Bold Palates. Kent Town: Wakefield Press, 2012.

Rotten as a Medlar

The next challenge for the Historical Food Fortnightly is to make something with a rare or scarce ingredients. Last October I was lucky enough to stumble upon a rather elusive fruit in a small French market. Called nèfles in French, medlars are very hard to come by in Australia, so I jumped at the opportunity to try these much maligned fruits.

A member of the rose family, medlars might look a bit like giant, brown rosehips but in texture they are more like their other relative, the quince. Like quinces medlars are extremely hard and sour, or at least until they are bletted. Bletting is the first step for basically any medlar recipe and involves leaving the fruit for several weeks to rot. The whole rotted fruit thing is part of the reason that the fruit has a bit of a bad name, but it’s also got centuries of bad nicknames (‘cul de chien’ in French, and an even more graphic one in English) and a history of sexual inneundo (Chaucer, Shakespear and D.H. Lawrence have all had a go at the poor medlar) to overcome. Don’t be put off though, for all its resemblance to certain anatomical features, the medlar is seeing a resurgence amongst foodies and for good reason too!

Some of the sites I read about bletting suggested putting the medlars in the fridge but I found that it was much faster to leave them out on the counter in a paper bag. It took a number of weeks and not all of the fruit ripened at the same time, you can arrest ripening by putting them in the fridge while you wait for the rest to be ready. They’re ready when they are wrinkled, soft and squishy, it’s not hard to tell. You can see the clear difference between the medlars before and after bletting in picture below.

IMG_1667

Once the medlars are bletted they can be eaten straight, just squeezed out of their skins but watch out for the seeds! I tried them like this and quite like the flavour which is similar to applesauce, but I didn’t like the texture which was quite grainy. With a carton of medlars to use up I turned to the historical cookbooks for directions. The most common way of using medlars seems to be as jelly which was particularly popular in the Victorian period, but other options include medlar tarts, medlar cheese or medlar preserves.

 The Recipe

This recipe comes from Foreign Desserts for English Tables which was published in 1862. The recipe is incredibly simple, can be applied to whatever quantity of medlars you have and makes a delicious jelly. It can be eaten like a jam, added to gravies and sauces or eaten with cheese as an alternative to quince paste, and it’s definitely worth a try if you can find some medlars!

Medlar Jelly, recipe from 1862

“Medlar Jelly – Pick over your medlars, choose them that are ripe but perfectly sound; halve them, and put them into a saucepan with the juice of a lemon and enough water to float them. Boil them until the water is reduced to a third of its original quantity. Mash the fruit in the liquor put it in a very fine sieve, and let the juice run through without using pressure. Take weight for weight of the latter and highly refined loaf-sugar, boil and skim it carefully, and when thick enough place it in your glass mould. This jelly should be beautifully clear when well made.”[1]

Now I don’t think its worth me giving a redaction, partly because I didn’t have scales in France when I made it and so don’t know what quantities I used, and partly because the original recipe is very straightforward. If you are concerned about using this recipe and want something with quantities you could use David Lebovitz’s recipe which is similar but adds an apple to up the pectin content (what helps the jelly set). The process for testing the jelly and bottling it is the same as for Transparent Marmalade.

 The Round-Up

The Recipe: From Foreign Desserts for English Tables (available here)

The Date: 1862

How did you make it? See above.

Time to complete?: 1hr 30.

How successful was it?:  Very nice indeed, a lovely translucent jelly with a rosy colour (it was less orange than it looks in the pictures).

How accurate?: Pretty good I think, with the exception of the sugar maybe?

Links

The Cook and the Curator on medlars and medlar cheese

Theodore Garrett’s Medlar Cheese

The Old Foodie on medlars and medlar tarts

 Medlar Jelly, recipe from 1862

[1] The Author of Everybody’s Pudding Book, Foreign Desserts for English Tables, by the Author of “Everbody”s Pudding Book’. (London: Richard Bentley, 1862), 147.

Bibliography

The Author of Everybody’s Pudding Book. Foreign Desserts for English Tables, by the Author of “Everbody”s Pudding Book’. London: Richard Bentley, 1862.

Last Lunch on the Titanic

Last year whilst in Belfast I visited the Titanic Quarter. Not many people realise it but Belfast claims the honour of having built the Titanic, and at the heart of the recently rejuvenated docks like Titanic Belfast. Part museum, part artwork, part monument to Belfast’s working class history, it’s a great way to pass a few drizzly hours in the city.

Titanic Luncheon Menu

Included in the exhibition is a remarkable object, a menu from the last lunch served on the Titanic. The 1st Class menu was taken from the sinking ship in the handbag of one Mrs. Dodge who escaped in a lifeboat with her son. Her husband also found a spot in a lifeboat, thanks to the steward Frederic Ray whose compliments can be found on the back of the menu.


The luncheon menu contains some 40 dishes for diners to choose from, and unfortunately making all of them was a bit beyond my budget. Instead I made a small selection which you can see in my own menu below.

 IMG_3875Titanic Luncheon Menu by Turnspit and Table


The Recipes


All the recipes are from American cookbooks and I tried to keep them as close chronologically as I could.


Cockie Leekie from ‘Mrs Rorer’s New Cook Book’ 1902


“1 fowl

2 quarts of water

1/2 pound of prunes

Yolks of two eggs

1 pound of beef marrow bones

2 dozen leeks

2 bay leaves

1 teaspoonful of salt

1 saltspoonful of pepper


Purchase the marrow bone from the round; have the butcher saw it into two-inch lengths, making four bones. Draw and truss the fowl; put it into a soup kettle; cover with cold water, bring to boiling point and skim. Add the marrow bones, the bay leaf and pepper;simmer gently for one hour. Add the leeks, neatly trimmed; simmer one hour longer. Add the prunes which have been soaked in water over night, and the salt; bring again to boiling point, and it is ready to serve. Remove the strings from the chicken, dish it in the centre of a large platter, put the prunes around, garnish the edge of the dish with carefully boiled rice, the marrow bones, and the leeks. Strain the soup into a tureen over the well beaten yolks of the eggs, and serve with squares of toasted bread. Serve egg sauce with the chicken. This dish takes the place of both meat and soup.”


Notes – I used a lot more water than the two quarts called for, I basically covered the chicken. I also used a lot fewer leeks, only 2 instead of the 2 dozen called for in the recipe. 10 mins before serving I spooned in the dumpling mixture and put the lid on to let them cook. To serve you pour the hot soup over the beaten eggs, forming strings of egg in the soup. I cut pieces of toast into small squares and floated them in the soup. I then served the chicken itself with the second course.

Cockie Leekie Soup

Dumplings from ‘Mrs Rorer’s New Cook Book’ 1902

“Put into a bowl one pint of flour with which you have sifted a rounding teaspoonful of baking powder and a half teaspoonful of salt; add about two-thirds of a cup of milk. Take the bowl and a teaspoon to the side of the fire and drop the mixture all over the top of the stew by teaspoonfuls. Cover the saucepan and cook slowly for ten minutes without lifting the lid. Dish by putting the dumplings around the edge of the platter; the stew in the centre, straining over the sauce; dust with a little chopped parsley, and send at once to the table.

Notes – I dropped large teaspoonfuls into the soup about 10 mins before serving and then served them with the boiled chicken. To be honest I didn’t like the mushy texture and lack of flavour.”

Cockie Leekie Chicken

Chicken à la Maryland from ‘The Boston Cooking-School Cook Book’ 1896


Maryland Chicken

“Dress, clean, and cut up two chickens. Sprinkle with salt and pepper,dip in flour, egg, and crumbs, place in a well-greased dripping-pan, and bake twenty minutes in a hot oven, basting after first five minutes of cooking with one-third cup melted butter. Arrange on platter and pour over two cups Cream Sauce.”


Cream sauce recipe is available here.


Notes- This was one of the lovely surprises of the evening. Juicy chicken with a crispy shell it was easy to make and really delicious. I also really liked it served with the cream sauce.

Chicken a la Maryland

Custard Pudding from ‘The Washington Women’s Cookbook’ 1909 (pg 66)

“One pint sweet milk, one cup sifted flour, stir together and cook until thick. When it is cool stir in flour, beaten eggs, two cups sugar and one cup chopped citron. Bake until it sets; serve cold with or without sauce.”


Notes – This was another surprise. When I was making it I was very concerned because it’s not a normal custard recipe and the cooked milk and flour was basically glue. I seived it to get rid of the lumps and continued with the recipe (except I replaced the chopped citron with some grated lemon peel) before baking it in a water bath for about 45 mins and it actually turned out very well. Probably better served hot.

Custard Pudding

Apple Meringue from ‘The Boston Cooking-School Cook Book’ 1896

Apple Meringue.

Use Meringue I. and pile lightly on baked apples, brown in oven, cool, and serve with Boiled Custard.
Canned peaches, drained from their liquor, may be prepared in the same way; it is then called Peach Meringue.

Baked Apples.
Wipe and core sour apples. Put in a baking-dish, and fill cavities withsugar and spice. Allow one-half cup sugar and one-fourth teaspooncinnamon or nutmeg to eight apples. If nutmeg is used, a few dropslemon juice and few gratings from rind of lemon to each apple is an improvement. Cover bottom of dish with boiling water, and bake in a hot oven until soft, basting often with syrup in dish. Serve hot or cold with cream. Many prefer to pare apples before baking. When this is done, core before paring, that fruit may keep in shape. In the fall, when apples are at their best, do not add spices to apples, as their flavor cannot be improved; but towards spring they become somewhat tasteless, and spice is an improvement.

Meringue I.

Whites 2 eggs.
2 tablespoons powdered sugar.
1/2 tablespoon lemon juice or
1/4 teaspoon vanilla.
Beat whites until stiff, add sugar gradually and continue beating, then add flavoring.

Notes – This was a bit of a multi-step recipe. You bake the apples first, then make the meringue before scooping the meringue onto the apples and baking again. It was very nice but very, very sweet. I think you could probably refrain from putting sugar on the apples at all, just a little spice.
Apple Meringue

Other Elements

– There were nuts and olives on the table for snacking

– I served baked potatoes, sliced tomato and beetroot with the chicken as per the menu. They also suggested lettuce but I just didn’t have any.

– Small bread rolls can be placed inside the folded napkins.

– Cheese is served with salad, bread or crackers before the dessert (but possibly between the pastry and dessert).

Stilton

Resources

  • ‘Last Dinner on the Titanic’ by Rich Archbold and Dana McCauley
  • For how to set a table I suggest ‘The Butler’s Guide to Running the Home and Other Graces’ by Stanely Auger and Fiona St. Aubyn, although my own table setting was limited by what I had on hand. For more about table settings and serving dinner you can try ‘Dinner is Served’ by Arthur Inch and Arlene Hirst.
  • For table etiquette see ‘The Etiquette of Today’ by Edith B. Ordway (although it is a little late).
  • I folded the napkins into a Bishop’s Hat using these instructions

Got the Blues

Sky-Blue Sauce

This fortnight’s challenge “Something Borrowed, Something Blue” was one of the hardest challenges to find something to make. I really wanted to do something blue, but blue foods are always a bit thin on the ground. The exception seems to be the Middle Ages when a range of colourants were used to dye foods: saffron or egg yolk for yellow, alkanet, blood or berries for reds, ground toast or liver for browns and blacks, spinach or parsley juice for green and almond milk and chicken for white.[1] To make blue medieval cooks had a range of options: ground lapis lazuli (don’t try this at home!), cooked carrot peel, blackberries, cherry or grape juice, or the rather enigmatic turnsole[2].


Many of these ingredients were used in jellies or leaches (milk jellies) to produce fanciful, multi-coloured dishes. Another popular use was coloured sauces, The Medieval Kitchen: Recipes from France and Italy lists white, green, yellow, pink, black, blue and camel-coloured sauces.[3]


The Recipe


The pleasant-sounding ‘Sky-blue sauce for summer’ (I’ve also seen it translated as ‘heavenly’ which I think is even nicer) seemed promising. I don’t speak Italian so I used an English translation (from The Medieval Kitchen) but an Italian version is available here called ‘Sapor celeste de estate’.


“Sky-blue sauce for summer. Take some of the wild blackberries that grow in hedgerows and some thoroughly pounded almonds, with a little ginger. And moisten these things with verjuice and strain through a sieve.”[4]


Unfortunately, as you may have guessed from the pictures there was a major problem with my version, it’s not blue. To add insult to injury, it also tastes pretty awful (it somehow managed to be both too watery and too sour at the same time). Because of these rather major faults I won’t be giving a redaction (if you want to try it you can find the redaction from the book here). I used similar proportions, although I halved the recipe and used slightly less verjuice. I do wonder if that was the problem, although having had a look at some other blogs it seems that no-one has really succeeded at turning the recipe blue, let alone “a lovely midnight-blue”[5].

Sky-Blue Sauce

The Round-up

The Recipe: Sky-blue sauce for summer from Libro de Arte Coquinaria by Martino de Rossi (available here in Italian)

The Date: c. 1465

How did you make it?: I mashed 2 cups of blackberries then added the 2 tbsp of ground almonds, 1/2 tsp of ground ginger and 1/4 cup of verjuice before straining the mixture.

Time to complete?: About 20 mins.

How successful was it?: Well it didn’t turn blue and didn’t taste good so it failed on pretty much all counts. Whether the taste was correct but just not my thing I’m not sure. As to not turning blue, I wonder if either I didn’t add enough verjuice or it wasn’t acidic enough. Epulario by Giovanne Roselli has a nearly identical recipe but he uses mulberries instead, would this work better?

How accurate?: I wonder what medieval verjuice was like, something to investigate further.


[1] Terence Scully, The Art of Cookery in the Middle Ages, 5th ed. (Suffolk and Rochester: Boydell Press, 2006), 114–116.

[2] Turnsole is a dyestuff that yields a colour that varies from red to purple to blue depending on the PH level of the liquid it is mixed with. It has been identified as several different plants, although the most likely is chrozophora tinctoria.

[3] Odine Redon, Francoise Sabban, and Silvano Serventi, The Medieval Kitchen: Recipe from France and Italy, trans. Edward Schneider (Chicago & London: The University of Chicago Press, 1998), 165–178.

[4] Ibid., 168.

[5] Ibid.


Bibliography

Redon, Odine, Francoise Sabban, and Silvano Serventi. The Medieval Kitchen: Recipe from France and Italy. Translated by Edward Schneider. Chicago & London: The University of Chicago Press, 1998.


Scully, Terence. The Art of Cookery in the Middle Ages. 5th ed. Suffolk and Rochester: Boydell Press, 2006.

All Jumbled Up

Savoury Jumbles with Seeds

Photography by Sophia Harris.


If you’ve ever flicked through a historical cookbook you may have stumbled across a recipe for jumbles (also spelt jumbals, iombils, jambals and any other way you can imagine), a popular type of biscuit from the 16th century onwards. When I first heard about jumbles I, like many other people I think, was under the impression that they were called jumbles because they were a jumble of ingredients, but in fact the name refers to their shape.


In 16th century England gimmell rings (from the Latin gemellus for twin) were popular symbols of love and friendship and often exchanged as wedding rings. The rings were made of two or more intersecting bands which could be separated to form two separate rings, worn by each party during the betrothal period and then re-joined during the wedding.[1] Many of these rings exist in museum collections, and they are also celebrated in the literature of the day. I particularly like Robert Herrick’s poem The Jimmall Ring Or True-Love Knot:


“Thou sent’st to me a true love-knot, but I
Returned a ring of jimmals to imply
Thy love had one knot, mine a triple tie.”[2]


Jumbles then are biscuits made in the shape of these rings, and their twisted and entwined shapes are easily recognisable in many 16th and 17th century paintings, only recently has their shape changed to a flat or mounded biscuit. What is less sure is what exactly they should be made of. In fact, there is a huge amount of variation over the centuries.


Still life with Venetian Glass, a romer and a candle by Clara Peeters, 1607. [Public domain], via Wikimedia Commons

Still life with Venetian Glass, a romer and a candle by Clara Peeters, 1607. [Public domain], via Wikimedia Commons

Early jumble recipes, such as those from Thomas Dawson’s The Good Huswife’s Jewell from 1597 are biscuits flavoured with aniseed and rosewater and formed into knots before being boiled and baked.[3] Martha Washington’s Cookbook which, according to Karen Hess, probably dates from the second half of the 17th century contains a similar recipe which is even more heavily spiced (with carraway, aniseed, rosewater, musk and ambergris) but is not boiled.[4] However, it also has recipes for jumbles made from marzipan and baked fruit paste, as well as one for Lemon Jumbles which Hess notes is more like a meringue. Published in 1741 Elizabeth Moxon’s book English Housewifery Exemplified also offer both biscuit and fruit paste versions (from apricots, or she gives the option of making Barberry Cakes in the form of jumbles).[5]


Jumbles held on well into the 19th century, although the flavouring had become more familiar with cinnamon, nutmeg and lemon amongst the most popular additions. The shapes were also probably less complex, being formed into little rings or simply rolled out and baked thin. Whilst Elizabeth Lea’s book Domestic Cookery, Useful Receipts, and Hints to Young Housekeepers (1859) offered a selection of recipes (Rich Jumbles, Common Jumbles, Molasses Jumbles, Jumbles for Delicate Persons, Cup Jumbles and Jackson Jumbles)[6], other sources had pared their recipes back to the bare minimum. A recipe from 1860 runs “Jumbles. Half a pound of sugar. Half a pound of butter. Half a pound of flour. Flavour with cinnamon.”[7] In Australia references to honey jumbles appear in newspapers around the turn of the 20th century, often referring to American recipes or producers. A version of these is still produced by Arnott’s today, but these soft, gingerbready biscuits bear little resemblance to any other type of jumbles in either their shape or ingredients. For an example of this type of recipe see here.

Sweet Jumbles, recipe from 1623

Photography by Sophia Harris.


The Recipes


I used two different recipes for jumbles, one is for a savoury more bread-like type of jumbles, pleasantly flavoured with aniseed and boiled before baking (like a modern bagel or pretzel).


“To Make Jambals : Take a pint of fine wheat flour, the yolks of three or four new laid eggs, three or four spoonfuls of sweet cream, a few anniseeds, and some cold butter, make it into paste, and roul it into long rouls, as big as a little arrow, make them into divers knots, then boil them in fair water like simnels; bake them, and being baked, box them and keep them in a stove. Thus you may use them, and keep them all the year.”[8]


I had a bit of difficulty shaping these because of the texture of the dough, and I think that they could probably use some salt, or at the least salted butter, to give them a little more flavour. The lack of salt in the recipe does confuse me a bit, given that May suggests you can keep them for a whole year. Possibly the salt was assumed in the recipe? The second recipe that I used was for a slightly chewy biscuit, also flavoured with aniseed. These were really good and I would definitely recommend the recipe.


“To make Iumbals. To make the best Iumbals, take the whites of three egges and beate them well, and take of the viell; then take a little milke and a pound of fine wheat flower and sugar together finely sifted, and a few Aniseeds well rubd and dried; and then make what formes you please ; & bake them in a soft ouen vpon white Papers.”[9]


The Redactions


To Make Jambals (the savoury bread type)


250g flour

2 tsp aniseeds, ground to a powder in a mortar and pestle

60g salted butter

4 egg yolks

4 tbsp cream


  1. Place the flour and aniseed in a bowl and mix together. Rub in the butter until it is like breadcrumbs then stir in the egg yolks and cream until combined. If necessary add a little egg white to soften the mixture.
  2. Take walnut sized pieces of dough and roll into sausages the thickness of a pencil. The dough gets air pockets in the middle which makes it difficult to roll but by applying downward pressure with your palms as you roll you can form sausages. Fold the sausage in half and twist the ends together or form into other shapes as desired.
  3. Preheat the oven to 180˚C. Bring a wide saucepan of water to rolling boil and carefully place the jumbles into the boiling water with a slotted spoon. Allow them to boil in the liquid for 1 minute then scoop them out and place them on a baking tray lined with baking paper. Bake for 25-30 minutes or until golden brown.
Savoury Jumbles

Photography by Sophia Harris.

To Make Jumbals (the sweet biscuit type)


3 egg whites

6 tbsp milk

225g plain flour

225 wholemeal flour

450g sugar

3 tsp aniseeds, ground to a powder in a mortar and pestle


  1. Preheat the oven to 180˚C. Beat the egg whites until fluffy then stir in the milk, flour, sugar and aniseeds until they form a dough.
  2. On a floured board shape pieces of dough into knots, hearts, letters etc. Place them on a baking tray lined with baking paper and cook in the oven for 20 minutes or until lightly golden.
Sweet Jumbles

Photography by Sophia Harris.


The Round-up

The Recipe: Jambals from The Accomplisht Cook by Robert May (available here)

The Date:1685

How did you make it?

Time to complete?: About an hr.

How successful was it?: More successful that I was expecting, at first I was really struggling to get the dough to stick together but by applying downwards pressure with my palms as I rolled, and adding a little egg white, I was able to get it to work. The larger twists fell apart a big during boiling, but the smaller ones stayed together really well. The flavour was quite subtle, and considering how long they are supposed to stay good, I was surprised at the lack of salt. Very different from the other jumbles, savoury rather than sweet but quite tasty.

How accurate?:  Not too bad I think, although I don’t know how long I should have boiled it for, I just guessed that. I’d also like to know how long they do keep, and what it means to box them and keep them in a stove.


The Recipe: Jumbals from Country Contentements by Gervase Markham (available here)

The Date:1623

How did you make it?

Time to complete?: About an hr.

How successful was it?: Very successful, gave a light slightly chewy biscuit lightly flavoured with aniseed.

How accurate?: I wasn’t quite sure what it meant to “take of the viell” so I just whipped the egg whites until fluffy. It seemed to work well.


[1] The British Museum, “Fede Ring/gimmel-Ring,” The British Museum Collection Online, accessed February 9, 2015, http://www.britishmuseum.org/research/collection_online/collection_object_details.aspx?objectId=79510&partId=1.

[2] Robert Herrick, The Hesperides & Noble Numbers, ed. Alfred Pollard, vol. 1 (London and New York: Lawrence & Bullen, Ltd., 1898), 217.

[3] Thomas Dawson, The Second Part of the Good Hus-Wifes Jewell (London: Printed by E. Allde for Edward White, 1597), 19.

[4] Karen Hess, Martha Washington’s Booke of Cookery and Booke of Sweetmeats, Reprint edition (New York: Columbia University Press, 1996), 348–351.

[5] Elizabeth Moxon, English Housewifry Exemplified (Leeds: Printed by J. Lister, and sole by J. Swale, J. Ogle, and S. Howgate, at Leeds; J. Lord at Wakefield; and the author at Pontefract., 1741), 139 & 175.

[6] Elizabeth E. Lea, Domestic Cookery, Useful Receipts, and Hints to Young Housekeepers (Baltimore: Cushings and Bailey, 1859), 118–119.

[7] Luther Tucker and Son and J.J Thomas, eds., The Country Gentleman, vol. 15 (Albany: Luther Tucker, 1860), 383.

[8] Robert May, The Accomplisht Cook, Or, The Art and Mystery of Cookery. (London: printed by R.W. for Nath: Brooke, 1660), 275.

[9] Gervase Markham, Countrey Contentments, or the English Huswife: Containing the Inward and Outward Vertues Which out to Be in a Compleate Woman (London: Printed for R. Jackson, 1623), 114.


Bibliography

Dawson, Thomas. The Second Part of the Good Hus-Wifes Jewell. London: Printed by E. Allde for Edward White, 1597.

Herrick, Robert. The Hesperides & Noble Numbers. Edited by Alfred Pollard. Vol. 1. London and New York: Lawrence & Bullen, Ltd., 1898.

Hess, Karen. Martha Washington’s Booke of Cookery and Booke of Sweetmeats. Reprint edition. New York: Columbia University Press, 1996.

Lea, Elizabeth E. Domestic Cookery, Useful Receipts, and Hints to Young Housekeepers. Baltimore: Cushings and Bailey, 1859.

Markham, Gervase. Countrey Contentments, or the English Huswife: Containing the Inward and Outward Vertues Which out to Be in a Compleate Woman. London: Printed for R. Jackson, 1623.

May, Robert. The Accomplisht Cook, Or, The Art and Mystery of Cookery. London: printed by R.W. for Nath: Brooke, 1660.

Moxon, Elizabeth. English Housewifry Exemplified. Leeds: Printed by J. Lister, and sole by J. Swale, J. Ogle, and S. Howgate, at Leeds; J. Lord at Wakefield; and the author at Pontefract., 1741.

The British Museum. “Fede Ring/gimmel-Ring.” The British Museum Collection Online. Accessed February 9, 2015. http://www.britishmuseum.org/research/collection_online/collection_object_details.aspx?objectId=79510&partId=1.

Tucker and Son, Luther, and J.J Thomas, eds. The Country Gentleman. Vol. 15. Albany: Luther Tucker, 1860.

Raising a Revolution

Soda Bread, recipe from 1836

Like Betsy from the Historical Food Fortnightly I decided to focus on a raising agent for the Revolutionary Food challenge, but where her recipe called for potassium bicarbonate (aka pearl ash) I used sodium bicarbonate. Sodium carbonate or soda ash had been in use as a leavening agent since its discovery in 1791 and continued in use into the mid-1800s, see for example the recipe for Buckwheat Cakes below, but sometime around the 1840s it began to be replaced by sodium bicarbonate and eventually baking powder.


Michigan Farmer, and Western Horticulturalist. 17th ed. Vol. 2. (Jackson, Michigan: D.D.T. Moore, 1844) 135.

Recipe for Buckwheat Cakes using carbonate of soda. From the Michigan Farmer, and Western Horticulturalist. 17th ed. Vol. 2. (Jackson, Michigan: D.D.T. Moore, 1844) 135.

As far as I can find out, sodium bicarbonate was discovered by Valentin Rose in 1801 but wasn’t used on a large scale until commercialisation in the 1840s. Nonetheless, I found a reference as early as 1808 to “digestive bread” made with bicarbonate of soda[1], and indeed many of the later recipes stress the health benefits of bread leavened with bicarbonate of soda rather than yeast.


I can’t say whether bicarbonate of soda really made bread that was healthier for you, but it certainly offered a number of advantages to the home baker. Firstly, it could be used with soft wheat flours, that is flour that doesn’t contain enough gluten to have the strength to make good bread with yeast. Secondly it was much faster, in fact as soon as the soda and the acid (often yoghurt or buttermilk) come together you have a very limited time to get it into the oven. Thirdly it was a lot less work, contrary to normal bread soda bread should not be kneaded. Fourthly, it was suitable for cakes and biscuits too, giving a lighter, fluffier result than those made with yeast. Finally, it was also cheap, didn’t go off in the summer months, and required much less attention than a sourdough starter or ale-barm. For all of these reasons, the introduction of chemical leavening agents was revolutionary for bakers of all types.


By Boston Public Library [Public domain], via Wikimedia Commons

Brothers-in-law John Dwight and Austin Church were some of the first commercial suppliers of sodium bicarbonate in the USA, first selling their product in 1846. The two separated to set up their own companies, but these were re-united in 1896.  By Boston Public Library [Public domain], via Wikimedia Commons

Although many countries have their traditions of quick breads leavened with chemical agents (damper, pancakes, griddle cakes, farls, bannocks, scones, biscuits) I’ve always had a strong attachment to the quick breads of Northern Ireland. Visiting my grandparents there meant fried pancakes, potato breads toasted and dripping with butter, soda farls with an Ulster Fry and best of all, thick slices of wheaten bread, slathered in butter and ready to be dipped into Granny’s vegetable soup.


Ireland’s relationship with quick breads is linked to several key factors. The Irish climate has always been better suited to soft wheats, and soft wheats are not suited to being made into yeast breads. These quick breads are also more suited to being cooked over a fire, an important factor given that until the 20th century many houses lacked an oven. The introduction of bicarbonate of soda also seems to have coincided with The Great Famine of 1845-1852, and the woefully inadequate imports of wheat and cornmeal which were to relieve the hunger. Nonetheless, the demand for bicarbonate of soda greatly increased during the famine years so much that it placed pressure on suppliers to find new ways to produce it[2].


The Recipe


Unfortunately few Irish recipe books exist from this period so I have had to make do with an early English recipe from The Farmers Magazine although a nearly identical recipe is available in the 1847 Manual of Domestic Economy[3]. It is quite simple to do, although it does make a very large loaf so it may be worth halving the recipe.

The Farmer’s Magazine July to December 1836. Vol. 5. (London: Printed by Joseph Rogerson, 1836) 328.

Recipe for Soda Bread from The Farmer’s Magazine: July to December 1836. Vol. 5. (London: Printed by Joseph Rogerson, 1836) 328.


The Redaction

Soda Bread

680g whole wheat flour

2 tsp salt

1 heaped tsp bicarbonate of soda

1/3 cup of water

Approx. 600ml buttermilk


  1. Heat the oven to 190˚C and heat a large baking tray in the oven for 15 minutes.
  2. Mix the flour and salt in a large mixing bowl. Dissolve the bicarbonate of soda into the water then stir it into the flour. Rub it together until it is evenly distributed.
  3. Stir in the buttermilk, as much as possible to make a soft dough that is still able to be handled. Turn it out onto a floured surface and shape into a large circle about 1 inch thick. Do not knead the dough and act as quickly as possible.
  4. Carefully remove the hot tray from the oven and place the dough onto it. Place in the oven and bake for 40-50 minutes or until the bread is golden and sounds hollow when knocked on the bottom. Serve hot or cold with butter.

Soda Bread, recipe from 1836


The Recipe: Soda Bread from The Farmer’s Magazine (available here)

The Date: 1836

How did you make it? See above.

Time to complete?: Very quick to mix, maybe 1 hr all up.

How successful was it?: Not as good as real Irish soda bread, the odd shape made it too crusty, and it had a slight aftertaste of soda.

How accurate?: The way of cooking it was very different, but that was unavoidable in the circumstances. I’m not sure if the quantity of soda was off, but it had an odd aftertaste which I can’t imagine it should have had.


[1] Andrew Ure, A Dictionary of Art, Manufactures, and Mines, vol. 2 (New York: D. Appleton and Company, 1808), 248.

[2] Thomas Richardson and Henry Watts, Acids, Alkalies and Salts: Their Manufacture and Applications, vol. 1 (London: H. Baillière, 219, Regent Street, 1863), 312.

[3] John Timbs, Manual of Domestic Economy: By the Editor of “The Year-Book of Facts.,” 1847, 97.


Bibliography

Michigan Farmer, and Western Horticulturalist. 17th ed. Vol. 2. D.D.T. Moore, 1844.

Richardson, Thomas, and Henry Watts. Acids, Alkalies and Salts: Their Manufacture and Applications. Vol. 1. London: H. Baillière, 219, Regent Street, 1863.

The Farmer’s Magazine July to December 1836. Vol. 5. London: Printed by Joseph Rogerson, 1836.

Timbs, John. Manual of Domestic Economy: By the Editor of “The Year-Book of Facts.” London: David Bogue, 86, Fleet Stree, 1847.

Ure, Andrew. A Dictionary of Art, Manufactures, and Mines. Vol. 2. 2 vols. New York: D. Appleton and Company, 1808.


Funereal Feasting

IMG_2384

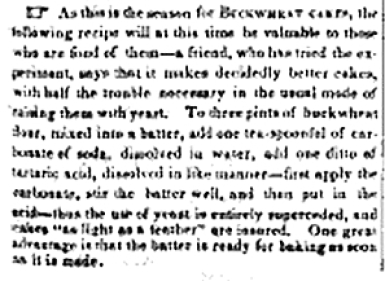
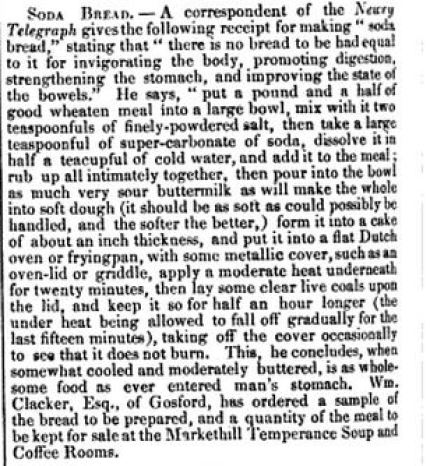
Here we are again, still playing catch-up with the Historical Food Fortnightly challenges I’m afraid, but as of next fortnight we should be back on schedule. For the ‘Sacred or Profane’ challenge I picked a topic which I’ve been curious about for a while now. For those of you who are seeing these for the first time, welcome to the weird, wacky and downright morbid world of funeral foods.

In Victorian times death was a big deal, maybe not on quite the same scale as an Egyptian pyramid, but certainly expensive enough to ruin a family and the focus of a complex web of symbolism which dictated the families clothing and behaviour for months, if not years, after the death. One of the most curious of these practices was the use of special biscuits in order to invite people to the funeral or to give out as a keepsake to guests. Although the use of biscuits at funerals seems to have been quite widespread in Northern England and parts of America, the form and usage varied based on the region and the social class of the deceased.

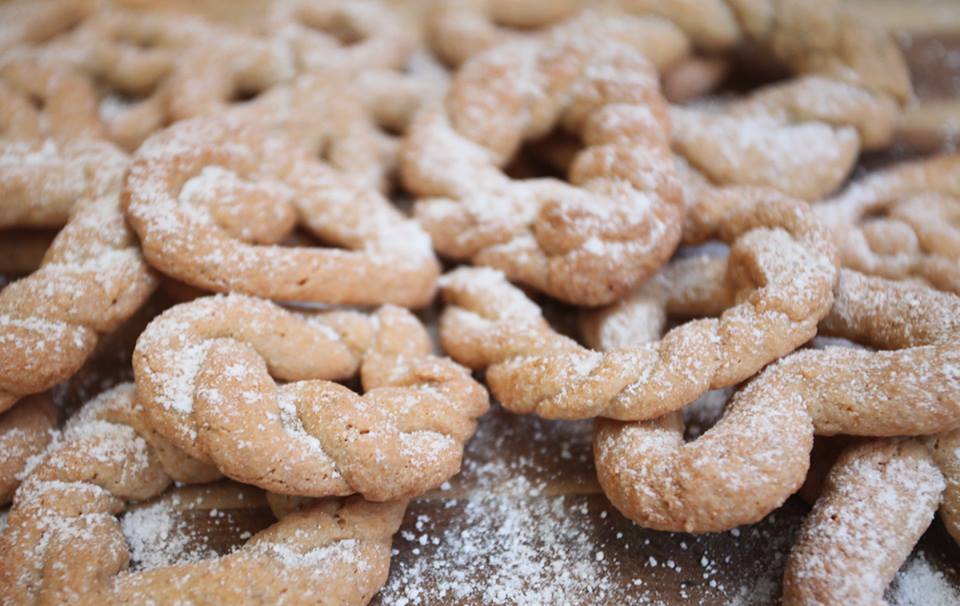
Essentially there were two types of biscuit, one was a Savoy or Naples biscuit (like a modern sponge finger or ladyfinger) and the second type was a kind of shortbread (The Great British Bake Off has a great video about these biscuits which you can watch here). The shortbread biscuits could be flavoured with caraway seeds and were often stamped with a mould, like the one below.

Funeral Biscuit Mould

This 17th century stone mould from Yorkshire was owned by Thomas Beckwith and was used to mark funeral biscuits. From Sylvanius Urban, ed., The Gentleman’s Magazine (London, England) (London: Printed by Nichols and Son, at Cicero’s Head, Red Lion Passage, Fleet-Street, 1802), fig. 2.

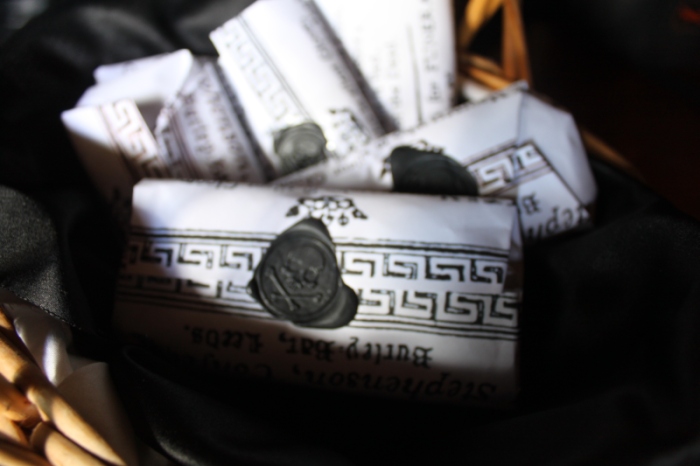
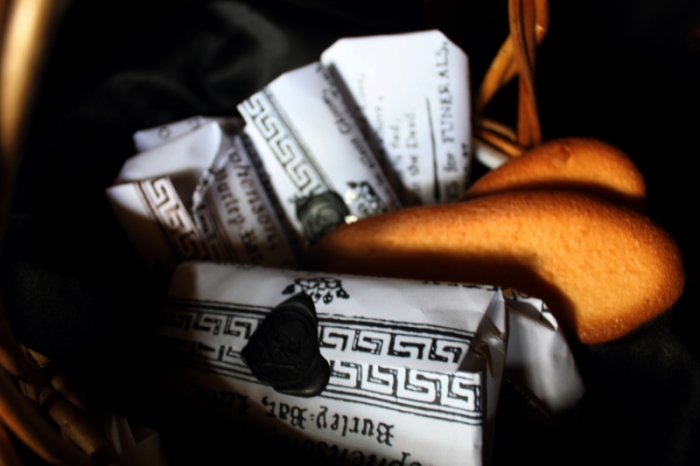
Depending on how the biscuits were to be given out they could be bundled into parcels of between 2 and 6 biscuits, wrapped in a paper printed with a poem or verse and sealed with black wax. A correspondent of ‘The Gentleman’s Magazine’ in 1802 describes a time when “The paper in which these biscuits were sealed was printed on one side with a coffin, cross-bones, skulls, hacks, spades, hour-glasses etc.”[1] You can see an example of one of these wrappers on the Pitt Rivers Museum website here.

There were a number of different ways to distribute the biscuits:

  1. Prior to the funeral a woman could be sent around ‘bidding’ friends and family to attend the funeral, and handing out wrapped packets of biscuits.
  2. The biscuits could be served during the wake or just before the last viewing of the body.
  3. A basket of wrapped parcels of biscuits could be left on a table for people to take home with them.
  4. Packets of wrapped biscuits could be sent to the homes of family and friends who were unable to attend.
  5. Packets of wrapped biscuits could be send to the homes of people who attended as a keepsake.[2]

Cropped 3

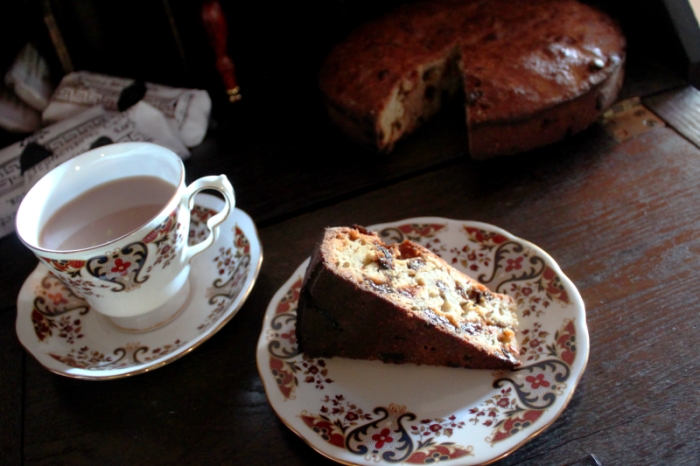
An alternative was a funeral cake, which could either be small individual spiced cakes, or a larger (8-11 inches in diameter), round cake made of “flour, water, yeast, currants, and some kind of spice”[3]. Joseph Hunter makes an interesting distinction between when cake was served rather than biscuits:

“When cakes such as these are presented to the persons invited to attend the funeral it is understood to intimate that it is a pay-burying, i.e. that each person is expected to contribute something, usually a shilling, towards the expense. When it is not a pay-burying a Naples biscuit is the arvel-bread : and after funerals of people of a better condition, two Naples biscuits are usually sent to the friends of the deceased, with gloves, hat-band or scarf, or all of these.”[4]

Another use for funeral biscuits is documented in the village of Cherry Burton. Apparently in this Yorkshire village it was considered necessary to place the bee-hive in mourning, and so it was draped in black fabric with a propitiatory offering of funeral biscuit soaked in wine left for the bees.[5] There was a strong link between wine and the biscuits for humans too, and nearly all of the sources which I can find mentions the two together, even amongst teetotallers[6].

Even though this picture is quite a bit earlier than the other sources we've been looking at, I think its very interesting to see the girl serving wine on the left (and the text mentions that those present will drink several glasses before and after the funeral) and the girl on the right who has a plate of food. Could it be biscuits?                                                                                                                          Funeral Scene from The ceremonies and religious customs of the known world by Bernard Picart, 1737. Credit: Wellcome Library, London. Wellcome Images [CC BY 4.0]Bernard Picart, 1737. Credit: Wellcome Library, London. Wellcome Images http://wellcomeimages.org  CC BY 4.0 http://creativecommons.org/licenses/by/4.0/
Even though this picture is quite a bit earlier than the other sources we’ve been looking at, I think its very interesting to see the girl serving wine on the left (and the text mentions that those present will drink several glasses before and after the funeral) and the girl on the right who has a plate of food. Could it be biscuits?   Funeral Scene from The ceremonies and religious customs of the known world by Bernard Picart, 1737. Credit: Wellcome Library, London. Wellcome Images [CC BY 4.0]

The Recipes

In spite of all this information about eating funeral biscuits, there are very few extant recipes for either funeral biscuits or cakes. W.S. Steveley has recipes for ‘Funeral Buns’ and ‘Funeral Biscuits’[7] (available here pg. 16-17) but there are so few instructions and the quantities are so large that I wasn’t keen to try either of them. His buns, however, do shed some light on the type of cakes that would have been served. The most important features, which also show up in the descriptions above, is the inclusion of currants and spices (often cinnamon and/or caraway seeds).

There is also a 19th century recipe for Dutch doot cookjes (death cookies) from America which calls for 50lb of flour and makes some 300 cookies the size of saucers![8] But they don’t fit the mould for either of the two types of biscuits that I had read about. So instead I turned to the trusty Mrs. Beeton for my recipes.

SAVOY BISCUITS OR CAKES. 1748. INGREDIENTS.—4 eggs, 6 oz. of pounded sugar, the rind of 1 lemon, 6 oz. of flour. Mode.—Break the eggs into a basin, separating the whites from the yolks; beat the yolks well, mix with them the pounded sugar and grated lemon-rind, and beat these ingredients together for 1/4 hour. Then dredge in the flour gradually, and when the whites of the eggs have been whisked to a solid froth, stir them to the flour, &c.; beat the mixture well for another 5 minutes, then draw it along in strips upon thick cartridge paper to the proper size of the biscuit, and bake them in rather a hot oven; but let them be carefully watched, as they are soon done, and a few seconds over the proper time will scorch and spoil them. These biscuits, or ladies’-fingers, as they are called, are used for making Charlotte russes, and for a variety of fancy sweet dishes. Time.—5 to 8 minutes, in a quick oven. Average cost, 1s. 8d. per lb., or 1/2d. each.[9]

Funeral Biscuit Darken

My Savoy biscuits didn’t turn out very well, they were very flat, so I haven’t provided a redaction for them although the recipe written quite clearly if you want to give it a try. The plain cake was also very dense, but I think that is probably inevitable with only 1tsp of baking powder. It is however rather tasty and wasn’t overpowered by the caraway as I had expected.

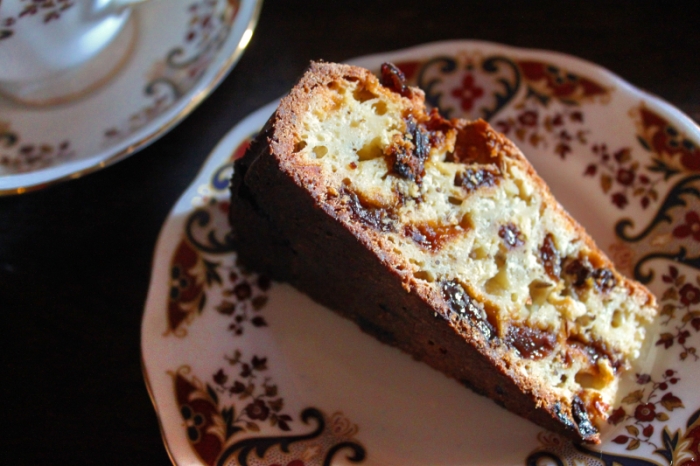
A NICE PLAIN CAKE. 1766. INGREDIENTS.—1 lb. of flour, 1 teaspoonful of Borwick’s baking-powder, 1/4 lb. of good dripping, 1 teacupful of moist sugar, 3 eggs, 1 breakfast-cupful of milk, 1 oz. of caraway seeds, 1/2 lb. of currants. Mode.—Put the flour and baking-powder into a basin; stir those together; then rub in the dripping, add the sugar, caraway seeds, and currants; whisk the eggs with the milk, and beat all together very thoroughly until the ingredients are well mixed. Butter a tin, put in the cake, and bake it from 11/2 to 2 hours. Let the dripping be quite clean before using: to insure this, it is a good plan to clarify it. Beef dripping is better than any other for cakes, &c., as mutton dripping frequently has a very unpleasant flavour, which would be imparted to the preparation. Time.—1-1/2 to 2 hours. Average cost, 1s. Seasonable at any time.[10]

The Redaction

A Nice Plain Cake

545g plain flour

1 tsp baking powder

113g beef dripping at room temperature

170g sugar

28g caraway seeds

225g currants

3 eggs

Approx. 300ml milk

  1. Heat the oven to 170°C and butter a 9” springform cake tin.
  2. Mix the flour and baking powder in a large bowl. Rub in the dripping with your fingertips until it is evenly distributed. Stir in the sugar, seeds and currants.
  3. Whisk together the eggs and 250ml milk then stir it into the dry ingredients. Add a little more milk, as necessary, until all the ingredients are wet and the mixture can be stirred.
  4. Bake the cake for about an hour, or until a skewer inserted into the middle comes out clean. It may be a good idea to place a tray under the cake to catch the dripping if it seeps out of the springform tin.

Funeral Cake

The Recipe: Mrs Beeton’s The Book of Household Management (available here)

The Date: 1861

How did you make it? See above.

Time to complete?: The cake took about 1hr 35, the biscuits took about 40 mins.

How successful was it?:  The biscuits just didn’t rise at all, but they tasted ok. The cake was very, very dense and didn’t last very well over a number of days but it had a nice flavour and the currants were quite juicy. The only other thing is that the dripping gives off a rather meaty smell while cooking!

How accurate?: I think the cake recipe was probably the type of thing that women could make at home for a funeral, especially if you had to mass produce it in a hurry. The biscuits however seem a bit too fiddly for that, and certainly there were lots of specialists you could buy them from so that seems more likely to me. In terms of accuracy, I did beat the biscuits by hand! But maybe that was the problem.

[1] Sylvanius Urban, ed., The Gentleman’s Magazine (London, England) (London: Printed by Nichols and Son, at Cicero’s Head, Red Lion Passage, Fleet-Street, 1802), 105.

[2] Peter Brears, “Arvals, Wakes and Month’s Minds: Food for Funerals,” in Food and the Rites of Passage, ed. Laura Mason (Devon: Prospect Books, 2002), 103–105.

[3] Jonathan Boucher, Glossary of Archaic and Provincial Words, Edited by Joseph Hunter. – London, Black, Young & Young 1833-, ed. Joseph Hunter (London: Black, Young & Young, 1833), sec. Arvel–bread.

[4] Ibid.

[5] George Oliver, The History and Antiquities of the Town and Minster of Beverley, with Historical Sketches of the Abbeys of Watton and Meaux [&c.]., 1829, 499.

[6] T. W. Thompson, “Arval or Avril Bread,” Folklore 29, no. 1 (March 30, 1918): 85.

[7] W. S. Steveley, The New Whole Art of Confectionary: Sugar Boiling, Iceing, Candying, Jelly Making, &c. Which Will Be Found Very Beneficial to Ladies, Confectioners, Housekeepers, &c., Particularly to Such as Have Not a Perfect Knowledge of That Art (Sutton & Son, 1828), 16–17.

[8] Peter G. Rose, Food, Drink and Celebrations of the Hudson Valley Dutch (The History Press, 2009), 69–70.

[9] Isabella Beeton, ed., Beeton’s Book of Household Management (London: S.O Beeton, 1861), pt. 1748.

[10] Ibid., pt. 1766.

Bibliography

Beeton, Isabella, ed. Beeton’s Book of Household Management. London: S.O Beeton, 1861.

Boucher, Jonathan. Glossary of Archaic and Provincial Words, Edited by Joseph Hunter. – London, Black, Young & Young 1833-. Edited by Joseph Hunter. London: Black, Young & Young, 1833.

Brears, Peter. “Arvals, Wakes and Month’s Minds: Food for Funerals.” In Food and the Rites of Passage, edited by Laura Mason, 87–114. Devon: Prospect Books, 2002.

Oliver, George. The History and Antiquities of the Town and Minster of Beverley, with Historical Sketches of the Abbeys of Watton and Meaux [&c.]., 1829.

Rose, Peter G. Food, Drink and Celebrations of the Hudson Valley Dutch. The History Press, 2009.

Steveley, W. S. The New Whole Art of Confectionary: Sugar Boiling, Iceing, Candying, Jelly Making, &c. Which Will Be Found Very Beneficial to Ladies, Confectioners, Housekeepers, &c., Particularly to Such as Have Not a Perfect Knowledge of That Art. Sutton & Son, 1828.

Thompson, T. W. “Arval or Avril Bread.” Folklore 29, no. 1 (March 30, 1918): 84–86.

Urban, Sylvanius, ed. The Gentleman’s Magazine (London, England). London: Printed by Nichols and Son, at Cicero’s Head, Red Lion Passage, Fleet-Street, 1802.

A Lemon Blancmange

Lemon Blancmange, recipe from 1861

First of all, apologies that it’s been a while, between exams, moving and Christmas its been a bit crazy but better late than never. The challenge this time was “Fear Factor”, no not the TV show but a dish, technique or ingredient that strikes fear into your very heart. For me the obvious answer was calves foot jelly, a moulded jelly made by boiling calves feet for hours to extract the gelatine. Between the ick factor, the sheer amount of effort involved and the scariness of unmoulding a jelly, I’m sure you can understand why this dish has me shaking in my boots.

Unfortunately (or fortunately?) I seriously underestimated how difficult it would be to find calves feet. Thinking about the recipe again though, I realised that the part that really strikes fear into my heart is setting and unmoulding the jelly, and that can certainly be done without extracting my own gelatine. If however you are really keen to learn about calves feet jelly, the amazing blog The Cook and the Curator has a great video about making it from scratch.

The recipe I decided to use comes from Mrs. Beeton’s The Book of Household Management and is for a Lemon Blancmange. Blancmange is a dish with a very long history, but has become almost unrecognisable over time. It’s a staple of medieval and Victorian cookbooks, whether as a white soup made of shredded chicken and almond milk, or an elaborate jelly set with isinglass.

The Recipe

LEMON BLANCMANGE. 1442.

INGREDIENTS.— 1 quart of milk, the yolks of 4 eggs, 3 oz. of ground rice, 6 oz. of pounded sugar, 1-1/2 oz. of fresh butter, the rind of 1 lemon, the juice of 2, 1/2 oz. of gelatine.

Mode.— Make a custard with the yolks of the eggs and 1/2 pint of the milk, and, when done, put it into a basin: put half the remainder of the milk into a saucepan with the ground rice, fresh butter, lemon-rind, and 3 oz. of the sugar, and let these ingredients boil until the mixture is stiff, stirring them continually; when done, pour it into the bowl where the custard is, mixing both well together. Put the gelatine with the rest of the milk into a saucepan, and let it stand by the side of the fire to dissolve; boil for a minute or two, stir carefully into the basin, adding 3 oz. more of pounded sugar. When cold, stir in the lemon-juice, which should be carefully strained, and pour the mixture into a well-oiled mould, leaving out the lemon-peel, and set the mould in a pan of cold water until wanted for table. Use eggs that have rich-looking yolks; and, should the weather be very warm, rather a larger proportion of gelatine must be allowed.

Time.— Altogether, 1 hour. Average cost, 1s. 6d. Sufficient to fill 2 small moulds. Seasonable at any time.[1]

Lemon Blancmange, recipe from 1861

The Redaction

Mrs Beeton’s Lemon Blancmange

4 cups of milk

4 egg yolks

85g ground rice

170g sugar

43g butter

The rind of 1 lemon, peeled

Juice of 2 lemons

14g powdered gelatine
Note: Every time you go to place milk in the saucepan wet it with water first.

  1. Place 1 cup of milk in a saucepan and bring it to a slow simmer. In a large bowl whisk the 4 egg yolks together. Slowly whisk the hot milk into the egg yolks until it is all incorporated. Place the mixture back into the saucepan and cook on a low heat, stirring constantly until it thickens into a custard*.
  2. Place another 1 1/2 cups of milk into the saucepan with the ground rice, half the sugar, the butter and pieces of lemon rind. Boil for 5-10 minutes or until it is stiff and holds its shape. Stir this mixture into the custard.
  3. Place the remaining 1 1/2 cups of milk into the saucepan. Sprinkle the gelatine over the milk and allow it to dissolve. Turn on a low heat and stir until dissolved before bringing it to the boil for 1 minute. Add this and the remaining sugar to the custard.
  4. Allow the mixture to cool before adding the lemon juice and removing the lemon peel. Pour the mixture into moulds greased with a flavourless oil and leave in the fridge to set. To remove place the mould in very hot water for 30 seconds, but don’t let the blancmange get wet, and just loosen the edge to break the vacuum. Carefully turn the blancmange out onto a plate. If it does not come out of the mould return it to the hot water for another 30 seconds before trying again.

*If the mixture is lumpy with bits of egg just sieve them out.


The Recipe: Lemon Blancmange from The Book of Household Management (available here)

The Date: 1861

How did you make it? See above.

Time to complete?: 45 mins to make it, several hours to set.

How successful was it?: It was delicious! Creamy, firm and not too sweet, it even turned out of the mould well, after a couple of anxious moments. I served it with a simple raspberry coulis of frozen raspberries, water and sugar cooked and mashed together.

How accurate?: I’m not sure what type of gelatine the original recipe would have used (powdered, leaf, liquid?) or how finely ground the rice should be but it seemed to work. I also set it in the fridge rather than in a bowl of cold water because the weather was too warm for that.

[1] Isabella Beeton, ed., Beeton’s Book of Household Management (London: S.O Beeton, 1861), rec. 1442.

Bibliography

Beeton, Isabella, ed. Beeton’s Book of Household Management. London: S.O Beeton, 1861.

Flat Fruit

The next challenge for the Historical Food Fortnightly is “Ethnic Foodways” and given that I’m in France I thought this was a great opportunity to explore the history of some of the local specialities. Well, I have to report mixed results. The modern sources all seem to be quoting each other, and even if you can discover what the original source was, that’s no guarantee that it is an any way accessible (my Latin is non-existent and $300 first edition cookbooks are a little out of my price-range). Nonetheless, I think I have been able to pin down enough to give you a bit of a glimpse into two local specialities (the second is coming soon).

First up, pommes et poires tapées or dehydrated, flattened apples and pears. They might not sound too appetising at this point, but they’re actually not all that different from the dried apple rings you can buy in the supermarket. Drying fruit to preserve it is a time-honoured tradition, going all the way back to prehistory. In France, archaeologists interpret pieces of carbonised fruit dating to the late Iron Age as evidence of dried fruits.[1] Jumping forward a bit but staying surprisingly close geographically, in 1560 the king’s physician Jean Bruyérin-Champier referred to pears and apples which were dried in ovens around Orleans and Tours.[2]

Pommes tapéesBy the beginning of the 18th century, a rather unusual technique had developed with whole fruits (apples, pears and peaches) being dried in the oven for several days, and gently pressed with a wooden implement to flatten them. It is widely believed that fruit dried in this way was a staple for sailors, and that the flattening was to make them more space-efficient on ships. The industry expanded over the next hundred years, and in 1878 the region was exporting some 500,000 kg of dried fruit, but the glory days of  pommes tapées weren’t to last. Refrigeration and cheap imported fresh fruit took their toll and production nearly stopped in the 20th century, only starting up again in the ‘80s.[3]

Michel Albin explains that there are certain features of the ‘traditional’ technique

  1. Plants aren’t watered while growing to give naturally drier fruit.
  2. The wood fire oven is heated for three days and three nights to infuse the bricks with heat.
  3. The temperature is held between 60 and 90˚C for up to four days, being brought back up to temperature as necessary.
  4. The fruits are pressed one by one (sometimes with a platissoire).
  5. The fruit is then returned to the oven for a final drying period.[4]

Pommes tapées


Historical sources, however, show quite a lot of variation in the methods used to dry the fruit. Some fruit is dried whole, some is cored and/or peeled first. Some is blanched before drying, some dipped in a sugar syrup flavoured with their own peel and yet others are sprinkled with sugar. To flatten them you can use a special implement called a platissoire, press them with the palm of your hand, squash them between your fingers or as in the recipe below with a wooden bat.

This recipe is from La nouvelle cuisinière bourgeoise published in 1817:

“Pelez des pommes très-seines, des reinettes ou autres ; avec une spatule creusé, extirpez-en le cœur ; mettez-les ensuite sur des claies, assez distantes les unes des autres, pour qu’elles ne se touchent pas ; mettez vos claies au four ; le lendemain, les pommes sont assez séchées pour que vous puissiez les taper avec une batte de bois ; remettez-les sur les claies ; faites chauffer le four modérément ; puis remettez-y vos pommes jusqu’à lendemain ; recommencez a les taper ; remettez-les de nouveau au four, jusqu’à ce qu’elles aient acquis le degré de sécheresse nécessaire ; puis mettez-les dans des boites, dans un endroit très-sec.”[5]

(Peel unblemished apples, Reinettes or another type. With a hollow spatula (apple-corer) remove the cores; then place them on racks far enough apart so that the apples aren’t touching one another, and place your racks in the oven. The next day, the apples should be dry enough for you to flatten them with a wooden bat, then put them back onto the racks. Bring the oven to a moderate heat and return the apples to the oven overnight, then begin to press them again. Place them in the oven once again until they have reached the right degree of dryness. Then pack them into boxes and store in a very dry place.)

But having spent three days heating your oven and four drying the apples or pears, how are you going to enjoy the fruits of your labour? Well don’t worry because you have between 3 and 10 years to decide, assuming the fruit was well dried. Nowadays the back of the packet recommends eating them as a snack, rehydrating them in liquid (e.g. wine, tea or cider) or incorporating them into your favourite sweet and savoury dishes (think pork roast with apples or a fruity tagine). You can also buy a variety of secondary products: jam, terrines, wine, fruit in wine, brandy or syrup, or pastries with a fruity filling.

Pommes tapées in Mulled Wine


As to how they were enjoyed historically, well that’s where I hit a bit of a brick wall. The one clear reference I found is from 1856 and says to enjoy them as a dessert, cooked in wine and sugar.[6] To be really historically correct, I suppose you would have to stop there. But. Considering that they are now enjoyed in a spiced, wine syrup, generally using spices which have been available in France for centuries, and because it’s coming up to Christmas, I decided to rehydrate the apples that I had bought in what is basically mulled wine.

And if you don’t have a wood-fired brick oven/four days/any desire to make your own? You can order pommes et poires tapées and assorted variations on them here or here. Another option would be to try something similar with dried apple rings, which aren’t as tough and chewy, but would give you a similar experience. This recipe makes a warming, spiced dessert which would be perfect served in crystal glasses on a cold winter’s night.

Pommes tapées in Mulled Wine


1 bottle of red wine, pretty much any type will do but you will have to adjust the sugar to taste

Sugar, probably between 1/4 and 1/2 a cup depending on the wine and how you like it

125g of pommes tapées, about 10 dried apples.

2 cinnamon sticks

3-4 cloves

Half an orange, sliced


  1. Place all the ingredients in a saucepan and bring to a low simmer. Simmer for 30 mins or until the apples have swollen and are soft. Serve hot.

Pommes tapées in Mulled Wine

The Recipe: Extrapolated from a reference in Bulletin de L’instruction Primaire : Journal D’éducation et D’enseignement, (available here)

The Date: 1856

How did you make it? See above.

Time to complete?: 30 mins.

How successful was it?:  Quite chewy, but really very tasty. I think it make a lovely winter dish, and it smells just like Christmas!

How accurate?: Well, I think it’s a combination that is possible, but without an actual recipe it’s very hard to tell.

Links

An English recipe for pommes tapées is available here

A French recipe for wine made from dried pears is available here

And to dry your own pears you could try this recipe (also in French)

[1] Benedicte Pradat, “L’économie Agro-Pastorale Dans Le Loiret À L’âge Du Fer (du Hallstatt Ancien À La Tène Finale) : Synthèse Des Données Carpologiques,” Revue Archéologique Du Centre de La France 49 (2010): 132.

[2] Michel Albin, “Pommes Tapées,” in L’inventoire Du Patrimoine Culinaire de La France, Région Centre – Produits Du Terroir et Recettes Traditionelles (France: Editions Albin Michel, 2012), 227.

[3] Ibid.

[4] Ibid., 228.

[5] Cousin d’avallon, La Nouvelle Cuisinière Bourgeoise, 4th ed. (Paris: Chez Davi et Locard, Pigoreau et Philippe, 1817), 248.

[6] A Y, “Économie Rurale et Domestique: Conservation et Préparation Des Fruits,” Bulletin de L’instruction Primaire : Journal D’éducation et D’enseignement, Aout 1856, sec. Vo. 3, No. 16, 126.

Bibliography

Albin, Michel. “Pommes Tapées.” In L’inventoire Du Patrimoine Culinaire de La France, Région Centre – Produits Du Terroir et Recettes Traditionelles, 226–28. France: Editions Albin Michel, 2012.

Cousin d’avallon. La Nouvelle Cuisiniere Bourgeoise. 4th ed. Paris: Chez Davi et Locard, Pigoreau et Philippe, 1817.

Pradat, Benedicte. “L’économie Agro-Pastorale Dans Le Loiret À L’âge Du Fer (du Hallstatt Ancien À La Tène Finale) : Synthèse Des Données Carpologiques.” Revue Archéologique Du Centre de La France 49 (2010): 103–61.

Y, A. “Economie Rurale et Domestique: Conservation et Préparation Des Fruits.” Bulletin de L’instruction Primaire : Journal D’education et D’enseignement, Aout 1856, sec. Vo. 3, No. 16.

css.php