An anti-miserabilist approach to historical cooking

Tag: Baking (page 2 of 3)

Tarte Owt of Lente


Tarte Owt of Lente, 15th century pie recipe from Turnspit & Table

I know that a lot of the HFF bloggers are doing the Future Learn course ‘A History of Royal Food and Feasting’ and seem to be really enjoying it. The basic premise is that each week covers a different monarch and a different Historic Royal Palace, with a loose focus on a particular event; last week that event was Edward VI’s christening at Hampton Court Palace. They then offer a few redacted recipes which you are invited to try out.


I thought it was a bit disappointing that they chose to focus on an event for which there is very little evidence of the food served, and that they then chose three recipes which were totally unrelated. Why not give a recipe for the spiced wafers that they know were served on the day?


The three recipes that they did give were Tarte Owt of Lente, Fylettys en Galentyne and Ryschewys Close and Fryez. You can watch videos of these recipes being made in the Hampton Court Kitchens, and get redacted recipes on the website.


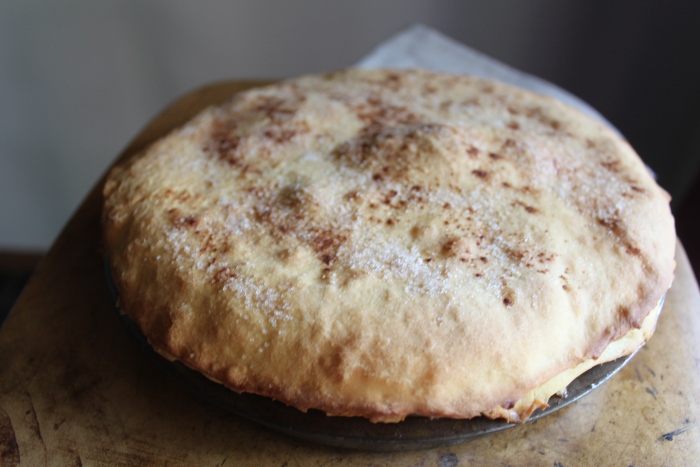
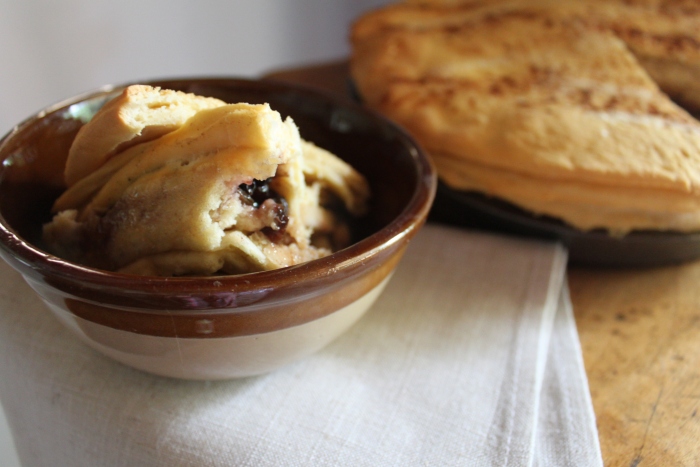
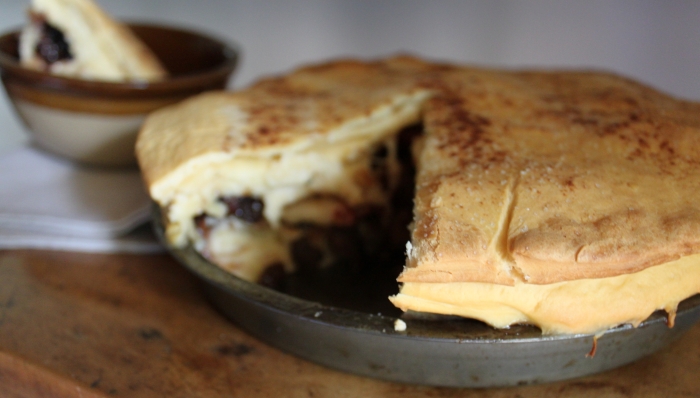
Since its Pie week for the HFF I decided to kill two birds with one stone by making Tarte Owt of Lente. The name tells us that it is a recipe for a pie which is inappropriate for Lent; it’s full of cream and eggs and cheese and so can only be eaten ‘out of Lent’. The original recipe comes from Gentyllmanly Cookere c. 1500:

“Take neshe chese and pare hit and grynd hit yn A morter and breke egges and do ther to and then put yn buttur and creme and mell all well to gethur put not to moche butter ther yn if the chese be fatte make A coffyn of dowe and close hit a bove with dowe and collor hit a bove with the yolkes of eggs and bake hit well and serue hit furth.”[1]

Tarte Owt of Lente, 15th century pie recipe from Turnspit & Table 

The first thing to decide in this recipe is what type of cheese to use. In the Hampton Court video and redaction they suggest Cheshire cheese, but the first step is to ‘take neshe chese’ or ‘take soft cheese’ which to me suggests a fresh cheese. In the comments to the recipe they actually mention this, saying that it is probably referring to a curd cheese like ricotta or cottage cheese. And yet, the next instruction is to ‘pare hit’ or ‘pare it’. That suggests removing a rind, or at least cutting the cheese up small. So, is it a soft, fresh cheese or a harder cheese with a rind? The jury is out, but either seems to work well.


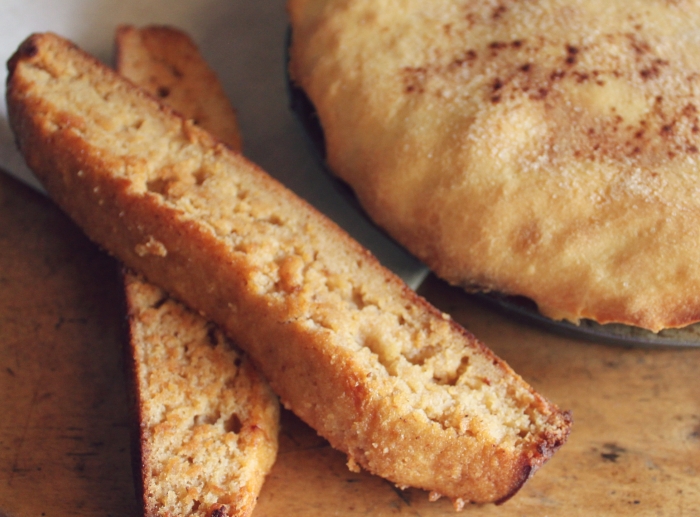
I decided to go with ricotta, and that meant that I had to change the proportions of other ingredients quite a bit so that the mixture wasn’t too liquid. The first tart I made, I kept quite close to the suggested redaction with 100g ricotta, 1 egg, 60 ml cream, 30g butter and seasoning, but when I put it in the oven I found that it burst it’s base. I’m still giving the amounts though, because it tasted very good and was my housemate’s favourite version. The trick, I think, would be to use a hot water pastry instead of a shortcrust pastry. There’s a recipe for hot water pastry in my post about chewets.


My second try worked a lot better because I increased the proportion of ricotta and reduced the liquids. I was a bit worried that the mixture would be too bland so I also added some grated parmesan to this version. That was very tasty, but is totally optional.

Tarte Owt of Lente, 15th century pie recipe from Turnspit & Table

The Recipe

A Tarte Owt of Lente

For the pastry:

110g flour

Pinch of salt

50g butter, cold and cut into 1cm cubes

Cold water


For the filling:

140g ricotta

15g butter

1 egg

1 tbsp cream

30g grated parmesan (optional)

Salt and pepper


1 beaten egg


  1. To make the pastry place the flour in a mixing bowl and stir in the salt. Add the butter and rub it into the flour with your fingertips until it resembles breadcrumbs. Add cold water, a tablespoon at a time, until the mixture comes together as a firm dough. Be careful not to overwork it. Cover in clingfilm and refrigerate while you make your filling.
  2. Cream together the butter and the ricotta in a bowl. Add remaining ingredients and mix well. Preheat the oven to 220°C.
  3. You can see a video of this method of shaping the pastry here. Remove the pastry from the fridge and separate about 2/3 of the pastry to make the base. Roll it out until about 3/4cm thick and use a plate or bowl as a template to cut out a circle. Working about 1.5cm from the edge, place your left thumb on the pastry and use your thumb and index finger on your right hand to push the pastry up against your thumb, and to pinch it into a ridge. Work your way around the pastry to make a self-supporting pastry base. Roll out the other 1/3 of the pastry to make a lid. Place the base on the pastry and cut around it to get the right size.
  4. Place your pastry base on a baking tray and pour in the filling. Brush a little beaten egg around the rim of the pastry and put the lid on top, pinching the edges to seal. Make a little hole in the top of the pie, and brush the top with beaten egg.
  5. Bake the pie for 40 minutes, or until golden brown.


The Round-Up

The Recipe: A Tarte Owt of Lente (available here).

The Date: late 15th century

How did you make it? See above.

Time to complete?: 1.5 hrs.

How successful was it?: It was good hot or cold, although as I said the first filling didn’t quite manage to stay in its pastry case. I was kind of surprised that it set so well, but I did like the addition of a bit of parmesan just to add some extra saltiness.

How accurate?: The big question is what type of cheese to use, and I still don’t have a strong feeling either way. I suppose the other option would be to use something like a brie or camembert which is both soft and can be pared. That might be worth a try.


[1] James L. Matterer, “Gentyll Manly Cokere. Culinary Recipes from MS Pepys 1047.,” Gode Cookery, 2009, http://www.godecookery.com/pepys/pepys.htm.

Tarte Owt of Lente, 15th century pie recipe from Turnspit & Table

Mastabas, Pyramids and Gumdrops: Cocoa-nut Cakes from Gaskell’s North and South

IMG_3965

My blog has been sadly neglected over the past few months; my thesis, a family wedding, an unexpected trip overseas and just normal life craziness has been getting in the way. I’m afraid that it probably isn’t going to get much better this year, but as an apology here is my entry for the HFF Literary Foods challenge (which was only due a week ago).


One of my favourite books is North and South by Elizabeth Gaskell. I like to describe it as Jane Austen with a social conscience; although it is ultimately a romance, the novel is bound up in concerns about class, industrialisation and poverty. Like many other Victorian novels (and indeed earlier English novels), food often isn’t discussed explicitly because it is not in good taste to talk about food too much in public [1]. That being said, there is a lot of food in North and South and the food, or lack thereof is a major device within the novel[2].


Luckily for me, there is one scene in particular which mentions an actual dish and it just happens to be one of my favourite sections of the novel in which Mr Thornton, mill-owner and love interest, comes to the Hales’ for tea.

“Behind the door was another table decked out for tea, with a white table-cloth, on which flourished the cocoa-nut cakes, and a basket piled with oranges and ruddy American apples, heaped on leaves.”[3]

IMG_3982.JPG

The Recipe

The cocoa-nut cakes which Dixon, the cook and special confidante of Mrs Hale, has made were made from eggs, sugar and grated coconut. Koivuvaara believes that these were made from eggs, sugar and grated coconut[4]. This lines up with the recipe provided in Mrs Beeton’s Book of Household Management. It is also similar to that provided in Miss Leslie’s book, Seventy-five Receipts For Pastry, Cakes and Sweetmeats (1828) which also contains spices. However, other recipes call only for egg whites e.g. Jennie June’s American Cookery Book (1870), Creole Cuisine (c. 1885) and Eliza Acton’s recipe for ‘Very Fine Cocoa-nut Macaroons’ in Modern Cookery for Private Families (1868). Robert Wells provides quite a different recipe in The Bread and Biscuit Baker’s and Sugar-Boiler’s Assistant (1890) including flour, chemical leaveners, butter and milk. I chose Mrs Beeton’s recipe, but perhaps it would have been more successful if only the egg whites had been used.


IMG_3968

Mrs Beeton’s recipe is as follows:


COCOA-NUT BISCUITS OR CAKES.

  1. INGREDIENTS.—10 oz. of sifted sugar, 3 eggs, 6 oz. of grated cocoa-nut.

Mode.—Whisk the eggs until they are very light; add the sugar gradually; then stir in the cocoa-nut. Roll a tablespoonful of the paste at a time in your hands in the form of a pyramid; place the pyramids on paper, put the paper on tins, and bake the biscuits in rather a cool oven until they are just coloured a light brown.

Time.—About 1/4 hour. Seasonable at any time.[5]

However, I’m sure that Dixon did a much better job than the melted, collapsing pyramids that I managed. My only solace is that I don’t seem to be alone in having difficulty with this recipe. SJ Alexander over at The Queen’s Scullery had a go at the same recipe a few years ago, and said “Shaping the coconut was not even remotely possible, and the eggs migrated out of the coconut haystacks to form custardy pools around the macaroons’s ankles, which turned crispy in the oven. When they came out, they tasted delicious, but fell apart the minute I tried to move them off their tray. The funny thing was that the recipe did not differ greatly from modern coconut macaroon recipes–I’m not sure what went wrong, exactly. Shelling and preparing fresh coconut was a fun experience, and it was noticeably different from preshredded coconut from the store.”[6]


Mine seemed to hold up a bit better than hers, and I think that’s because I used store-bought desiccated coconut. Desiccated coconut was first produced in 1880 in Sri Lanka, before then it had to be produced at home.[7] Eliza Acton describes how it’s done:

“Rasp a fresh cocoa-nut, spread it on a dish or tin and let it dry gradually for a couple of days, if it can be done conveniently …”[8] Whilst making your own desiccated coconut would certainly be an interesting thing to try, it wasn’t something I had time to do, and other than perhaps giving some insight into the coarseness of the coconut required, I’m not sure that it would make all that much difference.

IMG_3973

The first batch which melted into one big mass

Using the quantities given, I could roughly shape the mixture, but they were more mastaba than pyramid. What I found was that with a bit of extra coconut, I could shape the mixture into pyramids, but when my first batch went into the oven (at 150ºC), they slumped joined together. I had better luck with the last couple, to which I added even more coconut and cooked at a higher temperature (180ºC). This batch also had far fewer on the tray, and so they had room to spread out without touching each other. I’m still not sure though that they are quite the shape that Mrs Beeton was suggesting. They went into the oven as pyramids, and came out as large gumdrops.


[1] McWilliams, “‘A Vulgar Care’: Talking about Food in Eighteenth-Century Anglo-American Novels”; Moss, Spilling the Beans.

[2] see Koivuvaara, “Hunger, Consumption, and Identity in Elizabeth Gaskell’s Novels.”

[3] Gaskell, North and South, 90.

[4] Koivuvaara, “Hunger, Consumption, and Identity in Elizabeth Gaskell’s Novels,” 136.

[5] Recipe 1740 Beeton, Beeton’s Book of Household Management.

[6] Alexander, “Doing Bad Things to Innocent Cucumbers.”

[7] Santich, Bold Palates: Australia’s Gastronomic Heritage, 201.

[8] Acton, Modern Cookery, for Private Families, 545.

IMG_3979.JPG

The second batch, they held together but I’m still not sure they could really be called pyramids. 

The Redaction

Cocoa-nut Cakes

290g sugar

2 large eggs

170g desiccated coconut, plus enough to make into a mouldable paste (about 5 tbsp more)


  1. Preheat the oven to 180ºC. Line a baking tray with baking paper.
  2. Whisk the eggs until pale and frothy. Gradually whisk in the sugar to make a thick, silky batter. Stir in the coconut. Try to shape a dessert-spoonful into a pyramid. If the mixture is too soft, add more coconut, until they will hold the shape nicely.
  3. Place the pyramids on the baking tray, leaving lots of room between them. Bake for 10 minutes or until lightly golden.

The Round-Up

The Recipe: Cocoa-nut Biscuits or Cakes from Mrs Beeton’s Book of Household Management  (available at http://www.gutenberg.org/cache/epub/10136/pg10136-images.html).

The Date: 1861

How did you make it? See above.

Time to complete?: 30 mins.

How successful was it?: The first batch melted into one shapeless mass, and while they tasted great (like coconut ice but crunchier) the fell apart when you lifted them. The second batch held their shape much better, thanks to extra coconut and you could even lift them up.

How accurate?: I wonder if including the egg yolk was a mistake, because a lot of the other recipes just use the egg white beaten to stiff peaks. I think that would help hold the shape better. I didn’t grate and dry my own coconut, but I do think that the coconut should be dried and not used fresh. At the same time, I don’t know exactly what texture of coconut should be used, mine was quite fine and maybe it should have been coarser.

IMG_3976.JPG

Bibliography

Acton, Eliza. Modern Cookery, for Private Families: Reduced to a System of Easy Practice, in a Series of Carefully Tested Receipts, in Which the Principles of Baron Liebig and Other Eminent Writers Have Been as Much as Possible Applied and Explained. London: Longman, Green, Reader, and Dyer, 1868.

Alexander, SJ. “Doing Bad Things to Innocent Cucumbers.” The Queen’s Scullery, January 28, 2010. http://thequeenscullery.com/2010/01/28/doing-bad-things-to-innocent-cucumbers/.

Beeton, Isabella, ed. Mrs Beeton’s Book of Household Management. London: S.O Beeton, 1861.

Cunningham Croly, Jane. Jennie June’s American Cookery Book. New York: The American News Co., 1870.

Gaskell, Elizabeth. North and South. London: Penguin Books, 1994.

Hearn, Lafcadio. La Cuisine Creole: A Collection of Culinary Recipes, from Leading Chefs and Noted Creole Housewives, Who Have Made New Orleans Famous for Its Cuisine. New Orleans: F.F. Hansell & Bro. Ltd., 1885.

Koivuvaara, Pirjo. “Hunger, Consumption, and Identity in Elizabeth Gaskell’s Novels.” University of Tampere, 2012. http://tampub.uta.fi/bitstream/handle/10024/66893/978-951-44-8780-4.pdf.

Leslie, Eliza. Seventy-Five Receipts for Pastry, Cakes, and Sweetmeats. Boston: Munroe and Francis, 1828.

McWilliams, Mark. “‘A Vulgar Care’: Talking about Food in Eighteenth-Century Anglo-American Novels.” In Food and Language: Proceedings of the Oxford Symposium on Food and Cooking 2009, edited by Richard Hosking, 227–36. Great Britain: Prospect Books, 2010.

Moss, Sarah. Spilling the Beans: Eating, Cooking, Reading and Writing in British Women’s Fiction. Oxford University Press, 2013.

Santich, Barbara. Bold Palates: Australia’s Gastronomic Heritage. South Australia: Wakefield Press, 2012.

Wells, Richard. The Bread and Biscuit Baker’s and Sugar-Boiler’s Assistant. London: Crosby Lockwood and Son, 1890.


Playing History Detective, Early Modern Style


IMG_4138

If you have ever looked at historical food boards on Pinterest (and since you are reading this I would guess that you probably have) then you’ve probably seen Chelsea Monroe-Cassel’s Medieval Peach Crostata. Published on her Game of Thrones food blog Inn at the Crossroads, this dessert looks like a cross between a sweet pizza and a strudel. How could I resist making that?

That being said, I went back to Bartolomeo Scappi’s instructions and my interpretation of the final product is quite different. Scappi was a papal chef, writing in the 1560s, and his cookbook was published in 1570. Although Scappi is better than many of hist contemporaries at providing quantities and instructions, the recipes are still very hard to follow.

Scappi

Frontispiece from The Opera of Bartolomeo Scappi, [public domain], via Wikimedia Commons. 

You’re not only dealing with a translation, but you have to keep swapping between recipes to find the other instructions that you need (which is of course why this is my entry for the HFF History Detective challenge). I used four recipes in total, but there were a number of options to choose from for how to make the mostaccioli and how to do the twists. Basically, there’s no one right way to make this.

Please note that, like the Metternich cake, this recipe is not for the faint of heart. The crostata is made of up three sheets of pastry as the base, a pastry twist filled with dried fruit cooked in wine and spices which makes the side of the tart, then there are several layers of filling and then three more layers of pastry for the top. It contains copious amounts of butter and sugar, and took more than three hours of continuous work. You have been warned!

“63. To prepare a peach, apricot or plum crostata

Get a peach that is not too ripe; if it is hard it will do quite a bit better than if not. Peel it and cut it into slices. Have a tourte pan ready, lined with its three sheets of dough and its twist around it, greased with butter or rendered fat, and sprinkled with pepper, cloves, cinnamon, nutmeg and sugar, and with raisins and crumbled Neapolitan mostaccioli. On all that set out the peach slices and on top of them put the same ingredients as are under them. Cover the pan over with three thin sheets of dough, with rendered fat or butter brushed between each; sprinkle that with sugar and cinnamon. Bake it in an oven or braise it; it does not take too much cooking because it would disintegrate into a broth. Serve it hot, dressed with sugar and rosewater.

With those ingredients you can also add in provatura or grated cheese.”[1]


The first step is to make the mostaccioli, which are a kind of biscotti. The recipe that I chose was made from bread which is toasted and then ground into flour. The breadcrumb flour is mixed with flour, sugar, eggs, yeast, rosewater and anise to make a thick batter and left to rest. You then add more eggs and some salt and allow it to rest again. The mixture is then poured into a pan, baked, sliced into rectangles and baked again. Next time I would leave the biscuits to cook longer both times, and I would probably slice them more thinly too because they were a bit too gummy to really crumble.

Mostaccioli


“237. To prepare dainty biscuit morsels. (Morseletti or mostaccioli)

Get two pounds of white breadcrumb and bake it a second time. Grind it in a mortar and put it through a sieve so it becomes like flour. For every pound of that sieved substance, add as much again of fine flour, two and a half pounds of finely sieved sugar and four ounces of leaven ground in a mortar and moistened with fifteen fresh eggs; then everything should be mixed together with three-quarters of an ounce of raw anise ground into powder and four ounces of rosewater. When everything is thoroughly mixed and beaten together so that it looks like fritter batter, let it sit for two hours in a warm place. Beat it again, adding in four more eggs and an ounce of salt; then let it sit for another hour. Then have a buttered tourte pan and put the filling into it so it is a finger’s width in depth. Put that into an oven that is not too hot. Leave it there until it is dry. Remove it and with a sharp knife cut it into little long rectangles, as wide or narrow as you like. Just as soon as they have been cut up, put them immediately into marzipan tourte pans, set out apart with paper under them, and put them back into the oven with a very moderate heat. Leave them there for half an hour, turning them several times until they have firmed up. In order to keep them white, keep them covered with rag paper.”[2]

IMG_4188

So far so good, but this is where it gets a bit complicated. The recipe tells us that we need a tourte pan lined with three sheets of dough and a twist, but not how to do this. For detailed instructions we need to go to an earlier recipe for a crostata of cow’s udder.


“49. To prepare various sorts of crostate which Neapolitans call coppi and Lumbards napoleons, beginning with a cow’s udder.

When the udder has been boiled in salted water, so that it is thoroughly cooked, take it out and let it cool. Cut it into very thin slices. With that put the same amount of boiled, desalted sowbelly and slices of fresh provatura. Have a tourte pan ready, greased with rendered fat or butter, with a rather thick sheet of dough made with fine flour, rosewater, egg yolks, butter and salt. On that sheet of dough put two other thin ones greased with rendered fat or butter, and sprinkle them with sugar. Make the twist of flaky pastry all around and not very big. On the last sheet of dough set a layer of slices of provatura sprinkled with sugar, cinnamon and raisins, and beaten mint and marjoram; on that layer put little lumps of butter and some of the udder slices and of the sowbelly; continue doing the same up to three layers, covering the last with another sheet of somewhat thinner dough. On that sheet put some strips of flaky pastry, slitting the twist all around with the tip of a hot knife. Carefully, with a greased hand, put waves into the flaky pastry or else cut it into lacework with a knife. Put it into an oven and bake it, making sure to grease the flaky pastry with rendered fat or melted butter so it will puff up better. When it is done serve it hot…”[3]


This explains that the dough is made from flour, rosewater, egg yolks, butter and salt but gives no quantities. For that, we need to turn to another recipe again. The instructions for making a filled twist give the quantities: two pounds of flour, six egg yolks, two ounces of rosewater, an ounce of leaven moistened with warm water, four ounces butter and enough salt. Even though I didn’t knead the dough for the full half an hour I was amazed at how well this dough worked. It was smooth, silky and could be rolled out very thinly.


“122. To prepare a filled twist.

Make a dough of two pounds of fine flour with six fresh egg yolks, two ounces of rosewater, an ounce of leaven moistened with warm water, four ounces of either fresh butter or rendered fat that does not smell bad, and enough salt. That dough should be kneaded well for half an hour. Make a thin sheet of it, greasing it with either melted butter that is not too hot or with rendered fat. With the pastry wheel cut the edges one after the other, which are always thicker than the rest. Sprinkle the dough with four ounces of sugar and an ounce of cinnamon. Then get a pound of currants that have been brought to a boil in wine, a pound of dates cooked in that wine and cut up small, and a pound of seeded muscatel raisins that have been brought to a boil in wine; combine all those ingredients and mix them with sugar, cinnamon, cloves and nutmeg. Spread that mixture out over the sheet of dough along with a few little gobs of butter. Beginning at the long edge of the dough, roll it up like a wafer cornet, being careful not to break the dough. A twist like that only needs three rolls so it can cook well; it should not be too tight. Grease its surface with melted butter that is not too hot. Begin at one end to roll it up, not too tightly, so it becomes like a snail shell or a maze. Have a tourte pan on hand lined with a rather thick sheet of the same dough greased with melted butter and gently put the twist on it without pushing it down. Bake it in an oven or braise it with a moderate heat, not forgetting to grease it occasionally with melted butter. When it is almost done, sprinkle sugar and rosewater over it. Serve it hot. The tourte pan in which the twists are baked has to be ample and with low sides.”[4]


To line the tourte pan (I used a shallow, Victoria sponge cake tin) you place three circles of dough (the bottom one should be slightly thicker) in the base, brushing each with melted butter. The way that I read the recipe, these circles are the same size as the base of the pan, they do not come up the sides of the pan as in a modern pie recipe. The sides are formed with a twist. The twist is made by rolling out a long, thin sheet of the same dough and rolling this up around a filling of dried fruit cooked in wine and spices. This twist is laid around the edge of the tin and forms the sides of the crostata.


With the base now in place, the filling comes next. The base is sprinkled with spices, dried fruit, sugar and the crumbled mostaccioli from earlier. This is followed by a layer of sliced peaches and topped with more spices, sugar, fruit and biscuits. This is then topped with another three layers of pastry and then cooked in a moderate oven.


Crostata

The Redactions

Mostaccioli


180g bread, cut into slices and with the crusts removed

100g flour

250g sugar

5 eggs

7g of dried yeast (fresh yeast, ale barm or sourdough starter would be even better)

25ml rosewater

(anise if desired)

Salt


  1. Heat the oven to 150˚C. Place the bread slices on baking trays and toast lightly in the oven until golden and very dry, but be careful not to burn them.
  2. Crumble the toasted bread with your fingers, then take small amounts and grind it to a powder in a mortar and pestle. Sieve this powder to remove any bigger pieces and weigh the amount that you have. The quantities given in this recipe are for 100g of breadcrumb flour.
  3. Take the flour and mix it with 250g of sugar, 4 eggs and the yeast. Beat to combine, then add the anise and the rosewater. Leave to rest for two hours in a warm place.
  4. Beat the last egg and some salt into the mixture. Let rest for another hour.
  5. Pre-heat the oven to 150˚C and grease a square cake tin or a slice tin. Pour the mixture into the tin, it should be about 1 cm deep, and bake in the oven for about 30 mins, or until a skewer comes out clean.
  6. Allow the cake to cool slightly, then remove from the tin. Slice the cake into rectangles and lay them on their sides on a baking tray lined with baking paper. Return the biscuits to the oven for another 40 minutes or until hard and dry. When done, allow to cool completely.


Peach Crostata

Dough:

450g flour

Pinch of salt

56g cold butter, cut into cubes

3 egg yolks

30ml rosewater

7g dried yeast, dissolved in 15 ml of warm water


Filling:

Sugar

A handful of raisins

Ground pepper, cloves, cinnamon and nutmeg

4 mostaccioli, crumbled

1 hard peach, sliced


Filling for the twist:

55g sugar

225g currants, raisins and/or chopped dates

1/4 cup red wine

Ground cinnamon, cloves and nutmeg to taste


Melted butter, to grease


  1. To make the dough place the flour and some salt in a large mixing bowl. Rub in the butter with your fingertips until it is the consistency of breadcrumbs. Add the egg yolks, rosewater and the yeast. If it seems to dry add a little more water. Bring together and knead for at least 10 mins (or you can go for the full 30 mins if you are using a stand mixer with a dough hook).
  2. To make the filling for the twist, place the dried fruit, red wine, 1 tsp of sugar and spices to taste in a small saucepan and bring to a simmer. Allow to cook for 5-10 mins or until plump and slightly softened. Drain the fruit from the juice and allow to cool.
  3. For the base of the crostata take 1/3 of the dough. Break this into three parts, with one slightly larger than the other two. Begin with the larger piece and roll it out to the size of the base of your tourte pan. Use the base of the pan to cut out the circle of dough. Place the circle in the base of the greased pan, and brush the dough with melted butter. Repeat this twice more with the other two pieces of dough (they should be slighlty thinner than the first layer).
  4. For the twist, measure the circumference of your tourte pan. Take half the remaining dough and roll it out very thinly into a rectangle that is the same length as the circumference of your pan, and about 6 cm wide. Brush the dough with melted butter and sprinkle with the remaining sugar and some ground cinnamon.
  5. Spread the fruit mixture over the rectangle of dough, leaving 1 cm of space at the edges. Starting at one of the long sides, gently roll up the dough. It should not be too tight, and be careful that the dough doesn’t tear. Place the rolled up twist around the outside edge of your tourte pan, pinching the short ends together to form one continuous ring.
  1. Brush the twist and the base with melted butter. Sprinkle on some sugar, raisins, spices and 2 mostaccioli. On top of this layer place the sliced peach, then top with more sugar, raisins, spices and the remaining crumbled biscuits.
  2. Preheat the oven to 180˚C. Take the last 1/3 of the dough and break it into three equal pieces. Roll the first one out thinly until it will cover the crostata. Place over the top of the filling and run a knife around the edge of the pan to remove the scraps. Brush with butter and repeat twice more with the other two balls of dough. Brush the final layer with butter and sprinkle with sugar and cinnamon.
  3. Place the crostata in the oven and cook until the pastry is golden. Do not leave it too long of the juice from the peaches will dissolve the pastry. Serve hot.

IMG_4139

The Round-Up

The Recipe: To prepare a peach, apricot or plum crostata, from The Opera of Bartolomeo Scappi

The Date: 1570

How did you make it? See above.

Time to complete?: 3 hours + time for making the mostaccioli

How successful was it?: It had a nice combination of flavours, but was a bit on the heavy side. I think that is to be expected with so many layers of a yeasted pastry, but overall I was quite happy with the way that the pastry performed. I didn’t really expect it to work! The peaches have a tendency to make the bottom rather soggy, so it’s best to use fruit that isn’t too ripe.

How accurate?: I think that it is probably closer to the original recipe than some other versions, but the recipes are so ambiguous about the way in which the twist is formed in particular that it’s hard to know what they mean.


[1] Scappi, The Opera of Bartolomeo Scappi (1570), 466.

[2] Ibid., 533–534.

[3] Ibid., 459–460.

[4] Ibid., 488–489.


Bibliography

Scappi, Bartolomeo. The Opera of Bartolomeo Scappi (1570). Edited by Luigi Ballerini and Massimo Ciavolella. Translated by Terence Scully. Toronto: University of Toronto Press, 2008.

Metternich Cake, or Gateau à la Metternich


The Culinary Vices challenge had me stumped for a while. How do I create something excessive and luxurious on a budget, without spending days laminating pastry or buying yet more cake moulds? Then, while watching the third episode of Victorian Bakers, an excellent show which everyone should watch, inspiration struck. In the show you see the bakers at the turn of the 20th century struggling to diversify in the face of factory made bread, and one of the things they begin to make is cake.


I turned to a recent acquisition, Mrs A.B. Marshall’s Cookery Book (c. 1890s), where I found the Metternich Cake. With alternating layers of two different types of cake on a biscuit base all sandwiched together with a rich, chocolate buttercream, covered in noyeau-flavoured glace icing and decorated with two types of buttercream, this cake seemed to tick all of the boxes. It was excessive, yes, but I already had all the ingredients and equipment that I would need.

Agnes_B_Marshall

Print of Agnes Marshall (1855-1905), author unknown, [Public Domain], via Wikimedia Commons

The Recipe

“Take four whole raw eggs, six ounces of castor sugar, a pinch of cinnamon, and the very finely chopped peel of a lemon; whip these all together in a stewpan over boiling water till the mixture is just warm; then remove and whip until cold and thick, and mix into it four ounces of fine warm flour that has been passed through a sieve, and one eighth ounce of Marshall’s baking power. Butter a square fleur mould, place it on a baking tin, and put a double layer of buttered paper on the bottom inside the mould; then pour in the mixture, and bake in a moderate oven for one hour. The cake should be a very pale fawn colour when cooked.
Prepare a similar quantity of the above mixture, but in addition add about a saltspoonful of Marshall’s cherry red or carmine and a few drops of essence of vanilla, and finish as for the first mixture.
When both mixtures are cold cut them in slices and arrange them together in alternate layers, placing between each slice a layer of Vienna chocolate icing that is mixed with a wineglass of Silver Rays (white) rum; when they have reached the required height mask over with maraschino glace and then dish on a cake bottom. Garnish the cake as in the engraving with Vienna chocolate icing and rose Vienna icing, and serve. This would be nice to serve for a dinner sweet when ice cream or fruits may be served with it.”[1]

IMG_5782

Little did I know the anxiety which this cake would lead to. The first step is to make the two types of Genoise sponge; I would probably cook them slightly less next time because they were a little dry, and I would chill the cakes before icing. Next up is the cake bottom.

“Cake Bottom – Rub two ounces of butter into half a pound of flour till smooth, then add two ounces of castor sugar and one egg, and mix with cold water into a very stiff paste; roll out, cut in a square shape, and bake in a moderate oven for about half an hour, then put to press, trim and use. When these are used for savoury turbans the sugar should be left out.”[2]

Once the cakes are cooled I cut them into quarters and stacked the layers alternately. However, on re-reading the recipe I’m wondering if the instruction was actually to slice the cakes in layers vertically and to alternate those layers. You use the Vienna chocolate icing, a delicious chocolate and rum buttercream, to sandwich the layers together, and to attach the cake to the biscuit base.

“Vienna Chocolate Icing – To three quarters of a pound of icing sugar add half a pound of fresh butter, a quarter of a pound of finely powdered chocolate, a little of Marshall’s coffee brown, and about half a wineglass of brandy or liqueur. Mix all together with a wooden spoon for about fifteen minutes, when it will present a creamy appearance, and is ready for use.”[3]

Once the cakes are assembled, making absolutely certain that they are straight, it’s time to ‘mask’ the cake in glace icing. Before I begin, let me just say that there is a reason that glace icing is basically only used on cookies and cupcakes. It is a nightmare to work with! Following the recipe exactly created a thick paste that was impossible to use so I used more water and noyeau to get a smooth, spreadable icing.

“Maraschino Glace – Put into a stewpan three quarters of a pound of icing sugar, and one and a half tablespoonfuls of water, then mix in three tablespoonfuls of maraschino, stir over the fire till just warm, then use. Noyeau, or any other liqueur, can be used similarly.”[4]

Getting the cake iced was the worst part of the recipe, and not something I would be keen to do again. I actually iced the first cake and was so unhappy with it that I started again with the second cake. One of the problems was the texture of the cake, I kept getting crumbs in the icing even though I had brushed the sides with a simple syrup before beginning (this isn’t called for in the recipe, but I don’t know how you could get away without using jam or syrup first). The icing was also setting so quickly that I could hardly get it onto the cake, and once it was on it would break off in chunks.

“Vienna Icing – Ten ounces of icing sugar and a quarter of a pound of butter worked till smooth with a wooden spoon; mix with one small wineglass of mixed Silver Rays (white) rum and marashino, work it till like cream, then use. This may be flavoured and coloured according to taste.”[5]

Eventually I got the whole thing covered, although it was a far cry from smooth, let alone perfect. Luckily, some of the imperfections are covered by the piped Viennese icing, some in chocolate and some in rose (I took this to mean rose-coloured, but it could also be flavoured with a little rosewater).


IMG_5773

The Redaction

Metternich Cake

Makes 2 cakes


For each cake:

4 eggs

175g caster sugar

A pinch of cinnamon

Peel of a lemon

120g flour, warmed for 5 minutes in a very cool oven

3.5 g baking powder

For the second cake:

4 drops vanilla essence

1/2 tsp red food colouring

For the cake bottom:

60 g butter

230 g flour

65 g caster sugar

1 egg

About 2 tsp ice water

For the Vienna chocolate icing:

170 g icing sugar, sieved

115 g butter, softened

60 g cocoa powder

2 tbsp white rum

A few drops of coffee brown food colouring (optional – listed in the recipe but the icing is already so brown that it doesn’t really seem necessary)

For the glace icing:

340 g icing sugar

3 tbsp maraschino or noyeau

Water

For the Vienna rose icing:

140g icing sugar, plus extra

115g butter, softened

2 drops red food colouring

1 tsp rose-water (optional)

1 tbsp white rum

1 tbsp noyeau or maraschino

For assembly:

Simple syrup or warmed apricot jam


  1. Preheat the oven to 150˚C. Butter and line the base of two square, 8 inch cake tins. For each cake whisk the eggs, sugar and flavourings (and the food colouring for the second cake) in a heat proof bowl. Place this bowl over a small saucepan of simmering water and continue to whisk until the mixture is just warm to the touch. Remove from the saucepan and continue to whisk until the mixture thickens and is room temperature.


  1. Sift the flour and baking powder onto the egg mixture and carefully fold it in, trying not to lose too much of the volume that has been created by the whisking. Pour each mixture into a prepared tin. Place both tins in the oven and bake for 50-60 mins, or until dry and slightly springy to the touch.


  1. Remove the cakes from the oven when done, but leave the oven on, and allow to cool slightly before loosening the edges with a palette knife and turning them onto wire racks to cool.


  1. For the cake bottom, rub the butter into the flour. Mix in the sugar and the egg. Add the ice water a little at a time until the dough just comes together. Place a layer of baking paper on a baking sheet and dust with a little flour. Roll the dough out in a square shape directly onto the baking paper until it is about 1/2 cm thick. Bake in the oven for 30 mins.


  1. Once the cakes and the cake bottom have cooled, use a serrated knife to carefully cut each cake into quarters (or into layers, see comment above). Stack the cakes and trim to make sure that they are identical in size, otherwise you will have a lopsided cake. Use one of the squares to cut two cake bottoms of the same size.


  1. Make the Vienna chocolate icing by beating together the butter and the icing sugar until well combined. Add the cocoa powder and beat until it is all incorporated, then slowly mix in the rum.


  1. Use a palette knife to spread a small amount of Vienna chocolate icing on a cake bottom and then carefully press your first piece of cake onto the cake bottom. Continue to add 3 more pieces of cake, alternating between the plain and the pink cake, and using the Vienna chocolate icing to glue the layers together. At this point you should have two cakes, each with a cake bottom and 4 layers of cake, 2 pink and 2 white. Brush the cakes all over with simple syrup, or with slightly warmed apricot jam. Place the cakes in the fridge for 20 minutes or so, to firm up the cake.


  1. While the cakes are chilling make the glace icing. Place the icing sugar and maraschino or noyeau in a small saucepan over a low heat. Add water, a teaspoon at a time, until you have a smooth and thick but pourable icing. When the cakes are ready to ice, keep the icing on a low heat and bring one cake at a time to the icing. Spoon some icing over the top of the cake to make a smooth top, then use a palette knife to apply icing to the sides. Let the icing set.


  1. To make the rose icing, beat together the butter and icing sugar. Add the colouring, the rum and liqueur, and the rose-water if desired. Mix well. You may need to add more icing sugar to get the icing to a piping consistency. Fill one piping bag with a large star tube with the rose icing, and another with the remaining chocolate icing. Use the rose icing to pipe a shell border around the top and bottom of the cake. Use the two types of icing to pipe small stars and C-shapes onto the cake, following the engraving for inspiration.

IMG_5739

The Round-Up

The Recipe: Metternich Cake from Mrs A.B. Marshall’s Cookery Book

The Date: There’s no date given in the book but this edition was definitely published after 1894, and the note on the flyleaf shows that it was owned by Margaret Woolley in August 1906.

How did you make it? See above.

Time to complete?: Hours.

How successful was it?: The cake was a little dry and every element was so sweet that the overall experience was a bit overwhelming. That being said, the Vienna chocolate icing was probably the best chocolate buttercream I’ve ever had and the noyeau added a lovely flavour and colour to the glace icing. I still wouldn’t really be recommending anyone try to recreate the cake though.

How accurate?: The food colourings were a bit difficult to deal with because who knows what colour or strength they were. I used a few drops of red to make the pink cake and icing, but skipped the brown on the basis that the icing was already so brown thanks to the cocoa that it wouldn’t make a difference. The cocoa was another thing I wasn’t sure about, is that what was meant by powdered chocolate?

[1] Agnes Bertha Marshall, Mrs A.B. Marshall’s Cookery Book (London: Simpkin, Marshall, Hamilton, Kent & Co Ltd, no date), 381–382.

[2] Ibid., 39.

[3] Ibid., 41.

[4] Ibid.

[5] Ibid.


Bibliography

Marshall, Agnes Bertha. Mrs A.B. Marshall’s Cookery Book. London: Simpkn, Marshall, Hamilton, Kent & Co Ltd, no date.


Parkin: Attempt No. 2

Parkin, recipe from 1926

Having struggled with the last parkin recipe that I tried, but with most of a jar of treacle still to use up I have had another go. Parkin No. 2 was more successful, in that it was at least edible, but still a far cry from the pictures of soft, moist, cake-y parkin that accompany modern recipes.

What is interesting is the way that parkin has evolved in the nearly 100 years between the recipe from 1830 (the earliest one that has been found so far, and very similar to the one from 1867 that I made last week) and this recipe from 1926.

“Parkin. Half a pound of fine oatmeal, half a pound of flour, 6oz. of butter or dripping, quarter of a pound of brown sugar, half a pound of treacle, half an ounce of ground ginger, the grated rind of a lemon, a quarter of a teaspoonful of powdered cloves, one teaspoonful of bicarbonate of soda, one teaspoonful of alt. Mix together the oatmeal, flour, salt, ginger, cloves, lemon rind and soda. Melt the treacle, butter, and sugar together in a saucepan until thoroughly dissolved. Make a well in the centre of the dry ingredients, and into this pour the hot liquid. Beat the whole together well. Turn the mixture into a shallow baking tin, and bake in a slow oven for one hour.”[1]

By Spider.Dog (http://www.flickr.com/photos/spiderdog/2484274442/) [CC BY-SA 2.0 (http://creativecommons.org/licenses/by-sa/2.0)], via Wikimedia Commons

By Spider.Dog [CC BY-SA 2.0], via Wikimedia Commons. See the lovely, soft, cake-like texture of modern parkin? 

The mixture is now a bit more like a cake, with the addition of flour and bicarbonate of soda, and it is less bitter thanks to the brown sugar. The shift towards a sweeter, less bitter, product would continue. A quick look at recipes for parkin in Australian newspapers shows that golden syrup was suggested as an alternative to treacle from 1912. In the mid-1920s it was common to combine treacle and golden syrup and by the 1940s many recipes just use golden syrup. Of course, many people would object that it isn’t really parkin if it doesn’t use treacle!

The flavouring has also changed, with less of the fiery ginger and no caraway, but a little clove and lemon instead. For me, it was this change in the flavour profile that really made the difference, even though the texture still left something to be desired.

The process however remains much the same. The butter, treacle (and sugar) are melted together and added to the dried ingredients before being pressed into a tin and baked at a low heat (although there are exceptions, see for example this recipe in which the fat is rubbed into the dry ingredients).

If you’ve ever made Anzac biscuits this might sound familiar, and as The Colonial Gastronomer brought up in the comments on the last post, it has been suggested that parkin was the origin for Anzacs. Culinary historian Allison Reynolds makes a brief mention of the connection in this radio interview. The real difference that strikes me is the process of adding the raising agent which, in Anzac biscuits, is normally added to the hot liquids. Does anyone know of any parkin recipes which do that too?

[1] “PARKIN.,” Examiner, April 6, 1926.

Parkin, recipe from 1926

The Redaction

115g oatmeal

115g flour

8g ginger

A sprinkle of clove

1/2 lemon rind

1/2 tsp baking soda

1/2 tsp salt

120g treacle

85g butter

60g brown sugar

  1. Preheat the oven to 150°C. Grease a loaf tin.
  2. Mix the oatmeal, flour, ginger, clove, lemon rind, baking soda and salt in a medium bowl. Create a well in the centre.
  3. Gently heat the treacle, butter and brown sugar in a saucepan until melted and well combined. Pour the liquid into the well in the dry ingredients and stir to combine.
  4. Press the mixture into the base of the greased loaf tin and bake for an hour or until firm and lightly browned.

The Round-Up

The Recipe: Parkin from The Examiner (available here)

The Date: 1926

How did you make it? See above.

Time to complete?: 1 hr 30 mins

How successful was it?: It tasted much better than the previous recipe but was very dry and hard. It still had a bit of a tendency to crumble. The hardness may be typical though, this recipe suggests that freshly baked parkin is always too hard to eat but that it softens over time. Mine is about 24 hours old, so maybe it will improve yet.

How accurate?: The oatmeal wasn’t really fine enough which may be why it is crumbling.

Bibliography

“PARKIN.” Examiner. April 6, 1926. http://nla.gov.au/nla.news-article91626220.

Remember, Remember the Fifth of November; Gunpowder, Treason and Plot

Even though some of the things I make for this blog are more than a little strange, it’s rare that something is so disgusting as to be totally inedible. Still, there are always exceptions, and this 1867 recipe for Yorkshire Parkin was definitely one of them.

Perhaps I should start at the beginning though. I’m moving out of my place in a few weeks and so I’m trying to use up the ingredients in my pantry. This includes a large jar of treacle, and so when I saw The Old Foodie’s post on tharf-cake for Guy Fawkes Night (5th of November) I saw an opportunity.

Of course, the traditional food for Guy Fawkes Night is parkin, a dense gingerbread made with oats and treacle. The Old Foodie has covered parkin extensively and I’ll direct you to her page for the history.

But the recipe from 1830 that she provides has to be left for 24 hours, and I was in one of those must cook right now moods. Waiting 24 hours wasn’t an option. Luckily there was a similar recipe in The Young Englishwoman.[1]

Capture

Both recipes are quite different from modern recipes in that they don’t contain flour. I was a bit skeptical of that from the beginning, and the huge amount of ginger also seemed suspicious, but then the mixture smelled amazing so who was I to argue?

I melted the butter with the treacle and heated it until the mixture was viscous enough to pour easily, then added that to the oatmeal, ginger and 1 tsp of caraway seeds (I halved the overall recipe, but no quantity was given for the caraways so I just guessed). Once all the ingredients were moist I pressed the mixture into a buttered tin and cooked at 160 for 30 minutes and then let it cool.

Parkin, recipe from 1867

Although the warm parkin filled the house with a delightful, Christmas-y scent, the mixture was too dry to cut without crumbling. The taste was disappointing too. The treacle is bitter, the ginger chest-clearingly fiery and the caraways take it from simply disgusting to truly vile*.

In short, this is not a recipe that I recommend trying yourself. But I’m not giving up on parkin altogether, just waiting until I have my tastebuds back!

*In fairness, my house-mates didn’t hate it quite as vehemently as I did.

Parkin, recipe from 1867

The Round-Up

The Recipe: Yorkshire Parkin from The Young Englishwoman (available here)

The Date: 1867

How did you make it?: See above.

Time to complete?: About 50 minutes.

How successful was it?: Awful.

How accurate?: Actually I think it was pretty accurate, notwithstanding the usual comments about using a modern oven etc.

Bibliography

Young Englishwoman: A Volume of Pure Literature, New Fashions, and Pretty Needlework Designs. Ward, Lock and Tyler, 1867.

[1] Young Englishwoman, 53.

The Good Food Feast and a Medlar Tart

Medlar Tart, recipe from 1594

Update: For more about The Good Food Feast and even some photos of yours truly in a green and orange gown see the write up in Good Food

I have a couple of exciting things to share with you, or at least I hope you find them exciting like I do. The first is a recap of the fabulous Good Food Feast which was held in Politarchopolis (Canberra) this weekend by the Politarchopolan Assault Catering Corps. At $125 it was a bit pricier than your average SCA feast, but the Good Food Feast has been much anticipated in the 20 years since the last one, and with four courses, plenty of entertainment and souvenirs of the night we definitely got our moneys worth.

The menu was as follows:

Course the first

Stuffed eggs

Smoked pressed beef tongue

Pickled vegetables

Freshly baked pretzels

Course the second

Baked salmon, served on rye crackers

Oysters with lemon

Golden scallops

Roast goose with green garlic sauce

Course the third

Quail and pigeon pies

Veal with berry sauce

White sausage and pickled cabbage

Pea fritters with garlic sauce

Dessert

Plum tarts

A warm Malavosia Pear tart

Spanish pastry pillows

A selection of fine hand-formed Politarchopolan cheeses, with crisp Gouda biscuits.

Beverages

Homemade cordials

Red or white wine

Red or white hypocras

Homebrewed beer

The highlights were the scallops – a perfectly sculpted sugarpaste shell containing an almond milk and rosewater leach, and an orange marzipan – and the warm pear tart which was my favourite dish of the evening. Special mention also goes to the homemade cheeses, the small bird pies, and the soft, salty pretzels which were served on sticks just as depicted in period paintings.

Scallop Subtletie

Scallop Subtletie – an edible sugarpaste shell with an almondmilk and rosewater leach and orange marzipan.

As good as the food was, the real triumph of the evening was in creating the experience of a feast. The team had thought of everything, from wall hangings to scented water to wash our hands with. This attention to detail carried over to the place settings which became our keepsakes for the evening, along with a unique, hand-painted, sugarpaste plate.

My beautiful, hand-painted, sugarpaste plate

Unfortunately, I don’t have many photos of the actual event, but I will try to link some when I can. In the meantime, a couple of weeks ago I managed to acquire some more medlars from a friend who has a tree in the Blue Mountains.

The Recipe

Since my last encounter, I have been looking forward to trying a medlar tart. With my medlars well bletted, I set to work using the recipe ‘To make a tarte of Medlers’ from Thomas Dawson’s ‘The Good Housewife’s Handmaide for the Kitchin’, published in 1594.

To make a tarte of Medlers.

Take medlers that be rotten, and strain them then set them on a chafing dish of coals, and beat it in two yolks of eggs, and let it boil till it be somewhat thicken season it with cinnamon, ginger, and sugar, and lay it in paste.[1]

As you can read about over at the Pilgrim Seasonings blog, this recipe is the earliest of a number of nearly identical recipes published in 16th and 17th century cookbooks.

Medlar Tart, recipe from 1594

The Redaction

This is a really easy tart to make, if a bit time consuming, and once again you can always make it even faster by buying shortcrust pastry although there’s something very satisfying about making your own. Feel free to use your favourite pastry recipe if you would rather, or to find a hot water crust recipe as that seems to be the type used in the original cookbook. I used a 24cm pan and didn’t pre-bake the shell, but I would if I was doing it again and have included instructions to do that.

To Make a Medlar Tart

For the pastry:

335g flour

100g butter, chilled and cut into 1cm cubes

1/2 + 1/8 cup of water

1 egg yolk

For the filling:

1 kg medlars

2 egg yolks, beaten

3 spoons sugar

1 1/4 tsp cinnamon

1/2 tsp ginger

  1. Heat the oven to 180C. Mound the flour in a bowl and rub in the butter until it resembles breadcrumbs. Add the egg yolk and enough water to make a smooth, pliable dough. Roll out the dough and line your pie tin with it. Prick the base with a fork, line the crust with baking paper and fill it with pie beads, dry rice or uncooked lentils and bake it for 15-20 mins.
  2. Remove the flesh from the medlars by squeezing the pointy end and pushing out the flesh. Push the flesh through a sieve to get rid of the seeds and any fibrous bits.
  3. Place the sieved medlars into a saucepan over medium heat and stir in the egg yolks. Bring to the boil and cook for 5-10 minutes or until it thickens somewhat. Stir in the sugar and spices and cook for another 5 minutes.
  4. Pour the filling into the pre-baked pie shell and smooth the top. Bake for 40 mins or until the filling has solidified.

Medlar Tart, recipe from 1594

The Round-Up

The Recipe: Medler Tart from ‘The good Huswifes Handmaide for the Kitchin’ (available here)

The Date:1594

How did you make it?: See above.

Time to complete?: About 1.5 hrs.

How successful was it?: It tasted and looked quite a lot like pumpkin pie. It wasn’t overly sweet and was pleasantly spiced.

How accurate?: I used a shortcrust pastry rather than a hot water crust which is the type of pastry referred to in the book, and the lack of quantities makes it hard to know how close I really got to the original.

Bibliography

[1] Thomas Dawson, The Good Huswifes Handmaide for the Kitchin (Imprinted at London by Richard Jones, 1594), http://www.staff.uni-giessen.de/gloning/ghhk/.

Bonus recipe: A Carrot Pudding

IMG_4279

This is a bonus recipe for the Working Class Dinner challenge, it’s a dessert which, like the potato pudding, is based on a root vegetable. Carrot Puddings have a much longer history that I ever would have thought, and the Carrot Museum has collected recipes through the centuries that makes for very interesting reading. The recipe that I chose comes from the Lady’s Column of the Australasian newspaper in 1869.

Baked Carrot Pudding.—Take three quarters of a pound of carrots, half a pound of breadcrumbs, a quarter of a pound of raisins,four ounces of suet, a quarter of a pound of currants, three ounces of loaf sugar, three eggs, some nutmeg, and a little milk. Boil and pulp the carrots, add to them the breadcrumbs, the raisins stoned, the suet chopped very fine, a little nutmeg, and three ounces of sugar pounded; well beat the eggs, and add them to a sufficient quantity of milk to make the ingredients into a thick batter, then put it into a buttered pie-dish and bake it. When done, turn it out and sift sugar over it.[1]

Like its potato counterpart, this recipe is cheap, quick and uses up left-overs. It’s all about making the most of the natural sweetness of the carrots and the dried fruit, bulked out with stale breadcrumbs.

Carrot pudding, recipe from 1869

The Redaction

Baked Carrot Pudding

340g carrots, peeled and chopped

230g breadcrumbs, freshly made from stale bread is best

115g raisins

115g suet, fresh if you can get it but the suet sold in boxes in the supermarket also works

115g currants

90g sugar

1/2 tsp nutmeg

3 eggs, beaten

Milk

Sugar, to serve

  1. Heat the oven to 180˚C. Grease a pie or casserole dish very well. Boil the carrots until very soft, then mash them until smooth.
  2. Combine the breadcrumbs, suet, dried fruit, sugar and nutmeg in a large mixing bowl. Add the carrots and the beaten eggs. Stir well, then add enough milk to make a thick batter, thicker than cake batter.
  3. Pour the batter into the prepared dish and bake for 45 minutes, or until golden and a skewer inserted into the middle comes out clean. When it’s done allow it to cool a little, but while still warm very carefully turn it out onto a plate. You may need to carefully run a knife around the edge of the dish. Serve warm, sprinkled with sugar.

The Round-Up

The Recipe: Baked Carrot Pudding from the Australasian newspaper(available here)

The Date: 1869

How did you make it? See above.

Time to complete?: About an 1 hr 15.

How successful was it?: Surprisingly tasty, like a very thick carrot cake. It wasn’t overly sweet, but the little bursts of sweetness provided by the currants and raisins were very popular with my taste testers. They also liked it with the very non-historically accurate Greek yoghurt, but because it can be a bit dry it probably is a good idea to serve it with cream or something similar.

How accurate?: Fresh suet would have been better but I was trying to use up some of the ingredients in my mum’s larder, and I think that that is well within the mindset of a Victorian working class cook.

[1] “RECIPES.,” The Australasian, March 6, 1869.

Carrot pudding, recipe from 1869

Bibliography

“RECIPES.” The Australasian. March 6, 1869.

Puftaloons

Puftaloons, recipe from 1904

This fortnight for the Historical Food Fortnightly it’s Make Do or Do Without. Nowadays most ingredients are available year round, and even the more obscure ones are available online, but for historical cooks the options were much more limited. If tomatoes were out of season, too bad. If you lived in Australia and couldn’t get goose, well then you would use parrot instead. And what if you didn’t have the equipment or ingredients to make bread? Then you get inventive.

Whilst not a problem limited to countries of the New World, see for example my post on soda bread, settlers in colonial countries were particularly vulnerable to this problem. The lack of ovens, problems keeping yeast viable in hot weather and the transient lifestyles of stockmen, trappers etc meant that they had to come up with some creative solutions to meet their cravings for bread.

View of a Bush Kitchen, c. 1896. Image courtesy of the State Library of NSW.

View of a Bush Kitchen, c. 1896. Image courtesy of the State Library of NSW. As you can see, conditions were basic, but this kitchen is actually a step up from the temporary bush camps. Under the window you can see the Dutch ovens used for, among other things, baking damper. 

In Australia the quintessential answer was damper, a basic bread made from flour, baking powder, salt and water which is then shaped into a round and baked in the ashes, on a hot stone or in a Dutch oven. Francis Lancelott, a mineralogical surveyor, visited Australia in the mid 1800s and described the weekly menu of a shepherd:

You may talk of the dishes of Paris renown,

Or for plenty through London may range,

If variety’s pleasing, oh, leave either town,

And come to the bush for a change.

On Monday we’ve mutton, with damper and tea;

On Tuesday, tea, damper and mutton,

Such dishes I’m certain all men must agree

Are fit for peer, peasant, or glutton.

On Wednesday we’ve damper, with mutton and tea;

On Thursday tea, mutton and damper,

On Friday we’ve mutton, tea, damper while we

With our flocks over hill and dale scamper.

Our Saturday feast may seem rather strange,

‘Tis of damper with tea and fine mutton;

Now surely I’ve shown you that plenty of change

In the bush, is the friendly board put on.

But no, rest assured that another fine treat

Is ready for all men on one day,

For every bushman is sure that he’ll meet

With the whole of the dishes on Sunday.[1]

But although damper is the best known of the quickbreads that Australian settlers made and ate, it is not the only one. One of the downsides of the damper was that, at nearly a foot in diameter and several inches thick, it took up to an hour to cook. For hungry shepherds, that was a long time to wait and so a series of faster options developed. Johnny cakes, small rounds of dough fried in a dry pan, were based on the American corn breads of the same name, whilst puftaloons were a kind of scone cooked in fat. Other variations included fat cakes, normally containing fat but sometimes cooked in fat, and leather-jackets which seem to be nearly identical to the wheat based Johnny cakes.[2]

Tea and Damper, 1883, J.D; Troedel & Co. Courtesy of the State Library of Victoria.

Tea and Damper, 1883, J.D; Troedel & Co. Courtesy of the State Library of Victoria.

I have to admit I was quite intrigued by what I read about puftaloons, also known as puftalooners and puftaloonies. They seemed to be a favourite amongst children and stockmen alike but I’d never heard of them before doing this research. Still, the thought of a scone fried in lard was a bit off-putting.

Would they be soggy, greasy or, even worse, meaty? In fact they were delicious. Soft and scone-like inside but with a harder crust than your average scone. They were perfect for breakfast with some jam but would make an equally nice addition to bacon, eggs and some grilled tomatoes for a lazy brunch or with honey for an afternoon snack. Not only were they very tasty, but they were amazingly fast to make, the whole process took less than 20 minutes. I’m definitely a convert!

Puftaloons, recipe from 1904

The Recipe

The recipe for this comes from a 1904 edition of the Liverpool Herald, an Australian newspaper, but there are dozens of all but identical recipes. A variation for Pineapple Puftaloons is available here (apparently to shred pineapple you use the tines of a fork on a very ripe pineapple, but if anyone has actually done this please let me know if it works!).

“PUFTALOONS.” Liverpool Herald. October 15, 1904.

“PUFTALOONS.” Liverpool Herald. October 15, 1904, 12.

The Redaction

1 3/4 cups self-raising flour (I use Australian/UK cup sizes which are slightly different from US sizes)

1 1/2 cups of milk

A pinch of salt

Lard for frying (about 40g)

  1. Mix the flour and the salt together in a large mixing bowl. Make a well in the middle and pour in the milk. Mix the two together to form a slightly sticky dough.
  2. Lightly flour a flat surface and turn the dough out onto it. Knead it just until all the ingredients are incorporated. Use a rolling pin to roll it out half an inch thick. Cut out circles using a cutter or the floured mouth of a glass.
  3. Heat the lard in a frying pan over moderate heat until it’s melted and warm. Add the puftaloons and fry until golden, then turn them over to cook the other side. Keep the heat moderate because the dough needs time to cook all the way through. When golden on both sides drain them on kitchen towel and serve hot with your favourite spreads.

Puftaloons, recipe from 1904

The Round Up

The Recipe: From the Liverpool Herald (available here)

The Date: 1904

How did you make it? See above.

Time to complete?: 20 mins.

How successful was it?:  Soft and light inside, with a nice crust. They went well with both sweet and savoury toppings and were still good when reheated.

How accurate?: Pretty good I think, although they were done in a kitchen rather than at a bush camp which would make it significantly more difficult.

[1] Lancelott in Barbara Santich, Bold Palates (Kent Town: Wakefield Press, 2012), 156.

[2] Ibid., 215–220.

 Bibliography

“PUFTALOONS.” Liverpool Herald. October 15, 1904.

Santich, Barbara. Bold Palates. Kent Town: Wakefield Press, 2012.

All Jumbled Up

Savoury Jumbles with Seeds

Photography by Sophia Harris.


If you’ve ever flicked through a historical cookbook you may have stumbled across a recipe for jumbles (also spelt jumbals, iombils, jambals and any other way you can imagine), a popular type of biscuit from the 16th century onwards. When I first heard about jumbles I, like many other people I think, was under the impression that they were called jumbles because they were a jumble of ingredients, but in fact the name refers to their shape.


In 16th century England gimmell rings (from the Latin gemellus for twin) were popular symbols of love and friendship and often exchanged as wedding rings. The rings were made of two or more intersecting bands which could be separated to form two separate rings, worn by each party during the betrothal period and then re-joined during the wedding.[1] Many of these rings exist in museum collections, and they are also celebrated in the literature of the day. I particularly like Robert Herrick’s poem The Jimmall Ring Or True-Love Knot:


“Thou sent’st to me a true love-knot, but I
Returned a ring of jimmals to imply
Thy love had one knot, mine a triple tie.”[2]


Jumbles then are biscuits made in the shape of these rings, and their twisted and entwined shapes are easily recognisable in many 16th and 17th century paintings, only recently has their shape changed to a flat or mounded biscuit. What is less sure is what exactly they should be made of. In fact, there is a huge amount of variation over the centuries.


Still life with Venetian Glass, a romer and a candle by Clara Peeters, 1607. [Public domain], via Wikimedia Commons

Still life with Venetian Glass, a romer and a candle by Clara Peeters, 1607. [Public domain], via Wikimedia Commons

Early jumble recipes, such as those from Thomas Dawson’s The Good Huswife’s Jewell from 1597 are biscuits flavoured with aniseed and rosewater and formed into knots before being boiled and baked.[3] Martha Washington’s Cookbook which, according to Karen Hess, probably dates from the second half of the 17th century contains a similar recipe which is even more heavily spiced (with carraway, aniseed, rosewater, musk and ambergris) but is not boiled.[4] However, it also has recipes for jumbles made from marzipan and baked fruit paste, as well as one for Lemon Jumbles which Hess notes is more like a meringue. Published in 1741 Elizabeth Moxon’s book English Housewifery Exemplified also offer both biscuit and fruit paste versions (from apricots, or she gives the option of making Barberry Cakes in the form of jumbles).[5]


Jumbles held on well into the 19th century, although the flavouring had become more familiar with cinnamon, nutmeg and lemon amongst the most popular additions. The shapes were also probably less complex, being formed into little rings or simply rolled out and baked thin. Whilst Elizabeth Lea’s book Domestic Cookery, Useful Receipts, and Hints to Young Housekeepers (1859) offered a selection of recipes (Rich Jumbles, Common Jumbles, Molasses Jumbles, Jumbles for Delicate Persons, Cup Jumbles and Jackson Jumbles)[6], other sources had pared their recipes back to the bare minimum. A recipe from 1860 runs “Jumbles. Half a pound of sugar. Half a pound of butter. Half a pound of flour. Flavour with cinnamon.”[7] In Australia references to honey jumbles appear in newspapers around the turn of the 20th century, often referring to American recipes or producers. A version of these is still produced by Arnott’s today, but these soft, gingerbready biscuits bear little resemblance to any other type of jumbles in either their shape or ingredients. For an example of this type of recipe see here.

Sweet Jumbles, recipe from 1623

Photography by Sophia Harris.


The Recipes


I used two different recipes for jumbles, one is for a savoury more bread-like type of jumbles, pleasantly flavoured with aniseed and boiled before baking (like a modern bagel or pretzel).


“To Make Jambals : Take a pint of fine wheat flour, the yolks of three or four new laid eggs, three or four spoonfuls of sweet cream, a few anniseeds, and some cold butter, make it into paste, and roul it into long rouls, as big as a little arrow, make them into divers knots, then boil them in fair water like simnels; bake them, and being baked, box them and keep them in a stove. Thus you may use them, and keep them all the year.”[8]


I had a bit of difficulty shaping these because of the texture of the dough, and I think that they could probably use some salt, or at the least salted butter, to give them a little more flavour. The lack of salt in the recipe does confuse me a bit, given that May suggests you can keep them for a whole year. Possibly the salt was assumed in the recipe? The second recipe that I used was for a slightly chewy biscuit, also flavoured with aniseed. These were really good and I would definitely recommend the recipe.


“To make Iumbals. To make the best Iumbals, take the whites of three egges and beate them well, and take of the viell; then take a little milke and a pound of fine wheat flower and sugar together finely sifted, and a few Aniseeds well rubd and dried; and then make what formes you please ; & bake them in a soft ouen vpon white Papers.”[9]


The Redactions


To Make Jambals (the savoury bread type)


250g flour

2 tsp aniseeds, ground to a powder in a mortar and pestle

60g salted butter

4 egg yolks

4 tbsp cream


  1. Place the flour and aniseed in a bowl and mix together. Rub in the butter until it is like breadcrumbs then stir in the egg yolks and cream until combined. If necessary add a little egg white to soften the mixture.
  2. Take walnut sized pieces of dough and roll into sausages the thickness of a pencil. The dough gets air pockets in the middle which makes it difficult to roll but by applying downward pressure with your palms as you roll you can form sausages. Fold the sausage in half and twist the ends together or form into other shapes as desired.
  3. Preheat the oven to 180˚C. Bring a wide saucepan of water to rolling boil and carefully place the jumbles into the boiling water with a slotted spoon. Allow them to boil in the liquid for 1 minute then scoop them out and place them on a baking tray lined with baking paper. Bake for 25-30 minutes or until golden brown.
Savoury Jumbles

Photography by Sophia Harris.

To Make Jumbals (the sweet biscuit type)


3 egg whites

6 tbsp milk

225g plain flour

225 wholemeal flour

450g sugar

3 tsp aniseeds, ground to a powder in a mortar and pestle


  1. Preheat the oven to 180˚C. Beat the egg whites until fluffy then stir in the milk, flour, sugar and aniseeds until they form a dough.
  2. On a floured board shape pieces of dough into knots, hearts, letters etc. Place them on a baking tray lined with baking paper and cook in the oven for 20 minutes or until lightly golden.
Sweet Jumbles

Photography by Sophia Harris.


The Round-up

The Recipe: Jambals from The Accomplisht Cook by Robert May (available here)

The Date:1685

How did you make it?

Time to complete?: About an hr.

How successful was it?: More successful that I was expecting, at first I was really struggling to get the dough to stick together but by applying downwards pressure with my palms as I rolled, and adding a little egg white, I was able to get it to work. The larger twists fell apart a big during boiling, but the smaller ones stayed together really well. The flavour was quite subtle, and considering how long they are supposed to stay good, I was surprised at the lack of salt. Very different from the other jumbles, savoury rather than sweet but quite tasty.

How accurate?:  Not too bad I think, although I don’t know how long I should have boiled it for, I just guessed that. I’d also like to know how long they do keep, and what it means to box them and keep them in a stove.


The Recipe: Jumbals from Country Contentements by Gervase Markham (available here)

The Date:1623

How did you make it?

Time to complete?: About an hr.

How successful was it?: Very successful, gave a light slightly chewy biscuit lightly flavoured with aniseed.

How accurate?: I wasn’t quite sure what it meant to “take of the viell” so I just whipped the egg whites until fluffy. It seemed to work well.


[1] The British Museum, “Fede Ring/gimmel-Ring,” The British Museum Collection Online, accessed February 9, 2015, http://www.britishmuseum.org/research/collection_online/collection_object_details.aspx?objectId=79510&partId=1.

[2] Robert Herrick, The Hesperides & Noble Numbers, ed. Alfred Pollard, vol. 1 (London and New York: Lawrence & Bullen, Ltd., 1898), 217.

[3] Thomas Dawson, The Second Part of the Good Hus-Wifes Jewell (London: Printed by E. Allde for Edward White, 1597), 19.

[4] Karen Hess, Martha Washington’s Booke of Cookery and Booke of Sweetmeats, Reprint edition (New York: Columbia University Press, 1996), 348–351.

[5] Elizabeth Moxon, English Housewifry Exemplified (Leeds: Printed by J. Lister, and sole by J. Swale, J. Ogle, and S. Howgate, at Leeds; J. Lord at Wakefield; and the author at Pontefract., 1741), 139 & 175.

[6] Elizabeth E. Lea, Domestic Cookery, Useful Receipts, and Hints to Young Housekeepers (Baltimore: Cushings and Bailey, 1859), 118–119.

[7] Luther Tucker and Son and J.J Thomas, eds., The Country Gentleman, vol. 15 (Albany: Luther Tucker, 1860), 383.

[8] Robert May, The Accomplisht Cook, Or, The Art and Mystery of Cookery. (London: printed by R.W. for Nath: Brooke, 1660), 275.

[9] Gervase Markham, Countrey Contentments, or the English Huswife: Containing the Inward and Outward Vertues Which out to Be in a Compleate Woman (London: Printed for R. Jackson, 1623), 114.


Bibliography

Dawson, Thomas. The Second Part of the Good Hus-Wifes Jewell. London: Printed by E. Allde for Edward White, 1597.

Herrick, Robert. The Hesperides & Noble Numbers. Edited by Alfred Pollard. Vol. 1. London and New York: Lawrence & Bullen, Ltd., 1898.

Hess, Karen. Martha Washington’s Booke of Cookery and Booke of Sweetmeats. Reprint edition. New York: Columbia University Press, 1996.

Lea, Elizabeth E. Domestic Cookery, Useful Receipts, and Hints to Young Housekeepers. Baltimore: Cushings and Bailey, 1859.

Markham, Gervase. Countrey Contentments, or the English Huswife: Containing the Inward and Outward Vertues Which out to Be in a Compleate Woman. London: Printed for R. Jackson, 1623.

May, Robert. The Accomplisht Cook, Or, The Art and Mystery of Cookery. London: printed by R.W. for Nath: Brooke, 1660.

Moxon, Elizabeth. English Housewifry Exemplified. Leeds: Printed by J. Lister, and sole by J. Swale, J. Ogle, and S. Howgate, at Leeds; J. Lord at Wakefield; and the author at Pontefract., 1741.

The British Museum. “Fede Ring/gimmel-Ring.” The British Museum Collection Online. Accessed February 9, 2015. http://www.britishmuseum.org/research/collection_online/collection_object_details.aspx?objectId=79510&partId=1.

Tucker and Son, Luther, and J.J Thomas, eds. The Country Gentleman. Vol. 15. Albany: Luther Tucker, 1860.

css.php