An anti-miserabilist approach to historical cooking

Tag: 19th Century (page 1 of 2)

Making A ‘Flanc’ Of Greengages

One of the lovely things about being in back in California for the summer is fresh summer fruits. I’ve been picking blackberry and roasting plums in red wine and gorging myself on fresh cherries. And recently, I was able to get my hands on some greengages.


Greengages are a type of plum and, as the name suggests, a gorgeous green colour even when ripe. They’re on the smaller side, a sweet, tart mouthful each. Known in France as the Reine Claude, they’re hard to come by in California and even harder to find in Australia but absolutely worth it if you can find some.

greengages for sale in a market stall with prices per kg and per lb

Martinvl, CC BY-SA 3.0 <https://creativecommons.org/licenses/by-sa/3.0>, via Wikimedia Commons

I wanted to showcase these gorgeous plums with a historic recipe that wouldn’t cook them down too much. In the end I actually didn’t have that many recipes to choose from, in part because greengages were only introduced to England from France in the early 18th century and also I suppose because you could use greengages in most recipes that just call generically for plums.


Alexis Soyer, the Victorian celebrity chef, has recipes for greengage compote, small tarts, dumplings and the intriguing crusts of fruit in his 1850 edition of The Modern Housewife or, Ménagère:


Crusts of Fruit.—Put a quarter of a pound of butter in a sauté- or frying-pan, sprinkle a little sugar over, cut four or five slices of bread a quarter of an inch thick, three inches long, and one and a half wide, lay in your pan; take one dozen of greengages, open them in two, they must not be too ripe, lay the skin part on your bread, put a pinch of sugar in each, put it in a hot oven for twenty minutes; have ready a salamander or a hot shovel, and hold it over it for a few minutes, dish and serve hot or cold; the oven ought to be hot enough to give a nice yellow color to the bottom, which will eat crisp.

He also has a recipe for “flancs”

Flancs, with any kind of fruit, like a vol-au-vent, are more easily made, and are equally as good a side dish. This may be made of half-puff or short paste, and fill with raw cherries and some pounded sugar over: bake together. Greengages, apricots, or any kind of plums, will require a hotter oven than for flour only in it, the fruit giving moisture to the paste; if baked in a slow oven will be heavy, and consequently indigestible.

This is not the first time Soyer wrote recipes for a flanc, in The Gastronomic Regenerator (1846) he has a recipe for ‘Flanc à la Creme Pralinée’ which is for a tart filled with frangipane and almonds. Included in the chapter for ‘Entremets’, surrounded by pastry recipes and following directly after several recipes for fruit flans, at first this seems like a typo or maybe a variant spelling of flan.

But as Soyer explains in the Modern Housewife “AT this part of the dinner there are those dishes which are called Flancs, by which is understood, those dishes whose contents are not so large as the removes and not so small as the entrées, and the Receipts for which may be taken from either of those departments, with this difference;—instead of meat or poultry being cut up, it should be left whole: for instance, a loin of mutton, instead of being cut up into cutlets, should be served whole, with some sauce under it, and a duck, instead of being divided, should be left whole, with some sauce. It is also a great addition in the appearance of the table, and should always be served in a differently-formed dish to the entrées or removes; and are only required when eighteen or twenty persons dine, and four corner dishes are used.”

Sample menu for a two course meal for August from The London Art of Cookery by John Farley (1811) showing the four corner dishes that Soyer refers to. The ‘flancs’ are probably the tartlet and cheese cakes in the second course, and the chicken and French pie in the first course.

The term seems to be more related to the direct translation of the French flanc meaning side reflecting the layout of a meal served à la Française. Unlike in a modern restaurant meal (served à la Russe) where each course is served one after the other with one dish at a time to each individual diner, a meal served à la Française may still have multiple courses but many dishes are laid out on the table at the same time for each diner to take a serving of the different dishes. The layout, and especially the symmetry, of the different dishes was an important part of the meal and for highlighting the hostess’s skill.

Sample layout of dishes for the first and second courses from The Complete Economical Cook, and Frugal Housewife by Mary Holland (1837).

Sample two course menu from The Complete Economical Cook, and Frugal Housewife by Mary Holland (1837). Notice how the second course combines sweet and savoury dishes, and hot and cold.


In these meals, the centrepieces of each course would be placed that the top and bottom of the table, closest to the host and the hostess. These typically consisted of soup and fish in the first course and roast meats in the second course. These dishes could be removed once eaten and replaced by ‘removes’. Laid out around the main dishes during each course were ‘made-dishes’, also called entrées and entremets, which could be sweet or savory but generally became lighter and sweeter as the meal went on. Soyer’s flancs fit into this category as a kind of side dish, normally served cold alongside the more elaborate entrees and the larger meats.


Sample menus from The Cook’s Guide, and Housekeeper’s and Butler’s Assistant by Charles Francatelli (1863) show how seasonal menus for different numbers of diners were still made up of the same elements: soup, fish and roast meat in sequential removes served wtih entrees and entremets. The second course of the dinner for 6 people includes a Flance of pears and rice although unfortunately no recipe is included.

The problem with this theory is that the term flanc nearly always refers to a kind of sweet tart normally filled with fruit but occasionally even with sweet noodles, and it continues in use until the end of the 19th century when dining à la Française had been nearly completely replaced by dining à la Russe. Frederick Vine’s Practical Pastry published in 1894 has recipes for apples, gooseberries, greengages and apricots baked into tarts. A recipe for ‘flanc of peaches’ is included in both Cassell’s Dictionary of Cookery (1896) and Harper’s Cookbook Encyclopedia (1902) while Mrs de Salis offers a completely different style of recipe in The Lady’s Realm (1897).

So, does ‘flanc’ refer to the type of dish and it’s place within the meal, or is it a sweet tart generally with a fruit filling in a raised crust? I’m not sure, and this isn’t the only thing about the recipes that is a bit of a conundrum.

Glistening fruit tart on a blue and white plate with a metal cake server and some sunflowers in the background

The Recipe

The version I made comes from Mrs Beeton’s The Book of Household Management (1861).


FLANC OF APRICOTS, or Compote of Apricots in a Raised Crust.

(Sweet Entremets.)

  1. INGREDIENTS.—3/4 lb. of short crust No. 1212, from 9 to 12 good-sized apricots, 3/4 pint of water, 1/2 lb. of sugar.

Mode.—Make a short crust by recipe No. 1212, and line a mould with it as directed in recipe No. 1391. Boil the sugar and water together for 10 minutes; halve the apricots, take out the stones, and simmer them in the syrup until tender; watch them carefully, and take them up the moment they are done, for fear they break. Arrange them neatly in the flanc or case; boil the syrup until reduced to a jelly, pour it over the fruit, and serve either hot or cold. Greengages, plums of all kinds, peaches, &c., may be done in the same manner, as also currants, raspberries, gooseberries, strawberries, &c.; but with the last-named fruits, a little currant-juice added to them will be found an improvement.

Time.—Altogether, 1 hour to bake the flanc, about 10 minutes to simmer the apricots.

Average cost, 1s. 6d.

Sufficient for 1 entremets or side-dish.

Seasonable in July, August, and September.


The basic recipe refers to two other recipes to make the pastry case:


1212. INGREDIENTS.—To every pound of flour allow 2 oz. of sifted sugar, 3 oz. of butter, about 1/2 pint of boiling milk.

Mode.—Crumble the butter into the flour as finely as possible, add the sugar, and work the whole up to a smooth paste with the boiling milk. Roll it out thin, and bake in a moderate oven.

Average cost, 6d. per lb.


FLANC OF APPLES, or APPLES IN A RAISED CRUST.

(Sweet Entremets.)

  1. INGREDIENTS.—3/4 lb. of short crust No. 1211 or 1212, 9 moderate-sized apples, the rind and juice of 1/2 lemon, 1/2 lb. of white sugar, 3/4 pint of water, a few strips of candied citron.

Mode.—Make a short crust by either of the above recipes; roll it out to the thickness of 1/2 inch, and butter an oval mould; line it with the crust, and press it carefully all round the sides, to obtain the form of the mould, but be particular not to break the paste. Pinch the part that just rises above the mould with the paste-pincers, and fill the case with flour; bake it for about 3/4 hour; then take it out of the oven, remove the flour, put the case back in the oven for another 1/4 hour, and do not allow it to get scorched. It is now ready for the apples, which should be prepared in the following manner: peel, and take out the cores with a small knife, or a cutter for the purpose, without dividing the apples; put them into a small lined saucepan, just capable of holding them, with sugar, water, lemon juice and rind, in the above proportion. Let them simmer very gently until tender; then take out the apples, let them cool, arrange them in the flanc or case, and boil down the syrup until reduced to a thick jelly; pour it over the apples, and garnish them with a few slices of candied citron.


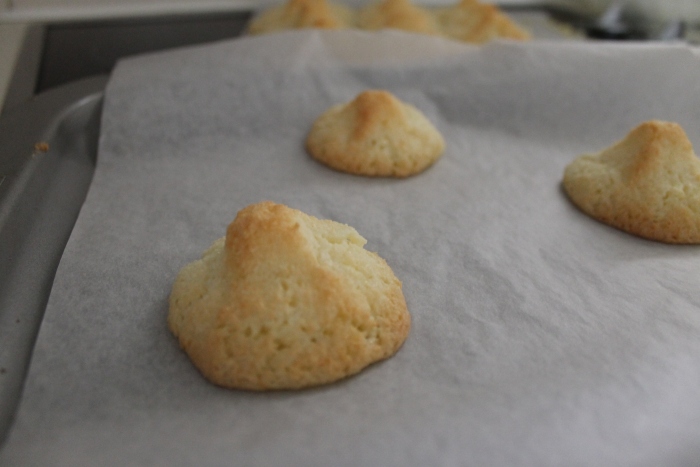
While making the filling is straightforward enough, the pastry is very oily and I had to press it into the tin instead of rolling it out. Then the recipe says to fill the raw pastry case with flour and bake it in order to blind bake it.This isn’t a technique I’ve seen before, but it seems to be common to several of the flanc recipes including the ‘Flanc de Nouilles méringuées’ (Flanc of Meringue-d Noodles) from The Art of French Cookery (1827) which is the earliest recipe I’ve found so far.

Recipe for Flanc de Nouilles méringuées from The Art of French Cookery (1827)

I was very nervous about this and wasn’t sure if I should put a layer of baking paper in the pastry first to make getting rid of the flour easier. In the end I didn’t, and it actually worked really well with the flour absorbing some of the oiliness of the pastry. Yet another example of how historical recipes often work if you just follow them! This made a very crisp pastry that stayed firm even when the quite liquid filling was put into it and was still crispy two days later. It’s definitely a method that I will be using again.


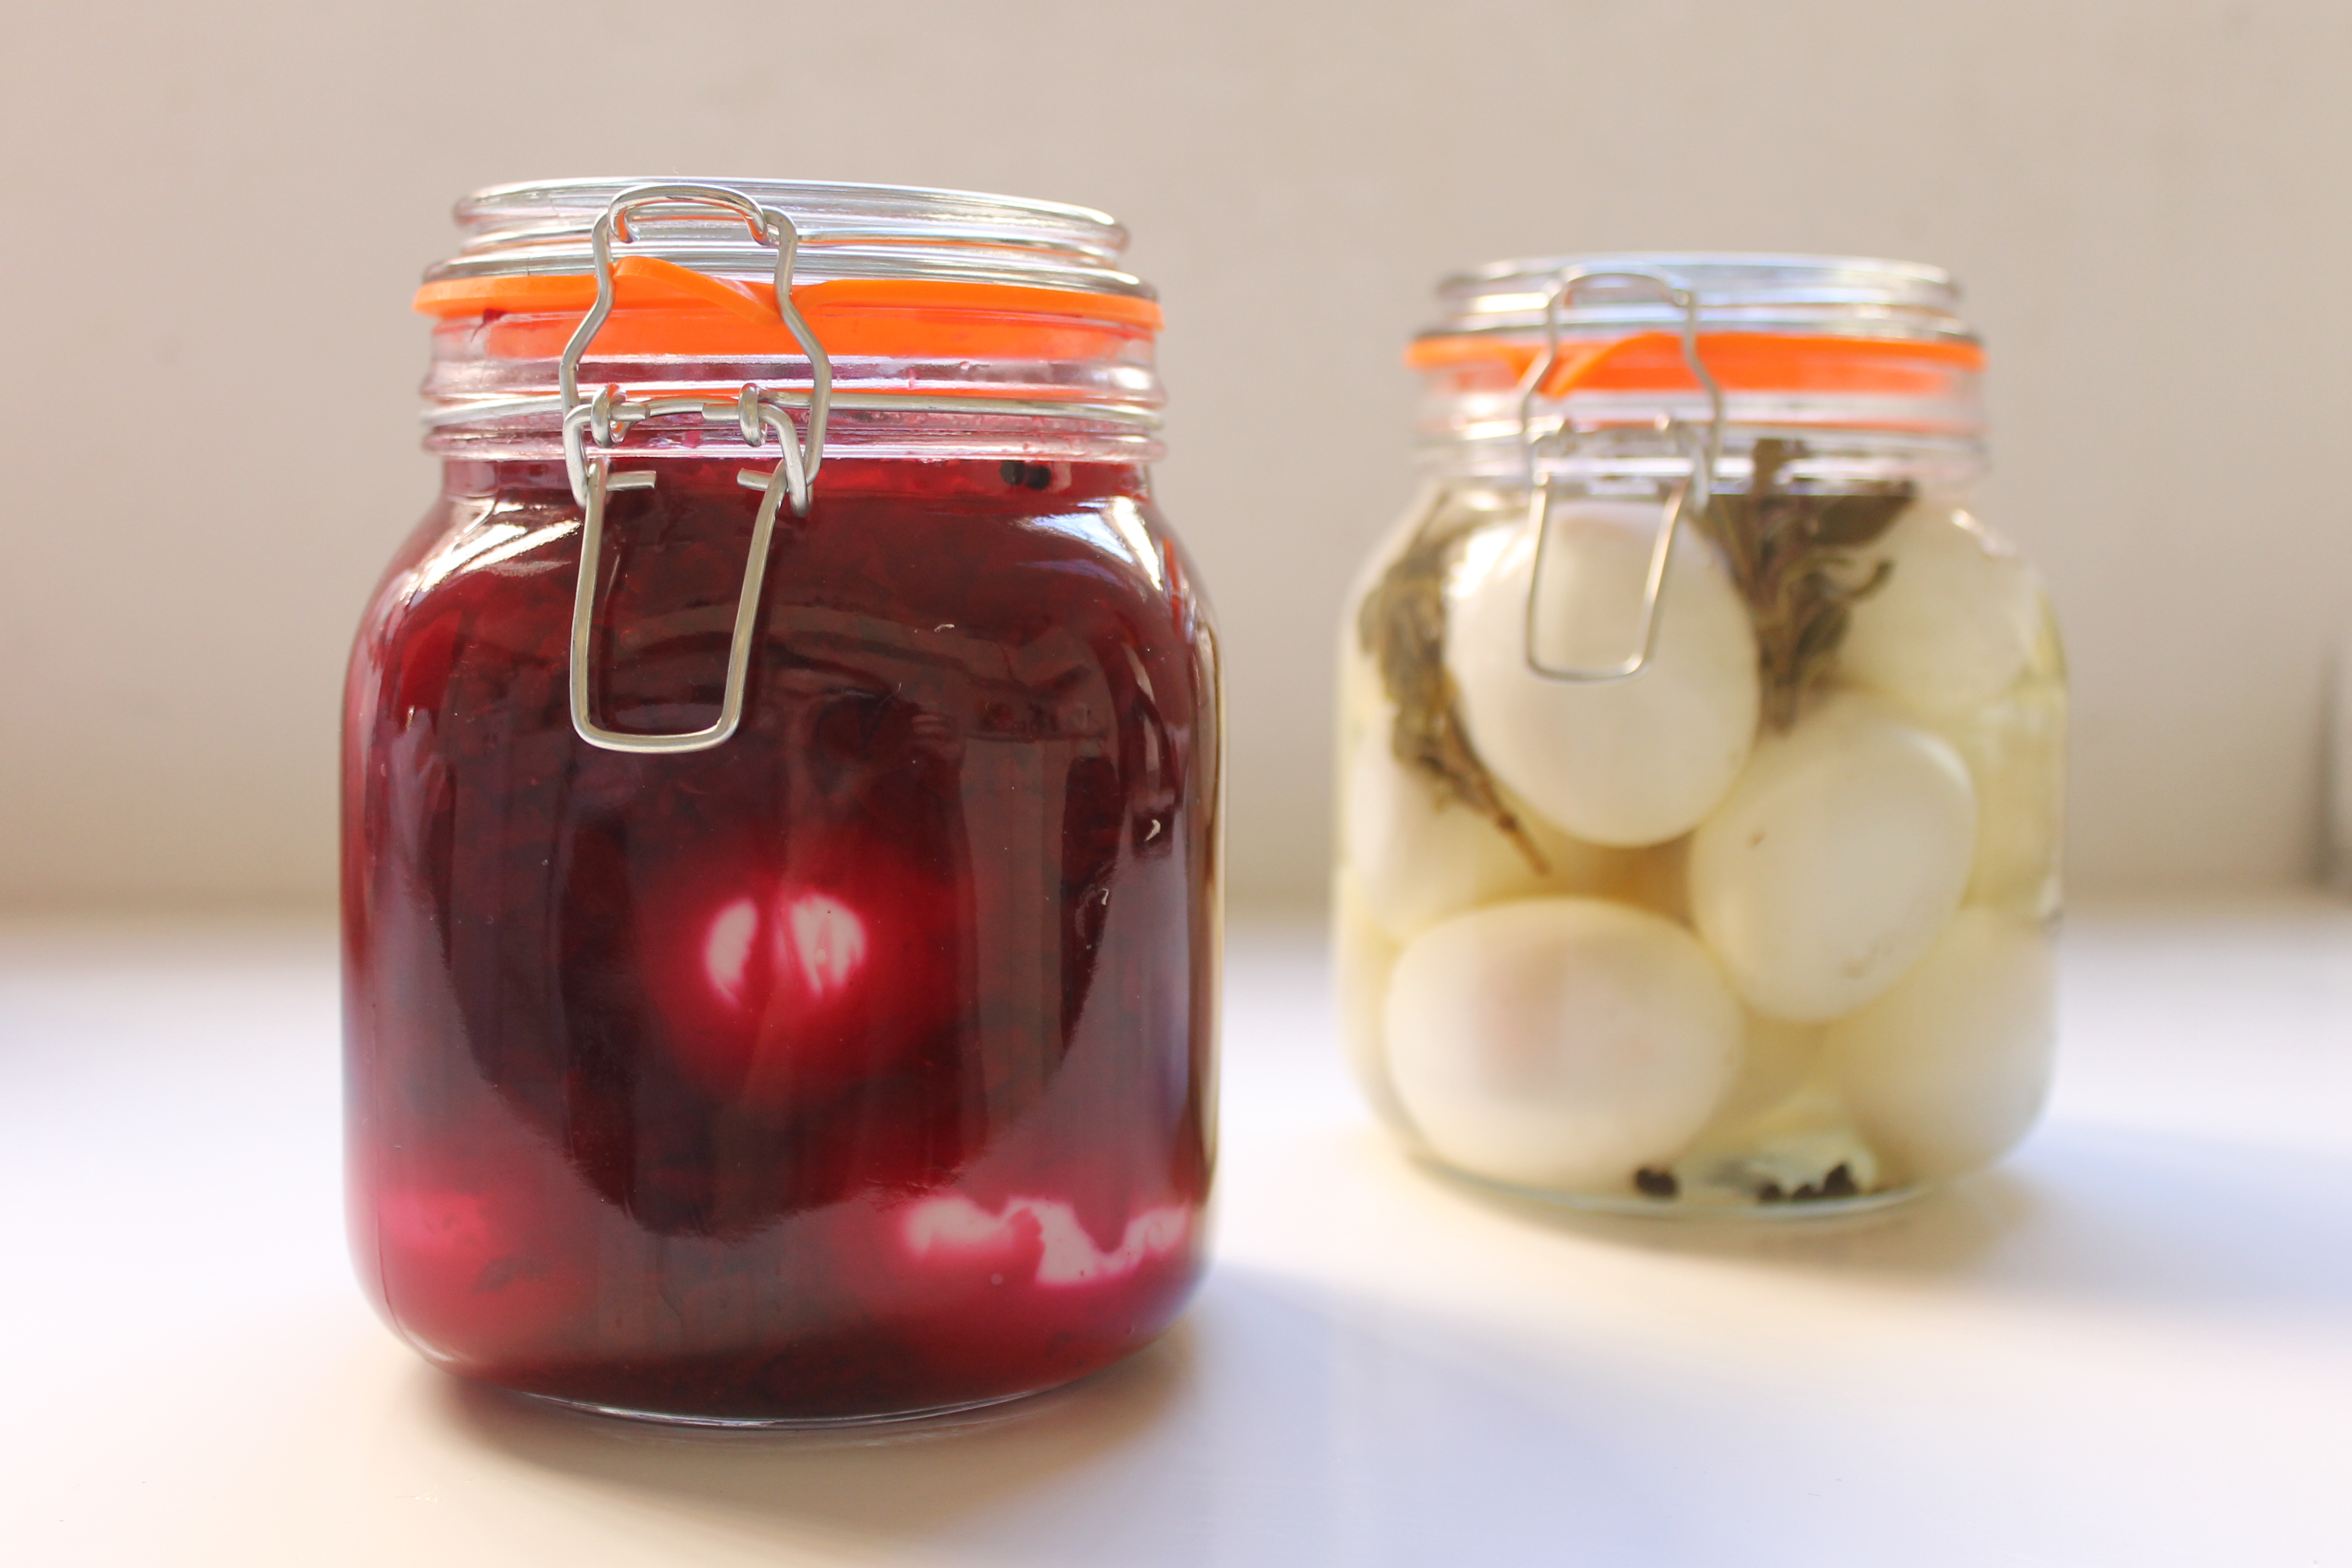
The filling itself is simple to make although I probably left the greengages in the syrup a little too long. You want them to change colour but not for the skin to start falling off them, it’s really only a couple of minutes. I then cooked the syrup down until it was starting to gel, testing it as if for jam. It will thicken a bit more as it cools, so don’t take it too far.


Overall, this makes one of the most delicious fruit tarts I’ve ever tasted with the sweetness of the syrup offset by the tartness of the greengages and balanced by the rich, biscuit-y pastry.


The Redaction

Flanc of Greengages


3/4 cups water

226g sugar

9-12 greengages, halved and pitted

226g plain flour, plus flour to fill the pastry case

57g sugar

85g cold butter, cubed

1.2 cups boiling milk


  1. Boil the sugar and water together in a medium saucepan for 10 mins. Turn down the heat to medium-low and add the greengages. Remove the greengages after 2-3 minutes when fully yellow and the skin is just starting to wrinkle.
  2. Continue boiling syrup until light gel forms (20-30 mins) then allow the syrup to cool.
  3. Heat the oven to 180°C. To make the pastry, place the flour and sugar in a mixing bowl and rub in the butter. Heat the milk and add enough milk to bring the dough together into a smooth paste.
  4. Butter a shallow pie dish and press the dough into the dish to make a case. Fill it with plain flour, then bake for 45 minutes. Use a spoon to carefully remove the flour and discard the flour. Use a pastry brush to remove any remaining flour, then put the case back in the oven and back for 15 minutes at 170°.
  5. When the case is golden brown and crispy, but not burnt at the edges, remove it from the oven. Arrange the greengages in the case and spoon over enough of the syrup to fill in the gaps between the fruit. Serve warm or cold.


For more about the history of dining, see:

Flandrin, Jean Louis. Arranging the Meal: A History of Table Service in France. English-Language ed, University of California Press, 2007.

Gray, Annie. “‘Perfection and Economy’: Continuity and Change in Elite Dining Practices, ca. 1780-1880.” The Importance of British Material Culture to Historical Archaeologies of the Nineteenth Century, edited by Alasdair Mark Brooks, University of Nebraska Press, 2015, pp. 216–42.


Carolina Snowballs Re-do

Carolina Snowballs, recipe from 1858

Way back in 2015 I made a late nineteenth century recipe for Peach Snowballs from Mina Lawson’s The Antipodean Cookery Book. Even though the peaches tasted great, the rice didn’t form a homogeneous layer the way that it is supposed to (for good examples see Savoring the Past and World Turn’d Upside Down).

Peach Snowballs, recipe from 1895

Not very successful peach snowballs

These snowballs are sometimes called Carolina Snowballs, because they were made with Carolina gold rice, grown in Carolina and Georgia. This kind of rice is no longer widely available, but in recent years has been resurrected by the Carolina Gold Rice Foundation (and sold by Anson Mills) so I’ve been meaning to try this recipe again using the proper type of rice.


The story of Carolina Gold is well beyond the scope of this blog post (a good place to start is Karen Hess’ The Carolina Rice Kitchen: The African Connection) but it is impossible to write about this rice without acknowledging its deep entanglements with slavery (for which see Michael Twitty’s The Cooking Gene).


By at least 1690, rice was being raised in South Carolina and plantation owners made their fortunes by exploiting the experience that enslaved West African workers had of growing rice.[i] West African men brought expertise in constructing complex irrigation systems to control the level of water in the rice fields. The knowledge of how to grow the rice, as well as how to make and use the equipment necessary for processing came from the women who had traditionally cultivated and prepared the rice in West Africa.


Wet rice cultivation, as practiced in South Carolina and Georgia, was extremely profitable at the expense of enslaved workers’ health. Conducted knee-deep in murky water under an unrelenting sun, the work itself was exhausting, dangerous and never-ending. The water harbored a host of threats including snakes, alligators, parasites and biting insects which spread diseases like malaria.[ii] As Jennifer Morgan points out “Rice is among the most onerous and labor intensive food crops, and the duration of the growing season and the dangerous and repellent nature of the work placed it at the extreme end of any continuum of forced agricultural labor in the early Atlantic world.”[iii]

African style rice pounder

African style rice pounder at the Whitney Plantation in Louisiana

As in Western Africa, rice came to play a central role in the diet of the South, from the homes of the labourers themselves to the wealthiest tables where it was cooked, of course, by enslaved African cooks and African American domestic servants. The complex cuisine that resulted was a combination of West African and European traditions, creating a distinct style of rice cookery. As historian Michael Twitty enumerates, this includes:

“chicken pilau, breads, puddings, rice cakes, crab fried rice—rice as the necessary accompaniment to barbecue hash, okra soup, crawfish étoufée, and red beans, as they had in Saint-Domingue/Haiti—and sugar and rice for a quick breakfast; all come down to us through the centuries as legacies of this heritage. So also have soups made with peanuts or peanuts and oysters, benne (sesame seed) and hot-pepper sauces, crab gumbos, and a battery of food with which the only acceptable accompaniment is rice cooked perfectly, with every grain steamed, separate and distinct.”[iv]


One of the maybe surprising results of this cuisine in the Carolina snowball. Possibly descended from the French bourdelot , an apple wrapped in pastry and boiled or baked, the snowball is an apple (or more rarely another type of fruit) wrapped in rice and boiled in a pudding cloth.[v]


What is really surprising is the longevity of this recipe; Hess quotes a recipe from The Lucayos Cook Book which might date back to as early as 1690, although the provenance of this manuscript isn’t great and it is unclear where the original is.[vi] At the very least, a recipe for Carolina Snow Balls in the eighth edition of Hannah Glasse’s The Art of Cookery published in 1763, and similar recipes continued to be published well into the 1920s.[vii]


Probably the reason for this extraordinary perseverance is that this recipe is about as cheap and easy a dessert as you can make. While rice was an expensive and exotic product in the medieval period, it became considerably more available in the Early Modern period – exports from South Carolina alone increased from 10,407 pounds in 1698 to more than 72 million pounds in 1774.[viii]


As the price of rice dropped, this kind of dessert became much more achievable for middle class consumers (such as Glasse’s readers). The short list of ingredients, the simplicity of the method, limited equipment required, and the hot, filling result would all have appealed to housewives and cooks needing a sweet dish.


[i] Henry C. Dethloff, “The Colonial Rice Trade,” Agricultural History 56, no. 1 (1982): 232.

[ii] Michael W. Twitty, The Cooking Gene: A Journey Through African American Culinary History in the Old South (New York, NY: Amistad, 2017), 240.

[iii] Laboring Women: Reproduction and Gender in New World Slavery (Philadelphia: University of Philadelphia Press, 2004), 162.

[iv] Twitty, The Cooking Gene, 262.

[v] Karen Hess, The Carolina Rice Kitchen: The African Connection (Columbia, S.C.: University of South Carolina Press, 1998), 146.

[vi] Hess, 144–45.

[vii] Hannah Glasse, The Art of Cookery, Made Plain and Easy; Which Far Exceeds Any Thing of the Kind yet Published … To Which Are Added, by Way of Appendix, One Hundred and Fifty New and Useful Receipts, and a Copious Index, 8th ed. (London: Printed for A. Millar [and others], 1763), http://archive.org/details/b30502500.

[viii] Dethloff, “The Colonial Rice Trade,” 234.


The Recipe

Capture

The version I’m following is from The Housekeeper and Gardener (1858) by Rebecca Upton. This is one recipe were it does really make a difference to have the right type of rice. On his blog, Kevin Carter suggests that medium grain rice is best but the Carolina Gold, which is a long grain rice, worked well for me (but other long grain rice did not). Make sure, if buying Carolina Gold that you buy the variety called Carolina Gold and not the brand Carolina Rice produced by Riviana Foods.


The recipe calls for two spoonfuls of rice, but how much is that? Two tbsp didn’t feel like enough to me, but I think that the 100 g I put in was maybe a little too much (James Townsend suggests ½ cup or about 115 g). The trickier bit is getting the rice evenly distributed, and smaller apples might help here.

IMG_8111

The Redaction

Carolina Snowballs


Per Snowball

1 large apple

Orange and lemon (approx. ¼ peel of 1 orange and 1 lemon) finely chopped peel, or grated zest

80-100 g Carolina gold rice


For Sauce (for 1-2 apples)

55 g butter

30 ml white wine

1 ½ tbsp sugar

Pinch of ground cinnamon

Pinch of ground nutmeg


  1. Core the apple(s). Place a clean pudding cloth in a bowl, with the cloth hanging over the edges of the bowl.Put a spoonful of the rice in the bottom of the cloth, then place the apple on top. Put the citrus peel inside the hole left by coring the apple(s). 2. Add the rest of the rice around the apple, then gather the corners of the cloth and tie the pudding up. Leave a little room for the rice to expand, but not too much so it doesn’t get soggy. The actual knot should be tight. Massage the rice around the apple so that it is spread evenly.
  2. Place the pudding in a saucepan of cold water and bring to the boil. Simmer for 1 hour.
  3. Meanwhile, make the sauce by melting the butter in a small saucepan. Add the remaining ingredients and heat until the sugar is dissolved.
  4. When the pudding is done, carefully remove it from the saucepan and dip it in cold water for a few seconds. Place the pudding in a bowl, cut off the string and carefully unwrap it. It may help to place another bowl on top and flip it, since the base normally looks better than the tied end. Serve with warm sauce.


Soyer’s Oxtail Soup


Alexis Soyer

Alexis Soyer, frontispiece engraving from A Shilling Cookery for the People, 1855, public domain.

A few years ago, I read Relish: The Extraordinary Life of Alexis Soyer, Victorian Celebrity Chef by Ruth Cowen, and now Alexis Soyer seems to pop up everywhere I turn. He was an amazing man, one of the first celebrity chefs (complete with his own line of cookbooks and product endorsements) but also an inventor and entrepreneur. Although in his restaurant he mostly cooked for the wealthy and famous he was also involved in philanthropic projects including setting up soup kitchens in Ireland during the Great Famine and working with Florence Nightingale to reform army cooking during the Crimean War.

Soyer's Kitchen at Scutari Barracks

Alexis Soyer’s Barrack Hospital kitchens in Scutari, Turkey during the Crimean War. Wood engraving. Licensed by the Wellcome Collection under CC BY.

Soyer also produced several cookbooks with recipes for cheap, simple and nutritious recipes that poor people could make at home, or that charities or institutions could make in bulk. These included Soyer’s Charitable Cookery; Or, the Poor Man’s Regenerator Dedicated to the Benevolent, for the Benefit of the Labouring, and Poor Classes of the United Kingdom (c.1847) and A Shilling Cookery for the People: Embracing an Entirely New System of Plain Cookery and Domestic Economy (1855). While the tone of his writing is self-aggrandising and patronising, Soyer evidently put a great deal of effort into the recipes and considered the equipment that people had, the ingredients they could afford, and their experience with cooking.

The Recipe

The first chapter in the A Shilling Cookery for the People contains 37 recipes for soups, stocks and gravies ranging from the extremely simple rice soup (rice boiled in broth) to the aspirational ‘Good White Mock Turtle Soup’. Needing only a heat source and a pot, these soups were adaptable to both older styles of fireplace cookery and the modern stoves. The recipe that I decided to make ‘Ox Tail Soup in Baking Pan’ would have required an oven, but there is another very similar version available for making it on the stove.

Ox Tail Soup in Baking Pan – Divide two ox tails, wash them well in cold water, then put them in the pan, with three teaspoonfuls of salt, one of pepper, four cloves, a little thyme, if handy, two good onions; add three quarts of water, two tablespoons of colouring; put on the cover, place it in a moderate oven for three hours to simmer, take off the fat, which save for use, and serve. Half a pound of any vegetable, mixed or not, cut in dice, can be added with advantage.[1]

The recipe for colouring is given later in the book:

A Common Batter – Put in a basin six good tablespoonfuls of flour, which dilute very slowly with one pint of milk, add one spoonful of salt, quarter that of pepper, beat an egg well in it, if used for toad-in-the-hole. A little parsley, chopped onions, or a little spice, makes an agreeable change; it will also make nice puddings, if baked alone, or under a joint in a well-greased tin.[2]

This recipe is pretty straightforward. The oxtails I bought were already cut up but if you’re buying a whole oxtail then ask your butcher to section it for you or you can do it yourself by cutting in between the caudal vertebrae (The Seasoned Cook has a video of how to do this). The benefit of using oxtail is that it’s very cheap, and it tastes delicious if you give it a long, slow cooking. Once your oxtails are ready, just stick everything in a lidded casserole dish, or a baking dish covered with foil and let it simmer for three hours. For the vegetables, I used leek, turnips and carrots but you could also use potatoes, pumpkin, peas, swedes, parsnips or celery.

[1] Soyer, A Shilling Cookery for the People, 16.

[2] Soyer, 164.


Oxtail Soup made from Alexis Soyer's 1855 recipe

The Redaction

Baked Oxtail Soup

1 tbsp flour

1/6 cup milk

Parsley, chopped (optional)

2 oxtails, sectioned

Thyme

3 tsp salt, plus additional for paste

1 tsp pepper, plus additional for paste

4 cloves

1 onion, chopped

1 leek, chopped

2 turnips, diced

2 small carrots, diced

3 litres water

  1. Preheat the oven to 180°C. Whisk together the flour, milk, and parsley (if using) until it forms as smooth paste and season with the additional salt and pepper.
  2. Place all of the other ingredients in a casserole dish or a baking tray. Stir in the flour and milk paste. Cover with a lid, or with aluminium foil.
  3. Put the dish in the oven and leave to simmer for 3 hours. Skim off any excess fat. Serve hot with crusty bread or buttered toast.

Oxtail Soup made from Alexis Soyer's 1855 recipe

References

Cowen, Ruth. Relish: The Extraordinary Life of Alexis Soyer, Victorian Celebrity Chef. London: Phoenix, 2008.

Soyer, Alexis. The Gastronomic Regenerator: A Simplified and Entirely New System of Cookery; with Nearly Two Thousand Practical Receipts, Suited to the Income of All Classes. London: Simpkin, Marshall, & Company, 1846.

Soyer, Alexis. Soyer’s Charitable Cookery; or, The Poor Man’s Regenerator. 1847. Reprint, London: Simpkin Marshall & Company, 1884.

Soyer, Alexis. A Shilling Cookery for the People: Embracing an Entirely New System of Plain Cookery

and Domestic Economy. London: G. Routledge & Company, 1855.


A Recipe for Ginger Beer, or How to Paint Your Ceiling with Alcoholic Beverages

Ginger Beer, brewed from a recipe from 1861

Since I’ve got a bit more time on my hands at the moment, I’ve been busy doing some sewing and trying to get as many unfinished projects done as I can. While I sew, I like to watch something that I’ve seen before so that I can still concentrate on whatever I’m working on.

So there I am, watching ‘Victorian Farm’ and sewing away. It’s the height of the Brisbane summer, so it’s hot and humid. Then suddenly, Peter is making homemade ginger beer and they all drink it and look so cool and refreshed. And so, of course, I had to try making some.

The Recipe

Capture

The recipe for ginger beer that I used from Philp, The Family Save-All, 167.

The recipe comes from ‘The Family Save-All’ which is a mid-nineteenth century cookbook all about using up left-overs and cheap ingredients. I’ve used it before, when I was making potato pudding and it’s a great source for cheap, everyday recipes.

The recipe would make an enormous amount of ginger beer, so even though the recipe warns that making a smaller quantity might make an inferior product, I reduced all the ingredients significantly.

Overall, it produced a very fizzy but quite pleasant ginger beer. I would have preferred a stronger ginger flavour and slightly less sugar but it was very refreshing.In the end, I didn’t measure how alcoholic it was, but do be careful because it certainly gave me a bit of a buzz.

The other thing to watch out for is the level of carbonation. If you bottle it after only four days, it will continue to ferment in the bottles. It’s really important that you put it into plastic bottles and that they get refrigerated. Otherwise, you’ll end up like me with ginger beer exploding all over the ceiling!

Ginger Beer, brewed from a recipe from 1861

The Redaction

Ginger Beer

45g ginger
4.85l water
650g sugar
Juice of 1 large lemon
1 tbsp honey
2g lemon essence
1 sachet ginger beer or beer yeast, dissolved in a little water that has been boiled and cooled

1. Sterilise all your equipment. Cut the ginger into chunks, put it in a bag and bruise with a rolling bin.
2. Place the ginger in a large saucepan and add 850ml of the water. Bring it to the boil, and simmer for 30 minutes.
3. Stir the sugar, the lemon juice, and the honey into the hot ginger water, then add the remaining water. Bring to the boil, then strain out the ginger and pour into a 1 gallon demijohn. Allow the mixture to cool until it is just lukewarm.
4. Stir in the lemon essence and the yeast. Set up the airlock and allow to ferment for 4 days.
5. On the fifth day, sterilise your bottles, lids and siphoning equipment. Siphon the ginger beer into plastic bottles, while trying not to disturb the yeast residue. Don’t fill the bottles completely, but leave some space at the top. Press out the air from this space, then cap. As the ginger beer continues to ferment, the bottle will expand. Once the bottles are expanded and hard, you must refrigerate them to keep them from exploding.
Note: This recipe isn’t written for beginner brewers. If you haven’t brewed before, then you should consult a basic guide for how to set up your equipment, do the siphoning etc. This guide is for mead, but I really like how intuitive it is, and it covers a lot of the skills you’ll need.

The Round-Up

The Recipe: Ginger Beer (available here)

The Date: 1861

How did you make it? See above.

Time to complete?: 5 days

How successful was it?: Other than the one bottle that exploded, it was pretty good. As I said, the ginger flavour wasn’t particularly strong and I don’t know if that was the result of reducing the quantities, or if it just wasn’t very strong to begin with.

How accurate?: The big change that I made was omitting the egg white. It was just going to be too difficult to add 1/14 of an egg white. I imagine that the main purpose of the egg white is to help clarify the ginger beer, so  I think that it would make more of a difference to the way it looks rather than the taste. The other big difference is the type of yeast that I used, and the way that it was introduced. The recipe didn’t specify, but it was probably a liquid yeast taken from the sludge left from beer brewing, rather than a modern dried yeast.

Ginger Beer, brewed from a recipe from 1861

References

Philp, Robert Kemp. The Family Save-All, a System of Secondary Cookery. Second. London: W. Kent and co., 1861.

Mastabas, Pyramids and Gumdrops: Cocoa-nut Cakes from Gaskell’s North and South

IMG_3965

My blog has been sadly neglected over the past few months; my thesis, a family wedding, an unexpected trip overseas and just normal life craziness has been getting in the way. I’m afraid that it probably isn’t going to get much better this year, but as an apology here is my entry for the HFF Literary Foods challenge (which was only due a week ago).


One of my favourite books is North and South by Elizabeth Gaskell. I like to describe it as Jane Austen with a social conscience; although it is ultimately a romance, the novel is bound up in concerns about class, industrialisation and poverty. Like many other Victorian novels (and indeed earlier English novels), food often isn’t discussed explicitly because it is not in good taste to talk about food too much in public [1]. That being said, there is a lot of food in North and South and the food, or lack thereof is a major device within the novel[2].


Luckily for me, there is one scene in particular which mentions an actual dish and it just happens to be one of my favourite sections of the novel in which Mr Thornton, mill-owner and love interest, comes to the Hales’ for tea.

“Behind the door was another table decked out for tea, with a white table-cloth, on which flourished the cocoa-nut cakes, and a basket piled with oranges and ruddy American apples, heaped on leaves.”[3]

IMG_3982.JPG

The Recipe

The cocoa-nut cakes which Dixon, the cook and special confidante of Mrs Hale, has made were made from eggs, sugar and grated coconut. Koivuvaara believes that these were made from eggs, sugar and grated coconut[4]. This lines up with the recipe provided in Mrs Beeton’s Book of Household Management. It is also similar to that provided in Miss Leslie’s book, Seventy-five Receipts For Pastry, Cakes and Sweetmeats (1828) which also contains spices. However, other recipes call only for egg whites e.g. Jennie June’s American Cookery Book (1870), Creole Cuisine (c. 1885) and Eliza Acton’s recipe for ‘Very Fine Cocoa-nut Macaroons’ in Modern Cookery for Private Families (1868). Robert Wells provides quite a different recipe in The Bread and Biscuit Baker’s and Sugar-Boiler’s Assistant (1890) including flour, chemical leaveners, butter and milk. I chose Mrs Beeton’s recipe, but perhaps it would have been more successful if only the egg whites had been used.


IMG_3968

Mrs Beeton’s recipe is as follows:


COCOA-NUT BISCUITS OR CAKES.

  1. INGREDIENTS.—10 oz. of sifted sugar, 3 eggs, 6 oz. of grated cocoa-nut.

Mode.—Whisk the eggs until they are very light; add the sugar gradually; then stir in the cocoa-nut. Roll a tablespoonful of the paste at a time in your hands in the form of a pyramid; place the pyramids on paper, put the paper on tins, and bake the biscuits in rather a cool oven until they are just coloured a light brown.

Time.—About 1/4 hour. Seasonable at any time.[5]

However, I’m sure that Dixon did a much better job than the melted, collapsing pyramids that I managed. My only solace is that I don’t seem to be alone in having difficulty with this recipe. SJ Alexander over at The Queen’s Scullery had a go at the same recipe a few years ago, and said “Shaping the coconut was not even remotely possible, and the eggs migrated out of the coconut haystacks to form custardy pools around the macaroons’s ankles, which turned crispy in the oven. When they came out, they tasted delicious, but fell apart the minute I tried to move them off their tray. The funny thing was that the recipe did not differ greatly from modern coconut macaroon recipes–I’m not sure what went wrong, exactly. Shelling and preparing fresh coconut was a fun experience, and it was noticeably different from preshredded coconut from the store.”[6]


Mine seemed to hold up a bit better than hers, and I think that’s because I used store-bought desiccated coconut. Desiccated coconut was first produced in 1880 in Sri Lanka, before then it had to be produced at home.[7] Eliza Acton describes how it’s done:

“Rasp a fresh cocoa-nut, spread it on a dish or tin and let it dry gradually for a couple of days, if it can be done conveniently …”[8] Whilst making your own desiccated coconut would certainly be an interesting thing to try, it wasn’t something I had time to do, and other than perhaps giving some insight into the coarseness of the coconut required, I’m not sure that it would make all that much difference.

IMG_3973

The first batch which melted into one big mass

Using the quantities given, I could roughly shape the mixture, but they were more mastaba than pyramid. What I found was that with a bit of extra coconut, I could shape the mixture into pyramids, but when my first batch went into the oven (at 150ºC), they slumped joined together. I had better luck with the last couple, to which I added even more coconut and cooked at a higher temperature (180ºC). This batch also had far fewer on the tray, and so they had room to spread out without touching each other. I’m still not sure though that they are quite the shape that Mrs Beeton was suggesting. They went into the oven as pyramids, and came out as large gumdrops.


[1] McWilliams, “‘A Vulgar Care’: Talking about Food in Eighteenth-Century Anglo-American Novels”; Moss, Spilling the Beans.

[2] see Koivuvaara, “Hunger, Consumption, and Identity in Elizabeth Gaskell’s Novels.”

[3] Gaskell, North and South, 90.

[4] Koivuvaara, “Hunger, Consumption, and Identity in Elizabeth Gaskell’s Novels,” 136.

[5] Recipe 1740 Beeton, Beeton’s Book of Household Management.

[6] Alexander, “Doing Bad Things to Innocent Cucumbers.”

[7] Santich, Bold Palates: Australia’s Gastronomic Heritage, 201.

[8] Acton, Modern Cookery, for Private Families, 545.

IMG_3979.JPG

The second batch, they held together but I’m still not sure they could really be called pyramids. 

The Redaction

Cocoa-nut Cakes

290g sugar

2 large eggs

170g desiccated coconut, plus enough to make into a mouldable paste (about 5 tbsp more)


  1. Preheat the oven to 180ºC. Line a baking tray with baking paper.
  2. Whisk the eggs until pale and frothy. Gradually whisk in the sugar to make a thick, silky batter. Stir in the coconut. Try to shape a dessert-spoonful into a pyramid. If the mixture is too soft, add more coconut, until they will hold the shape nicely.
  3. Place the pyramids on the baking tray, leaving lots of room between them. Bake for 10 minutes or until lightly golden.

The Round-Up

The Recipe: Cocoa-nut Biscuits or Cakes from Mrs Beeton’s Book of Household Management  (available at http://www.gutenberg.org/cache/epub/10136/pg10136-images.html).

The Date: 1861

How did you make it? See above.

Time to complete?: 30 mins.

How successful was it?: The first batch melted into one shapeless mass, and while they tasted great (like coconut ice but crunchier) the fell apart when you lifted them. The second batch held their shape much better, thanks to extra coconut and you could even lift them up.

How accurate?: I wonder if including the egg yolk was a mistake, because a lot of the other recipes just use the egg white beaten to stiff peaks. I think that would help hold the shape better. I didn’t grate and dry my own coconut, but I do think that the coconut should be dried and not used fresh. At the same time, I don’t know exactly what texture of coconut should be used, mine was quite fine and maybe it should have been coarser.

IMG_3976.JPG

Bibliography

Acton, Eliza. Modern Cookery, for Private Families: Reduced to a System of Easy Practice, in a Series of Carefully Tested Receipts, in Which the Principles of Baron Liebig and Other Eminent Writers Have Been as Much as Possible Applied and Explained. London: Longman, Green, Reader, and Dyer, 1868.

Alexander, SJ. “Doing Bad Things to Innocent Cucumbers.” The Queen’s Scullery, January 28, 2010. http://thequeenscullery.com/2010/01/28/doing-bad-things-to-innocent-cucumbers/.

Beeton, Isabella, ed. Mrs Beeton’s Book of Household Management. London: S.O Beeton, 1861.

Cunningham Croly, Jane. Jennie June’s American Cookery Book. New York: The American News Co., 1870.

Gaskell, Elizabeth. North and South. London: Penguin Books, 1994.

Hearn, Lafcadio. La Cuisine Creole: A Collection of Culinary Recipes, from Leading Chefs and Noted Creole Housewives, Who Have Made New Orleans Famous for Its Cuisine. New Orleans: F.F. Hansell & Bro. Ltd., 1885.

Koivuvaara, Pirjo. “Hunger, Consumption, and Identity in Elizabeth Gaskell’s Novels.” University of Tampere, 2012. http://tampub.uta.fi/bitstream/handle/10024/66893/978-951-44-8780-4.pdf.

Leslie, Eliza. Seventy-Five Receipts for Pastry, Cakes, and Sweetmeats. Boston: Munroe and Francis, 1828.

McWilliams, Mark. “‘A Vulgar Care’: Talking about Food in Eighteenth-Century Anglo-American Novels.” In Food and Language: Proceedings of the Oxford Symposium on Food and Cooking 2009, edited by Richard Hosking, 227–36. Great Britain: Prospect Books, 2010.

Moss, Sarah. Spilling the Beans: Eating, Cooking, Reading and Writing in British Women’s Fiction. Oxford University Press, 2013.

Santich, Barbara. Bold Palates: Australia’s Gastronomic Heritage. South Australia: Wakefield Press, 2012.

Wells, Richard. The Bread and Biscuit Baker’s and Sugar-Boiler’s Assistant. London: Crosby Lockwood and Son, 1890.


Metternich Cake, or Gateau à la Metternich


The Culinary Vices challenge had me stumped for a while. How do I create something excessive and luxurious on a budget, without spending days laminating pastry or buying yet more cake moulds? Then, while watching the third episode of Victorian Bakers, an excellent show which everyone should watch, inspiration struck. In the show you see the bakers at the turn of the 20th century struggling to diversify in the face of factory made bread, and one of the things they begin to make is cake.


I turned to a recent acquisition, Mrs A.B. Marshall’s Cookery Book (c. 1890s), where I found the Metternich Cake. With alternating layers of two different types of cake on a biscuit base all sandwiched together with a rich, chocolate buttercream, covered in noyeau-flavoured glace icing and decorated with two types of buttercream, this cake seemed to tick all of the boxes. It was excessive, yes, but I already had all the ingredients and equipment that I would need.

Agnes_B_Marshall

Print of Agnes Marshall (1855-1905), author unknown, [Public Domain], via Wikimedia Commons

The Recipe

“Take four whole raw eggs, six ounces of castor sugar, a pinch of cinnamon, and the very finely chopped peel of a lemon; whip these all together in a stewpan over boiling water till the mixture is just warm; then remove and whip until cold and thick, and mix into it four ounces of fine warm flour that has been passed through a sieve, and one eighth ounce of Marshall’s baking power. Butter a square fleur mould, place it on a baking tin, and put a double layer of buttered paper on the bottom inside the mould; then pour in the mixture, and bake in a moderate oven for one hour. The cake should be a very pale fawn colour when cooked.
Prepare a similar quantity of the above mixture, but in addition add about a saltspoonful of Marshall’s cherry red or carmine and a few drops of essence of vanilla, and finish as for the first mixture.
When both mixtures are cold cut them in slices and arrange them together in alternate layers, placing between each slice a layer of Vienna chocolate icing that is mixed with a wineglass of Silver Rays (white) rum; when they have reached the required height mask over with maraschino glace and then dish on a cake bottom. Garnish the cake as in the engraving with Vienna chocolate icing and rose Vienna icing, and serve. This would be nice to serve for a dinner sweet when ice cream or fruits may be served with it.”[1]

IMG_5782

Little did I know the anxiety which this cake would lead to. The first step is to make the two types of Genoise sponge; I would probably cook them slightly less next time because they were a little dry, and I would chill the cakes before icing. Next up is the cake bottom.

“Cake Bottom – Rub two ounces of butter into half a pound of flour till smooth, then add two ounces of castor sugar and one egg, and mix with cold water into a very stiff paste; roll out, cut in a square shape, and bake in a moderate oven for about half an hour, then put to press, trim and use. When these are used for savoury turbans the sugar should be left out.”[2]

Once the cakes are cooled I cut them into quarters and stacked the layers alternately. However, on re-reading the recipe I’m wondering if the instruction was actually to slice the cakes in layers vertically and to alternate those layers. You use the Vienna chocolate icing, a delicious chocolate and rum buttercream, to sandwich the layers together, and to attach the cake to the biscuit base.

“Vienna Chocolate Icing – To three quarters of a pound of icing sugar add half a pound of fresh butter, a quarter of a pound of finely powdered chocolate, a little of Marshall’s coffee brown, and about half a wineglass of brandy or liqueur. Mix all together with a wooden spoon for about fifteen minutes, when it will present a creamy appearance, and is ready for use.”[3]

Once the cakes are assembled, making absolutely certain that they are straight, it’s time to ‘mask’ the cake in glace icing. Before I begin, let me just say that there is a reason that glace icing is basically only used on cookies and cupcakes. It is a nightmare to work with! Following the recipe exactly created a thick paste that was impossible to use so I used more water and noyeau to get a smooth, spreadable icing.

“Maraschino Glace – Put into a stewpan three quarters of a pound of icing sugar, and one and a half tablespoonfuls of water, then mix in three tablespoonfuls of maraschino, stir over the fire till just warm, then use. Noyeau, or any other liqueur, can be used similarly.”[4]

Getting the cake iced was the worst part of the recipe, and not something I would be keen to do again. I actually iced the first cake and was so unhappy with it that I started again with the second cake. One of the problems was the texture of the cake, I kept getting crumbs in the icing even though I had brushed the sides with a simple syrup before beginning (this isn’t called for in the recipe, but I don’t know how you could get away without using jam or syrup first). The icing was also setting so quickly that I could hardly get it onto the cake, and once it was on it would break off in chunks.

“Vienna Icing – Ten ounces of icing sugar and a quarter of a pound of butter worked till smooth with a wooden spoon; mix with one small wineglass of mixed Silver Rays (white) rum and marashino, work it till like cream, then use. This may be flavoured and coloured according to taste.”[5]

Eventually I got the whole thing covered, although it was a far cry from smooth, let alone perfect. Luckily, some of the imperfections are covered by the piped Viennese icing, some in chocolate and some in rose (I took this to mean rose-coloured, but it could also be flavoured with a little rosewater).


IMG_5773

The Redaction

Metternich Cake

Makes 2 cakes


For each cake:

4 eggs

175g caster sugar

A pinch of cinnamon

Peel of a lemon

120g flour, warmed for 5 minutes in a very cool oven

3.5 g baking powder

For the second cake:

4 drops vanilla essence

1/2 tsp red food colouring

For the cake bottom:

60 g butter

230 g flour

65 g caster sugar

1 egg

About 2 tsp ice water

For the Vienna chocolate icing:

170 g icing sugar, sieved

115 g butter, softened

60 g cocoa powder

2 tbsp white rum

A few drops of coffee brown food colouring (optional – listed in the recipe but the icing is already so brown that it doesn’t really seem necessary)

For the glace icing:

340 g icing sugar

3 tbsp maraschino or noyeau

Water

For the Vienna rose icing:

140g icing sugar, plus extra

115g butter, softened

2 drops red food colouring

1 tsp rose-water (optional)

1 tbsp white rum

1 tbsp noyeau or maraschino

For assembly:

Simple syrup or warmed apricot jam


  1. Preheat the oven to 150˚C. Butter and line the base of two square, 8 inch cake tins. For each cake whisk the eggs, sugar and flavourings (and the food colouring for the second cake) in a heat proof bowl. Place this bowl over a small saucepan of simmering water and continue to whisk until the mixture is just warm to the touch. Remove from the saucepan and continue to whisk until the mixture thickens and is room temperature.


  1. Sift the flour and baking powder onto the egg mixture and carefully fold it in, trying not to lose too much of the volume that has been created by the whisking. Pour each mixture into a prepared tin. Place both tins in the oven and bake for 50-60 mins, or until dry and slightly springy to the touch.


  1. Remove the cakes from the oven when done, but leave the oven on, and allow to cool slightly before loosening the edges with a palette knife and turning them onto wire racks to cool.


  1. For the cake bottom, rub the butter into the flour. Mix in the sugar and the egg. Add the ice water a little at a time until the dough just comes together. Place a layer of baking paper on a baking sheet and dust with a little flour. Roll the dough out in a square shape directly onto the baking paper until it is about 1/2 cm thick. Bake in the oven for 30 mins.


  1. Once the cakes and the cake bottom have cooled, use a serrated knife to carefully cut each cake into quarters (or into layers, see comment above). Stack the cakes and trim to make sure that they are identical in size, otherwise you will have a lopsided cake. Use one of the squares to cut two cake bottoms of the same size.


  1. Make the Vienna chocolate icing by beating together the butter and the icing sugar until well combined. Add the cocoa powder and beat until it is all incorporated, then slowly mix in the rum.


  1. Use a palette knife to spread a small amount of Vienna chocolate icing on a cake bottom and then carefully press your first piece of cake onto the cake bottom. Continue to add 3 more pieces of cake, alternating between the plain and the pink cake, and using the Vienna chocolate icing to glue the layers together. At this point you should have two cakes, each with a cake bottom and 4 layers of cake, 2 pink and 2 white. Brush the cakes all over with simple syrup, or with slightly warmed apricot jam. Place the cakes in the fridge for 20 minutes or so, to firm up the cake.


  1. While the cakes are chilling make the glace icing. Place the icing sugar and maraschino or noyeau in a small saucepan over a low heat. Add water, a teaspoon at a time, until you have a smooth and thick but pourable icing. When the cakes are ready to ice, keep the icing on a low heat and bring one cake at a time to the icing. Spoon some icing over the top of the cake to make a smooth top, then use a palette knife to apply icing to the sides. Let the icing set.


  1. To make the rose icing, beat together the butter and icing sugar. Add the colouring, the rum and liqueur, and the rose-water if desired. Mix well. You may need to add more icing sugar to get the icing to a piping consistency. Fill one piping bag with a large star tube with the rose icing, and another with the remaining chocolate icing. Use the rose icing to pipe a shell border around the top and bottom of the cake. Use the two types of icing to pipe small stars and C-shapes onto the cake, following the engraving for inspiration.

IMG_5739

The Round-Up

The Recipe: Metternich Cake from Mrs A.B. Marshall’s Cookery Book

The Date: There’s no date given in the book but this edition was definitely published after 1894, and the note on the flyleaf shows that it was owned by Margaret Woolley in August 1906.

How did you make it? See above.

Time to complete?: Hours.

How successful was it?: The cake was a little dry and every element was so sweet that the overall experience was a bit overwhelming. That being said, the Vienna chocolate icing was probably the best chocolate buttercream I’ve ever had and the noyeau added a lovely flavour and colour to the glace icing. I still wouldn’t really be recommending anyone try to recreate the cake though.

How accurate?: The food colourings were a bit difficult to deal with because who knows what colour or strength they were. I used a few drops of red to make the pink cake and icing, but skipped the brown on the basis that the icing was already so brown thanks to the cocoa that it wouldn’t make a difference. The cocoa was another thing I wasn’t sure about, is that what was meant by powdered chocolate?

[1] Agnes Bertha Marshall, Mrs A.B. Marshall’s Cookery Book (London: Simpkin, Marshall, Hamilton, Kent & Co Ltd, no date), 381–382.

[2] Ibid., 39.

[3] Ibid., 41.

[4] Ibid.

[5] Ibid.


Bibliography

Marshall, Agnes Bertha. Mrs A.B. Marshall’s Cookery Book. London: Simpkn, Marshall, Hamilton, Kent & Co Ltd, no date.


Remember, Remember the Fifth of November; Gunpowder, Treason and Plot

Even though some of the things I make for this blog are more than a little strange, it’s rare that something is so disgusting as to be totally inedible. Still, there are always exceptions, and this 1867 recipe for Yorkshire Parkin was definitely one of them.

Perhaps I should start at the beginning though. I’m moving out of my place in a few weeks and so I’m trying to use up the ingredients in my pantry. This includes a large jar of treacle, and so when I saw The Old Foodie’s post on tharf-cake for Guy Fawkes Night (5th of November) I saw an opportunity.

Of course, the traditional food for Guy Fawkes Night is parkin, a dense gingerbread made with oats and treacle. The Old Foodie has covered parkin extensively and I’ll direct you to her page for the history.

But the recipe from 1830 that she provides has to be left for 24 hours, and I was in one of those must cook right now moods. Waiting 24 hours wasn’t an option. Luckily there was a similar recipe in The Young Englishwoman.[1]

Capture

Both recipes are quite different from modern recipes in that they don’t contain flour. I was a bit skeptical of that from the beginning, and the huge amount of ginger also seemed suspicious, but then the mixture smelled amazing so who was I to argue?

I melted the butter with the treacle and heated it until the mixture was viscous enough to pour easily, then added that to the oatmeal, ginger and 1 tsp of caraway seeds (I halved the overall recipe, but no quantity was given for the caraways so I just guessed). Once all the ingredients were moist I pressed the mixture into a buttered tin and cooked at 160 for 30 minutes and then let it cool.

Parkin, recipe from 1867

Although the warm parkin filled the house with a delightful, Christmas-y scent, the mixture was too dry to cut without crumbling. The taste was disappointing too. The treacle is bitter, the ginger chest-clearingly fiery and the caraways take it from simply disgusting to truly vile*.

In short, this is not a recipe that I recommend trying yourself. But I’m not giving up on parkin altogether, just waiting until I have my tastebuds back!

*In fairness, my house-mates didn’t hate it quite as vehemently as I did.

Parkin, recipe from 1867

The Round-Up

The Recipe: Yorkshire Parkin from The Young Englishwoman (available here)

The Date: 1867

How did you make it?: See above.

Time to complete?: About 50 minutes.

How successful was it?: Awful.

How accurate?: Actually I think it was pretty accurate, notwithstanding the usual comments about using a modern oven etc.

Bibliography

Young Englishwoman: A Volume of Pure Literature, New Fashions, and Pretty Needlework Designs. Ward, Lock and Tyler, 1867.

[1] Young Englishwoman, 53.

Peach Snowballs

Peach Snowballs, recipe from 1895

I made these peach snowballs months and months ago, but never quite got around to writing up the recipe. We’ve talked before about Mina Lawson’s The Antipodean Cookery Book when I made potato corks. Just like the potato corks, these peach snowballs are all about fast, cheap and filling food; they only have three ingredients after all!

The Recipe

Recipes like this one are known from the late 18th century and continue to appear throughout the 19th century. Nearly all are balls of rice wrapped around an apple, or apple pieces, but some are more unusual. Rachel Snell has written about snowballs in the context of 19th century class concerns and budget constraints[1]. She has suggested that the rice versions may be a variation on earlier dumpling recipes which use pastry rather than rice. Another possible forerunner of the snowball might be something like the recipe for ‘A cheap Rice Pudding’ from The Whole Duty of a Woman[2]. This recipe calls for the rice to be mixed with raisins then gathered in a pudding cloth and boiled.

Yet another variation is to omit the apple and a recipe for this appears in the Canadian book The Frugal Housewife’s Manual, where we are instructed to simply form balls of rice and serve them with a sauce[3]. A similar recipe appears in an 1895 Australian newspaper, however these snowballs are moulded in cups rather than being boiled in a cloth[4]. Interestingly, this is followed by a recipe for ‘Apple Dumplings’ which are clearly the same as ‘Snowballs’.

Yet in all these recipes, except for the one with raisins and a single Eliza Acton recipe which uses oranges[5], the fruit is always apples. This makes the following recipe for peach snowballs in The Antipodean Cookery Book rather unusual.

“Peach Snowballs: – Ingredients: 1 pound of rice, some sugar, 6 peaches. Mode: Throw the rice into a saucepan of boiling water and let it boil from five to seven minutes. Drain it, and when it has cooled spread it in equal parts on six small pudding cloths. Peel the peaches carefully, coat them thickly with sugar and place one in the centre of each layer of rice; gather the cloth round and securely tie it. Then plunge these puddings into boiling water, and when done turn them out, sprinkle with sugar, and serve with a sweet sauce over them. Time, one hour and a half to boil.”[6]

Peach Snowballs, recipe from 1895

The Redaction

As I’m sure you’ve already figured out from the picture above, I had a lot of difficulty getting the rice to form a nice smooth ball around the peaches. Kevin Carter over at Savoring the Past has an excellent article about apple snowballs, and it includes a video which you might want to watch if you are going to give this recipe a go. He also recommends using medium grained sticky rice, and that might be better than the long grained rice that I used.

Peach Snowballs

For 2 snowballs

150g rice

Sugar

2 peaches

  1. Bring a saucepan of water to the boil and add the rice. Boil for 5-7 minutes. Drain the rice and allow to cool slightly.
  2. Carefully peel the peaches and roll them in sugar until evenly covered.
  3. Bring a large saucepan of water to the boil.
  4. Cut a piece of calico into 2 squares with sides about 20cm long. Place half the drained rice into the middle of each square and spread it out in a circle. Place the peach in the middle and gather the four corners of the cloth at the top. Use your hands to spread the rice around the peach and when it seems to be evenly covered tie off the cloth.
  5. Place the balls into the boiling water and boil for an hour and a half.

Peach Snowballs, recipe from 1895

The Round-Up

The Recipe: Peach Snowballs from The Antipodean Cookery Book by Mrs Lance Rawson

The Date: 1895

How did you make it? See above.

Time to complete?: 2 hours.

How successful was it?: The peach was delicious, but the rice fell apart around  and was so watery that it didn’t taste very good.

How accurate?: I’m not sure what type of rice Mrs Lawson would have used, I used what I had on hand and maybe it was the wrong type since it didn’t hold together well.

[1] Rachel A Snell, “Snowballs: Intermixing Gentility and Frugality in Nineteenth Century Baking,” The Recipes Project, August 13, 2015, http://recipes.hypotheses.org/category/family-and-household.

[2] Anonymous, The Whole Duty of a Woman, Or, An Infallible Guide to the Fair Sex: Containing Rules, Directions, and Observations, for Their Conduct and Behavior Through All Ages and Circumstances of Life, as Virgins, Wives, Or Widows : With … Rules and Receipts in Every Kind of Cookery … (London: Printed for T. Read in Dogwell Court, White-Fryers, Fleet Street, 1737), 476.

[3] A.B of Grimsby, The Frugal Housewife’s Manual : Containing a Number of Useful Receipts, Carefully Selected, and Well Adapted to the Use of Families in General : To Which Are Added Plain and Practical Directions for the Cultivation and Management of Some of the Most Useful Culinary Vegetables (Toronto: s.n., 1840), 9, http://eco.canadiana.ca/view/oocihm.90013/13?r=0&s=1.

[4] “SOME RICE RECIPES.,” Leader, June 15, 1895.

[5] Eliza Acton, Modern Cookery, in All Its Branches: Reduced to a System of Easy Practice, for the Use of Private Families. In a Series of Receipts, Which Have Been Strictly Tested, and Are Given with the Most Minute Exactness (Lea and Blanchard, 1845), 282.

[6] Mrs. Lance Rawson, The Antipodean Cookery Book and Kitchen Companion (Kenthurst, NSW: Kangaroo Press, n.d.), 64.

Peach Snowballs, recipe from 1895

Bibliography

A.B of Grimsby. The Frugal Housewife’s Manual : Containing a Number of Useful Receipts, Carefully Selected, and Well Adapted to the Use of Families in General : To Which Are Added Plain and Practical Directions for the Cultivation and Management of Some of the Most Useful Culinary Vegetables. Toronto: s.n., 1840. http://eco.canadiana.ca/view/oocihm.90013/13?r=0&s=1.

Acton, Eliza. Modern Cookery, in All Its Branches: Reduced to a System of Easy Practice, for the Use of Private Families. In a Series of Receipts, Which Have Been Strictly Tested, and Are Given with the Most Minute Exactness. Lea and Blanchard, 1845.

Anonymous. The Whole Duty of a Woman, Or, An Infallible Guide to the Fair Sex: Containing Rules, Directions, and Observations, for Their Conduct and Behavior Through All Ages and Circumstances of Life, as Virgins, Wives, Or Widows : With … Rules and Receipts in Every Kind of Cookery … London: Printed for T. Read in Dogwell Court, White-Fryers, Fleet Street, 1737.

Rawson, Mrs. Lance. The Antipodean Cookery Book and Kitchen Companion. Kenthurst, NSW: Kangaroo Press, n.d.

Snell, Rachel A. “Snowballs: Intermixing Gentility and Frugality in Nineteenth Century Baking.” The Recipes Project, August 13, 2015. http://recipes.hypotheses.org/category/family-and-household.

“SOME RICE RECIPES.” Leader. June 15, 1895.

Pass the Pickled Eggs

So a couple of months ago, just before my birthday, I was talking about birthday presents with my cousin Ryan and his girlfriend. While my request for a penguin seemed perfectly reasonable, I was a bit surprised when he said that all he wanted for his birthday was some pickled eggs. When The Old Foodie posted a selection of historical pickled egg recipes a week later, it just seemed like the universe was sending me a message.
Fast forward several months and the week of his birthday I was not only ridiculously busy but also quite sick. I suppose I could have changed my mind and used a modern recipe with, you know, quantities and real instructions, but where is the fun in that? Oh and why just make one historical recipe when you can do two?

Girl with a Basket of Eggs by Joachim Beuckelaer (circa 1533–1575) [Public domain], via Wikimedia Commons

Girl with a Basket of Eggs by Joachim Beuckelaer (circa 1533–1575) [Public domain], via Wikimedia Commons

The Recipes

And so, although the process was not without hiccups, the eggs were pickled and enjoyed and I sat down to write this post. Actually I’ve tried a number of times, but each time I got side-tracked into doing more research. In spite of scouring dozens of cookbooks, I cannot find an older English recipe than the sage recipe which was posted by The Old Foodie and dates from 1725.

“Boil New laid Eggs in Vinegar, Cloves, Pepper, and a Handful of Sage-leaves, till hard, then peel them and put them into Glasses; when your Pickle is cold, put it to them, and cover them down close.”[1]

Sage Pickled Eggs, recipe from 1725

Since the pickled egg is a favourite among re-enactment groups I had just assumed that they were much older, and so apparently do lots of modern cookbook writers. These led me back to Dorothy Hartley’s book Food in England which says that, “When eggs are plentiful, farmers’ wives take four or six dozen newly laid, and boil them hard; then, taking off the shells, they place them in earthenware jars and pour upon them scalding vinegar well seasoned with pepper, allspice, ginger, and garlic. The eggs are fit to use after a month.”[2] She says this recipe comes from 1700 or thereabouts, although nearly identical recipes appear throughout the 19th century, the earliest version I can find is from 1844 in The Mechanic’s Magazine[3].

In fact pickled eggs are much older, just not in England. Going back further, there is a reference to pickled eggs in Andrew Boorde’s A Dyetary of Helth from about 1542 which says that:

“In Turkey, and other hyghe chrystyan landes anexed to it, they use to seth two or thre busshels of egges togither harde, and pull of the shels, & sowse them, and kepe them to eate at all tymes; but hard egges be slow and slack of dygestyon and doth nutryfye the body grosly.”[4]

Sousing is the process of preserving meat or animal parts in a pickle, so these are definitely pickled eggs. Boorde’s comment that these eggs come from Turkey and surrounding lands is interesting in light of a recipe from Kitab Wasf al-At’ima al-Mu’tada or The Description of Familiar Foods. A 14th century cookbook written in Arabic, possibly from Cairo, The Description of Familiar Foods includes the following recipe:

“Baid Mukhallal – Take boiled eggs and peel and sprinkle with a little ground salt and Chinese cinnamon [cassia] and dry coriander. Then arrange them in a glass jar and pour wine vinegar on them, and put it up.”[5]

That’s definitely going to be the next pickled egg recipe I try, but I doubt that it will be as pretty as the second recipe that I made. Dyed pink with beetroot juice, this recipe comes from The Practical American Cook Book, Or, Practical and Scientific Cookery. The Old Foodie quoted an 1855 edition, but I have only been able to find an 1863 edition. Today these pink eggs are particularly associated with the Pennsylvania Dutch and they make a lovely addition to salads with their variegated colours.

Pickled Eggs. Boil them until hard; throw them hot into cold water, which will make the shell slip off smoothly after the eggs have remained in it about ten minutes; boil some red beets till very soft; peel and mash them fine, and put enough of the liquor into cold vinegar to color it pink; add a little salt, pepper, nutmeg, and cloves; put the eggs into a jar and pour the beets, vinegar &c., over them. This makes a pretty garnish for fish or corned meats. Cut the eggs in slices when used.[6]

Pink Pickled Eggs, Recipe from 1863

The Redactions

Safety Note: These are the quantities and processes that I used to make these recipes, but because the liquids are cold when poured over the boiled eggs there is a higher chance of bacterial growth than in modern pickled egg recipes. If you decide to try these recipes you should keep the eggs refrigerated and consume them within days of making them. You can also increase the safety heating the pickling liquid to boiling point and pouring it over the eggs. 

Sage Pickled Eggs

12 eggs

2 1/2 cups vinegar

3 cloves

1 tsp peppercorns

Small handful of sage

  1. Hard boil eggs, then allow to cool and shell them. Place into a sterilised jar.
  2. Mix the vinegar, spices and sage in a saucepan and just bring to the boil. Allow the liquid to cool and pour over the eggs.

Beet Pickled Eggs

12 eggs

1 beetroot, or use the whole, pre-boiled beetroots that you can sometimes find vacuum sealed

1tsp black pepper

1/2 tsp salt

1/2 cup normal vinegar

1/2 cup red wine vinegar

1/2 cup juice from beetroot

3 cloves

  1. Quarter the beetroot, place in a saucepan and cover in boiling water. Bring the pot to the boil and cook until the beetroot is soft, this takes longer than you would think, about 30 mins. When soft, remove the beetroot and allow the pieces to cool enough to handle. Peel the beetroot, then dice it and roughly mash the cubes.

2. Put the eggs into a saucepan, cover with water, bring to a rolling boil and simmer for 8 minutes. Allow to cool and peel.

  1. Place the eggs in a sterilised jar, then add the beetroot over the top. Mix the rest of the ingredients and pour over.

Pickled eggs, recipes from 1725 and 1863

The Round-Up

The Recipe: Pickled Eggs from Robert Smith’s Court Cookery: Or, The Compleat English Cook 128.(available here) and from The Practical American Cook Book by A Housekeeper (preview available here).

The Date:1725 and 1865

How did you make it?: See above.

Time to complete?: The beetroot took a very long time to cook, so those ones took over an hour and a half, but the sage ones were faster; including cooling time they probably took about an hour.

How successful was it?: I only tried the beetroot ones which were a beautiful colour, slightly rubbery but very pleasant. Ryan preferred the sage eggs, but that may be because he isn’t the biggest fan of beetroot.

How accurate?: I ended up changing the process of the sage eggs somewhat, because the first time that I made them I diluted the vinegar with water which would have changed the eggs preservative properties. The sage also through off a nasty scum when boiled like that. In the end I started again, boiling the eggs in water and then heating the other ingredients separately. The biggest difference in terms of ingredients is probably the type of vinegar used, but there was no indication of the type of vinegar in the recipes and I haven’t done enough research to really know what would have been used.

11911464_1059338284077547_633809302_n 11897045_1059338217410887_1619311519_n

[1] Robert Smith, Court Cookery: Or, The Compleat English Cook (London: Printed for T. Wotton, at the Three-Daggers in Fleet-Street, 1725), 128.

[2] Dorothy Hartley, Food in England (London: Little, Brown & Company, 1999), 345.

[3] Robertson, ed., Mechanics Magazine (London: James Bounsall, 1844), 352.

[4] Andrew Boorde, The Fyrst Boke of the Introduction of Knowledge Made by Andrew Borde, of Physycke Doctor. A Compendyous Regyment; Or, A Dyetary of Helth Made in Mountpyllier, ed. Frederick James Furnivall (London: Published for the Early English Text Society by N.T. Trubner & Co, 1870), 265.

[5] Charles Perry, “Kitab Wasf Al-At’ima Al-Mu’tada [The Description of Familiar Foods],” in Medieval Arab Cookery, by Maxime Rodinson, A.J Arberry, and Charles Perry (Totnes, U.K.: Prospect Books, 2001), 397.

[6] A Housekeeper, The Practical American Cook Book (New York: D Appleton and Company, 1863), 91.

And my penguin? He's already making friends.

And my penguin? He’s already making friends.

Bibliography

A Housekeeper. The Practical American Cook Book. New York: D Appleton and Company, 1863.

Boorde, Andrew. The Fyrst Boke of the Introduction of Knowledge Made by Andrew Borde, of Physycke Doctor. A Compendyous Regyment; Or, A Dyetary of Helth Made in Mountpyllier. Edited by Frederick James Furnivall. London: Published for the Early English Text Society by N.T. Trubner & Co, 1870.

Hartley, Dorothy. Food in England. London: Little, Brown & Company, 1999.

Perry, Charles. “Kitab Wasf Al-At’ima Al-Mu’tada [The Description of Familiar Foods].” In Medieval Arab Cookery, by Maxime Rodinson, A.J Arberry, and Charles Perry, 373–450. Totnes, U.K.: Prospect Books, 2001.

Robertson, ed. Mechanics Magazine. London: James Bounsall, 1844.

Smith, Robert. Court Cookery: Or, The Compleat English Cook. London: Printed for T. Wotton, at the Three-Daggers in Fleet-Street, 1725.

Bonus recipe: A Carrot Pudding

IMG_4279

This is a bonus recipe for the Working Class Dinner challenge, it’s a dessert which, like the potato pudding, is based on a root vegetable. Carrot Puddings have a much longer history that I ever would have thought, and the Carrot Museum has collected recipes through the centuries that makes for very interesting reading. The recipe that I chose comes from the Lady’s Column of the Australasian newspaper in 1869.

Baked Carrot Pudding.—Take three quarters of a pound of carrots, half a pound of breadcrumbs, a quarter of a pound of raisins,four ounces of suet, a quarter of a pound of currants, three ounces of loaf sugar, three eggs, some nutmeg, and a little milk. Boil and pulp the carrots, add to them the breadcrumbs, the raisins stoned, the suet chopped very fine, a little nutmeg, and three ounces of sugar pounded; well beat the eggs, and add them to a sufficient quantity of milk to make the ingredients into a thick batter, then put it into a buttered pie-dish and bake it. When done, turn it out and sift sugar over it.[1]

Like its potato counterpart, this recipe is cheap, quick and uses up left-overs. It’s all about making the most of the natural sweetness of the carrots and the dried fruit, bulked out with stale breadcrumbs.

Carrot pudding, recipe from 1869

The Redaction

Baked Carrot Pudding

340g carrots, peeled and chopped

230g breadcrumbs, freshly made from stale bread is best

115g raisins

115g suet, fresh if you can get it but the suet sold in boxes in the supermarket also works

115g currants

90g sugar

1/2 tsp nutmeg

3 eggs, beaten

Milk

Sugar, to serve

  1. Heat the oven to 180˚C. Grease a pie or casserole dish very well. Boil the carrots until very soft, then mash them until smooth.
  2. Combine the breadcrumbs, suet, dried fruit, sugar and nutmeg in a large mixing bowl. Add the carrots and the beaten eggs. Stir well, then add enough milk to make a thick batter, thicker than cake batter.
  3. Pour the batter into the prepared dish and bake for 45 minutes, or until golden and a skewer inserted into the middle comes out clean. When it’s done allow it to cool a little, but while still warm very carefully turn it out onto a plate. You may need to carefully run a knife around the edge of the dish. Serve warm, sprinkled with sugar.

The Round-Up

The Recipe: Baked Carrot Pudding from the Australasian newspaper(available here)

The Date: 1869

How did you make it? See above.

Time to complete?: About an 1 hr 15.

How successful was it?: Surprisingly tasty, like a very thick carrot cake. It wasn’t overly sweet, but the little bursts of sweetness provided by the currants and raisins were very popular with my taste testers. They also liked it with the very non-historically accurate Greek yoghurt, but because it can be a bit dry it probably is a good idea to serve it with cream or something similar.

How accurate?: Fresh suet would have been better but I was trying to use up some of the ingredients in my mum’s larder, and I think that that is well within the mindset of a Victorian working class cook.

[1] “RECIPES.,” The Australasian, March 6, 1869.

Carrot pudding, recipe from 1869

Bibliography

“RECIPES.” The Australasian. March 6, 1869.

css.php